Opel Frontera UE. Manual - part 1363


  Index      Opel     Opel Frontera UE - service repair manual 1999-2001 year


Search            


Content   ..  1361  1362  1363  1364   ..


Opel Frontera UE. Manual - part 1363


4D1–28 TRANSFER CASE

Synchronizers

The synchronizer hubs and sliding sleeves are a selected
assembly and should be kept together as originally
assembled.
Clean synchronizer components with clean solvent and
air dry.
Inspect the components for the following:

D

Teeth for wear, scuffs, nicks, burrs or breaks.

D

Keys and springs for wear, cracks or distortion,
replace if these conditions are present.

D

If scuffed, nicked or burred conditions cannot be
corrected with a soft stone or crocus cloth, replace the
component.

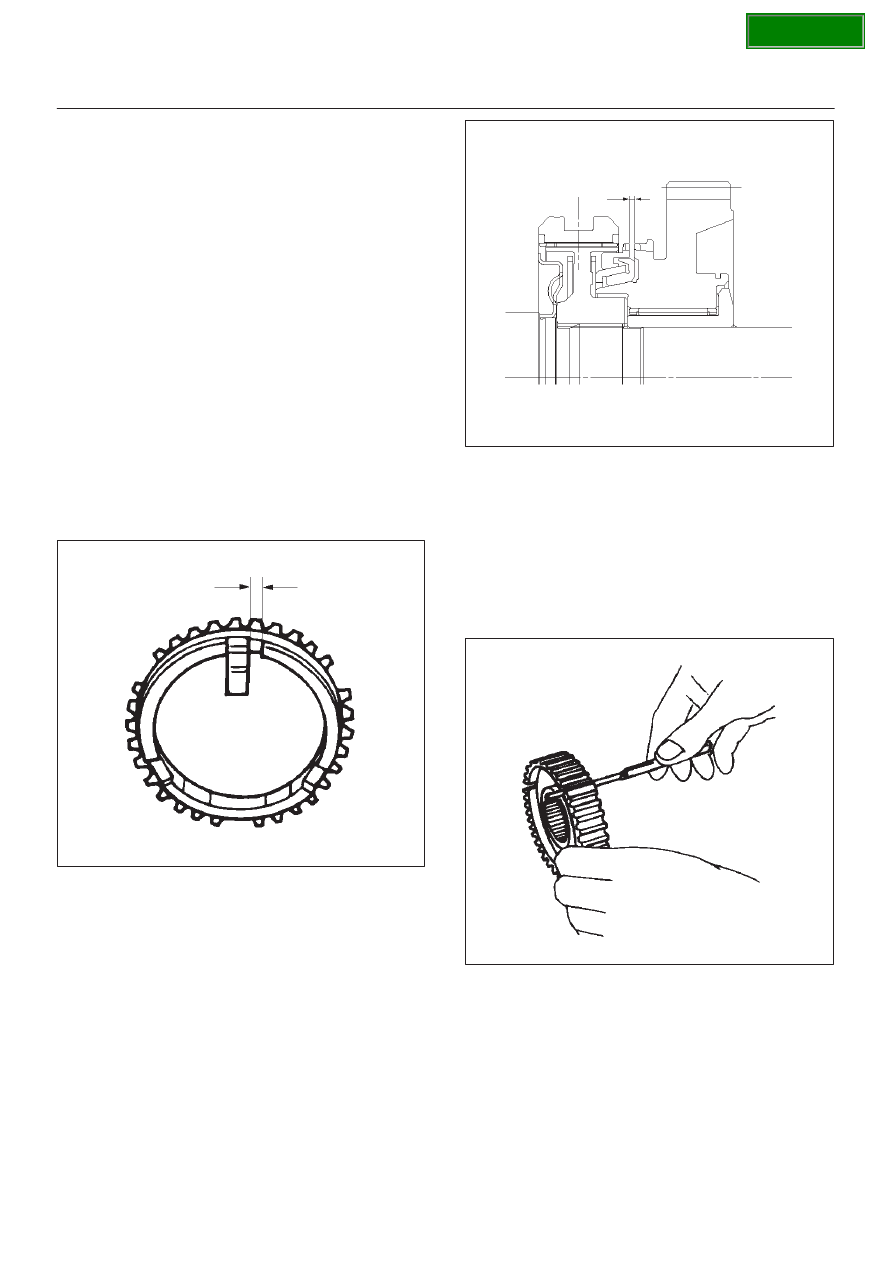
Block Ring and Insert Clearance

1. Use a vernier caliper to measure the clearance

between the block ring and the insert.

2. If the measured value exceeds the specified limit, the

block ring and the insert must be replaced.

Block ring and insert clearance
Standard : 2.46–2.74 mm (0.097–0.108 in)
Limit : 3.0 mm (0.118 in)

226RS037

2WD–4WD Synchronizer (3–Cone)

1. Use a thickness gauge to measure the clearance

between the block ring and the dog teeth.

2. If the measured value exceeds the specified limit, the

2WD–4WD synchronizer assembly must be
replaced.

Block ring and insert clearance
Standard : 1.5 mm (0.059 in)
Limit : 0.8 mm (0.031 in)

226RW142

Clutch Hub and Insert Clearance

1. Use a thickness gauge to measure the clearance

between the clutch hub and the insert.

2. If the measured value exceeds the specified limit, the

clutch hub and the insert must be replaced.

Clutch hub and insert clearance
Standard : 0.01–0.19 mm (0.0004–0.0075 in)
Limit : 0.3 mm (0.012 in)

226RS038

SECTION

TRANSFER CASE 4D1–29

Detent Springs

1. Inspect the springs for distortion, cracks or wear.

Replace if these conditions are present.

Detent Spring Free Length

1. Use a vernier caliper to measure the detent spring

free length.

2. If the measured value is less than the specified limit,

the detent spring must be replaced.

Detent spring free length

Detent ball

Standard :

Inner

23.2 mm (0.91 in)

Outer

26.8 mm (1.06 in)

Limit :

Inner

22.6 mm (0.84 in)

Outer

26.2 mm (1.03 in)

Interlock pin

Standard :

15.9 mm (0.626 in)

Limit :

15.3 mm (0.602 in)

220RW035

Detent Spring Tension

1. Use a spring tester to measure the detent spring

tension.

2. If the measured value is less than the specified limit,

the detent spring must be replaced.

Detent ball

Compressed height : 19.7 mm (0.776 in)

Standard :

Inner

22.6 

 32.4 N 

(2.3 

 3.3 kg/ 5.1 

 7.3 lb)

Outer

91.2 

 101.0 N 

(9.3 

 10.3 kg/20.5 

 22.7 lb)

Interlock pin

Compressed height : 11.5 mm (0.453 in)

Standard :

9.8 N (1.0 kg/2.2 lb)

220RS013

Shift Arm

1. Inspect the shift arms for wear, distortion or scoring.

Replace if these conditions are present.

Shift Arm Thickness

1. Use a micrometer to measure the shift arm thickness.
2. If the measured value is less than the specified limit,

the shift arm must be replaced.

Shift arm thickness
Standard : 9.60–9.85 mm (0.378–0.388 in)
Limit : 9.0 mm (0.354 in)

230RS006

SECTION

4D1–30 TRANSFER CASE

Reassembly

Input Shaft Oil Seal Replacement

1. Remove the oil seal from the transfer case.
2. Apply the engine oil to the oil seal outer surfaces.
3. Apply recommended grease (BESCO L2) or

equivalent to the oil seal lip.

4. Use the oil seal installer 5–8840–2279–0 (A/T)

5–8840–2193–0 (M/T) and driver handle
5–8840–0007–0 to install the oil seal to the transfer
case.

A/T

220RW130

Legend

(47) Oil Seal

M/T

220RW132

Legend

(48) Transmission Side Oil Seal
(49) Transfer Side Oil Seal

SECTION

TRANSFER CASE 4D1–31

Front Output Shaft Oil Seal Replacement

1. Remove the oil seal from the transfer case.
2. Apply engine oil to the oil seal outer surfaces.
3. Apply recommended grease (BESCO L2) or

equivalent to the oil seal lip.

4. Use the oil seal installer 5–8840–2281–0 to install the

oil seal to the transfer case.

220RW131

Legend

(50) Front Output Shaft Oil Seal

1. Install the transfer case (with oil seal) (42), performing

the following steps. (M/T)

D

Cover the shaft splines with adhesive tape (43).
This will prevent damage to the oil seal lip (44).

A07RW022

Legend

(43) Adhesive Tape
(44) Oil Seal Lip
(45) Oil Seal Collar
(46) Bearing

D

Apply recommended liquid gasket (LOCTITE
17430) or its equivalent to the transmission,
intermediate plate and transfer case fitting surfaces
(M/T).

220RS026

SECTION


Content   ..  1361  1362  1363  1364   ..