Nissan Rogue (2020 year). Manual - part 12


  Index      Nissan     Nissan Rogue (2020 year) - manual in english


Search            copyright infringement  


Content      ..     10      11      12      13     ..


Nissan Rogue (2020 year). Manual - part 12


NOTE:

Request switches for all doors and lift-
gate can be deactivated when the I-Key
Door Lock feature is turned OFF using
the “Vehicle Settings” menu on the ve-
hicle information display. For additional
information, refer to “Vehicle informa-
tion display” in the “Instruments and
controls” section of this manual.

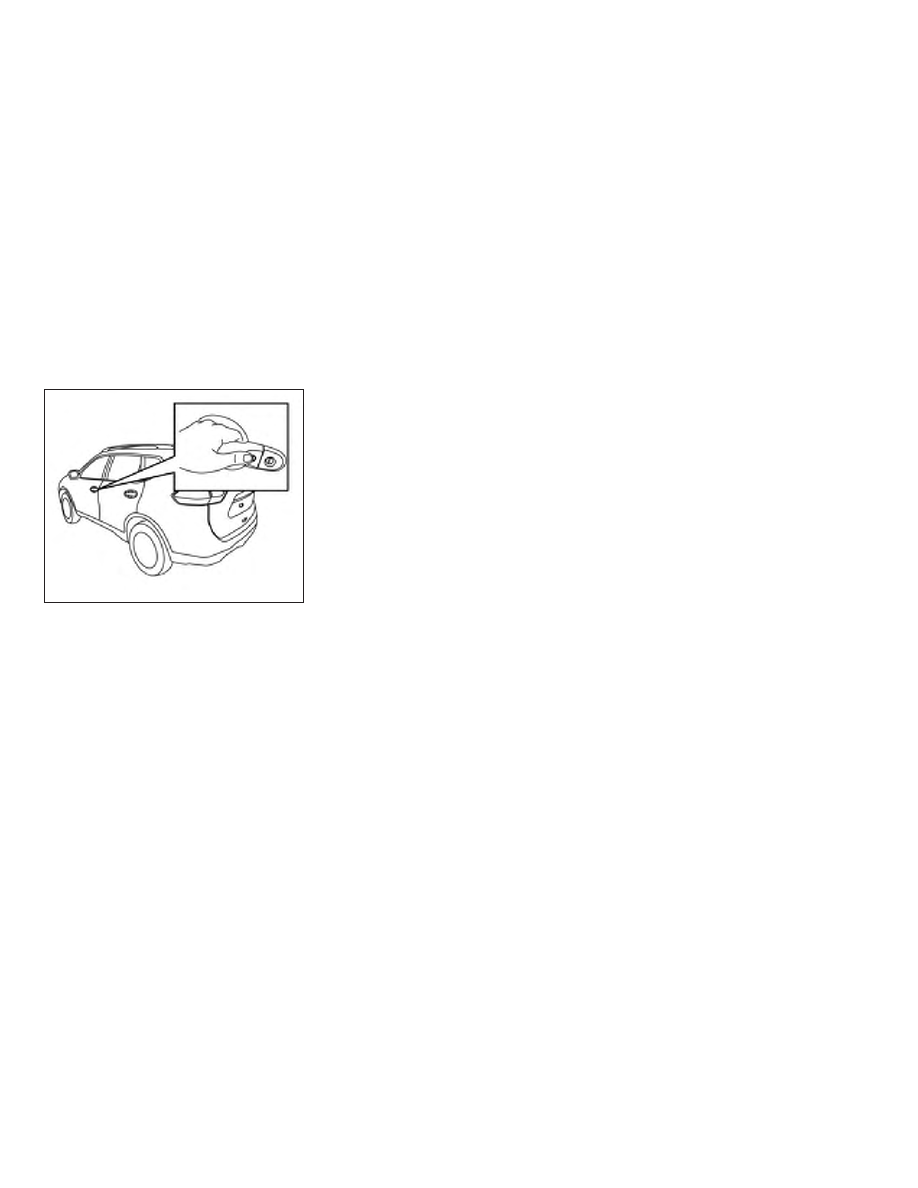
If a door handle is pulled while unlocking
the doors, that door may not be unlocked.
Returning the door handle to its original
position will unlock the door. If the door
does not unlock after returning the door

handle, push the door handle request
switch to unlock the door.

All doors will be locked automatically un-
less one of the following operations is per-
formed within one minute after pushing
the request switch.

∙ Opening any door.

∙ Pushing the ignition switch.

The interior light timer illuminates for a pe-
riod of time when a door is unlocked, the
room light (if so equipped) switch is in the
DOOR position and when the DOOR/OFF
switch is in the OFF position.

The interior light can be turned off without
waiting by performing one of the following
operations:

∙ Placing the ignition switch in the ON po-

sition.

∙ Locking the doors with the remote con-

trol.

∙ Switching

the

room

light

(if

so

equipped) switch to the OFF position
and the DOOR/OFF switch is in the ON
position.

∙ Switching the Auto Room Lamp feature

to OFF using the “Vehicle Settings”
menu on the vehicle information dis-
play. For additional information, refer to
“Vehicle information display” in the “In-
struments and controls” section.

For additional information, refer to ”Interior
lights” in the “Instrument and controls” sec-
tion of this manual.

HOW TO USE THE REMOTE
KEYLESS ENTRY FUNCTION

The remote keyless entry function can op-
erate all door locks using the remote key-
less function of the Intelligent Key. The re-
mote keyless function can operate at a
distance of 33 ft (10 m) away from the ve-
hicle. The operating distance depends
upon the conditions around the vehicle.

The remote keyless entry function will not
function under the following conditions:

∙ When the Intelligent Key is not within the

operational range.

∙ When the doors or the rear liftgate are

open or not closed securely.

∙ When the Intelligent Key battery is dis-

charged.

LPD2773

3-16

Pre-driving checks and adjustments

-------------------------------------------------------------------------------------------------------------------------------------------------------------

CAUTION

When locking the doors using the Intel-
ligent Key, be sure not to leave the key in
the vehicle.

TYPE A (if so equipped)

1.

(remote engine start)

2.

(lock) button

3.

(unlock) button

4.

(panic) button

TYPE B (if so equipped)

1.

(remote engine start)

2.

(lock) button

3.

(unlock) button

4.

(liftgate) button

5.

(panic) button

Locking doors

1. Place the ignition switch in the LOCK

position.

2. Close all doors.

LPD3602

LPD3026

Pre-driving checks and adjustments

3-17

-------------------------------------------------------------------------------------------------------------------------------------------------------------

3. Press the

button on the Intelli-

gent Key.

4. The hazard indicator lights flash twice

and the horn beeps once.

5. All doors will be locked.

WARNING

∙ After locking the doors using the In-

telligent Key, be sure that the doors
have been securely locked by operat-
ing the door handles. Failure to follow
these instructions may result in inad-
vertently unlocking the doors, which
may decrease the safety and security
of your vehicle.

Unlocking doors

1. Press the

button on the Intelligent

Key.

2. The driver’s door will unlock and the

hazard indicator lights flash once.

3. Press the

button again within

60 seconds, the hazard indicator lights
flash once and the remaining doors
unlock.

NOTE:

The Selective Unlock feature can be
changed using the “Vehicle Settings”
menu on the vehicle information display.
For additional information, refer to “Ve-
hicle information display” in the “Instru-
ments and controls” section of this
manual.

All doors will be locked automatically un-
less one of the following operations is per-
formed within one minute after pressing
the

button:

∙ Opening any doors.

∙ Pushing the ignition switch.

The interior light timer illuminates for a pe-
riod of time when a door is unlocked, the
room light (if so equipped) switch is in the
DOOR position and when the DOOR/OFF
switch is in the OFF position.

The light can be turned off without waiting
by performing one of the following opera-
tions:

∙ Placing the ignition switch in the ON po-

sition.

∙ Locking the doors with the Intelligent

Key.

∙ Switching

the

room

light

(if

so

equipped) switch to the OFF position
and the DOOR/OFF switch is in the ON
position.

∙ Switching the Auto Room Lamp feature

to OFF using the “Vehicle Settings”
menu on the vehicle information dis-
play. For additional information, refer to
“Vehicle information display” in the “In-
struments and controls” section.

For additional information, refer to ”Interior
lights” in the “Instrument and controls” sec-
tion of this manual.

Releasing the rear liftgate (if so
equipped)

The rear liftgate can be opened and closed
by performing the following:

∙ Press the

button for longer than

1 second to open the rear liftgate.

∙ Press the

button again for longer

than 1 second to close the rear liftgate.

When the

button is pressed during

the open or close process the liftgate will
stop. When pressed again, the liftgate will
reverse and go in the opposite direction.

3-18

Pre-driving checks and adjustments

-------------------------------------------------------------------------------------------------------------------------------------------------------------

Using the panic alarm

If you are near your vehicle and feel threat-
ened, you may activate the panic alarm to
call attention by pressing and holding
the

button on the Intelligent Key for

longer than 0.5 seconds.
The panic alarm and headlights will stay on
for a period of time.

The panic alarm stops when:

∙ It has run for a period of time, or

∙ Any button is pressed on the Intelligent

Key.

∙ The request switch on the driver or pas-

senger door is pushed and the Intelli-
gent Key is in range of the door handle.

Using the interior lights

Press the

button on the key fob once

to turn on the interior lights.
For additional information, refer to “Interior
lights” in the “Instruments and controls”
section of this manual.

Answer back horn feature

If desired, the answer back horn feature
can be deactivated using the Intelligent
Key. When it is deactivated and the
button is pressed, the hazard indicator
lights flash twice. When the

button is

pressed, neither the hazard indicator lights
nor the horn operates.

NOTE:

If you change the Answer Back Horn fea-
ture with the Intelligent Key, the vehicle
information display screen will show the
current mode after the ignition switch
has been cycled from the OFF to the ON
position. The vehicle information display
screen can also be used to change the
answer back horn mode.
To deactivate:

Press and hold the

and

but-

tons for at least 2 seconds. The hazard
indicator lights will flash three times to con-
firm that the answer back horn feature has
been deactivated.

To activate:

Press and hold the

and

but-

tons for at least 2 seconds once more.
The hazard indicator lights will flash once
and the horn will sound once to confirm
that the horn beep feature has been reac-
tivated.
Deactivating the horn beep feature does
not silence the horn if the alarm is trig-
gered.

Pre-driving checks and adjustments

3-19

-------------------------------------------------------------------------------------------------------------------------------------------------------------

Intelligent Key button operation
light

The light blinks only when you press any
button on the Intelligent Key. The light illu-
mination only signifies that the key fob has
transmitted a signal. You may look and/or
listen to verify that the vehicle has per-
formed the intended operation. The num-
ber of blinks identifies each registered key
(i.e. 1 blink = 1st key,...,4 blinks = 4th key) for
your own identification purposes.

If the light does not blink, your battery may
be too weak to communicate to the ve-
hicle. If this occurs, the battery may need to
be replaced. For additional information re-
garding the replacement of a battery, refer
to “Battery replacement” in the “Do-it-
yourself ” section of this manual.

WARNING SIGNALS

To help prevent the vehicle from moving
unexpectedly by erroneous operation of
the Intelligent Key or to help prevent the
vehicle from being stolen, a chime or
buzzer sounds from inside and outside the
vehicle and a warning is displayed in the
instrument panel.

When a chime or beep sounds or a warning
is displayed, be sure to check the vehicle
and the Intelligent Key.

For additional information, refer to the
“Troubleshooting guide” in this section and
“Vehicle information display” in the “Instru-
ments and controls” section of this manual.

TROUBLESHOOTING GUIDE

Verify the location of all Intelligent Keys that
are programmed for the vehicle. If another
Intelligent Key is in range or inside the ve-
hicle, the vehicle system may respond dif-
ferently than expected.

LPD2836

3-20

Pre-driving checks and adjustments

-------------------------------------------------------------------------------------------------------------------------------------------------------------

Symptom

Possible Cause

Remedy

When stopping the engine

The Shift to Park warning appears on
the display and the inside warning
chime sounds continuously.

The shift lever is not in the P (Park)
position.

Move the shift lever to the P (Park)
position.

When opening the driver’s door to get
out of the vehicle

The Door/liftgate Open warning ap-
pears on the display.

The ignition switch is in the ON
position.

Place the ignition switch in the OFF
position.

When closing the door after getting
out of the vehicle

The No Key Detected warning appears
on the display, the outside chime
sounds three times and the inside
warning chime sounds for approxi-
mately three seconds.

The ignition switch is in the ON
position.

Place the ignition switch in the OFF
position.

The Shift to Park warning appears on
the display and the inside chime
sounds continuously.

The ignition switch is in the ON posi-
tion and the shift lever is not in the P
(Park) position.

Move the shift lever to the P (Park) po-
sition and place the ignition switch in
the OFF position.

The Rear Door Alert warning message
appears on the display, the horn
sounds three times twice, or a Check
Rear Seat for All Articles warning ap-
pears on the display.

The Rear Door Alert is activated.

Check the rear seat for all articles,
press the ENTER button to clear the
Rear Door Alert warning message.

When closing the door with the inside
lock knob turned to the locked
position.

The outside chime sounds for approxi-
mately three seconds and all the
doors unlock.

The Intelligent Key is inside the vehicle.

Carry the Intelligent Key with you.

When pushing the door handle re-

quest switch or the

button

on the Intelligent Key to lock the door

The outside chime sounds for approxi-
mately three seconds.

The Intelligent Key is inside the vehicle.

Carry the Intelligent Key with you.

When pushing the ignition switch to
start the engine

The Key Battery Low warning appears
on the display.

The battery charge is low.

Replace the battery with a new one.
For additional information, refer to
“Battery replacement” in the “Do-it-
yourself ” section of this manual.

The Key ID Incorrect warning appears
on the display.

The Intelligent Key is not in the vehicle.

Carry the Intelligent Key with you.

When pushing the ignition switch

The Key System Error warning ap-
pears on the display.

It warns of a malfunction with the In-
telligent Key system.

It is recommended that you visit a
NISSAN dealer.

Pre-driving checks and adjustments

3-21

-------------------------------------------------------------------------------------------------------------------------------------------------------------

The

button will be on the NISSAN In-

telligent Key® if the vehicle has Remote En-
gine Start. This feature allows the engine to
start from outside the vehicle.
The following features may be affected
when Remote Engine Start is used:

∙ Vehicles with a manual climate control

system will default to the last used
heating or cooling mode.

∙ Vehicles with an automatic climate

control system may default to either
heating or cooling mode, depending on
outside and cabin temperatures. For
additional information, refer to “Remote
Engine Start with Intelligent Climate
Control” in the “Monitor, climate, audio,
phone and voice recognition systems”
section of this manual.

Laws in some local communities may re-
strict the use of remote starters. For ex-
ample, some laws require a person using

Remote Engine Start to have the vehicle in
view. Check local regulations for any re-
quirements.

Other conditions may affect the function of
the Remote Engine Start feature. For addi-
tional information, refer to “Conditions the
Remote Engine Start will not work” in this
section.

Other conditions can affect the perfor-
mance of the Intelligent Key transmitter.
For additional information, refer to “NISSAN
Intelligent Key®” in this section.

REMOTE ENGINE START
OPERATING RANGE

WARNING

To help avoid risk of injury or death
through unintended operation of the
vehicle and/or its systems, including
entrapment in windows or inadvertent
door lock activation, do not leave chil-
dren, people who require the assistance
of others or pets unattended in your ve-
hicle. Additionally, the temperature in-
side a closed vehicle on a warm day can
quickly become high enough to cause a
significant risk of injury or death to
people and pets.

Type A (if so equipped)

LPD2895

Type B (if so equipped)

LPD2947

REMOTE ENGINE START (if so
equipped)

3-22

Pre-driving checks and adjustments

-------------------------------------------------------------------------------------------------------------------------------------------------------------

CAUTION

When the Intelligent Key battery is dis-
charged or other strong radio wave
sources are present near the operating
location, the Intelligent Key operating
range becomes narrower, and the Intel-
ligent Key may not function properly.

The Remote Engine Start function can only
be used when the Intelligent Key is within
the specified operating range from the ve-
hicle.

The Remote Engine Start operating range
is approximately 197 ft (60 m) from the ve-
hicle.

REMOTE STARTING THE VEHICLE

To use the Remote Engine Start feature
perform the following:

1. Aim the Intelligent Key at the vehicle.

2. Press the

button to lock all

doors.

3. Within 5 seconds press and hold

the

button until the turn signal

lights flash and the tail lamps turn on. If
the vehicle is not within view press and
hold the

button for at least 2 sec-

onds.

The following events will occur when the
engine starts:

∙ The parking lights will turn on and re-

main on as long as the engine is run-
ning.

∙ The doors will be locked and the climate

control system may come on.

∙ The engine will continue to run for

10 minutes. Repeat the steps to extend
the time for an additional 10 minutes.
For additional information, refer to “Ex-
tending engine run time” in this section.

Press and hold the brake pedal while
switching the ignition to the ON position
before driving. For additional information,
refer to “Driving the vehicle” in the “Starting
and driving” section of this manual.

EXTENDING ENGINE RUN TIME

The Remote Engine Start feature can be
extended one time by performing the
steps listed in “Remote starting the vehicle”
in this section. Run time will be calculated
as follows:

∙ The first 10 minute run time will start

when the Remote Engine Start function
is performed.

∙ The second 10 minutes will start imme-

diately when the Remote Engine Start
function is performed again. For ex-
ample, if the engine has been running
for 5 minutes, and 10 minutes are
added, the engine will run for a total of
15 minutes.

∙ Extending engine run time will bring you

to the two Remote Engine Start limit.

A maximum of two Remote Engine Starts,
or a single Remote Engine Start with an
extension, are allowed between ignition
cycles. The ignition switch must be cycled
to the ON position and then back to the
OFF position before the Remote Engine
Start procedure can be used again.

CANCELING A REMOTE ENGINE
START

To cancel a Remote Engine Start, perform
one of the following:

∙ Aim the Intelligent Key at the vehicle

and press

until the parking lights

turn off.

∙ Turn on the hazard warning flashers.

∙ Cycle the ignition switch on and then

off.

Pre-driving checks and adjustments

3-23

-------------------------------------------------------------------------------------------------------------------------------------------------------------

∙ The extended engine run time has ex-

pired.

∙ The first 10 minute timer has expired.

∙ Opening the engine hood.

∙ Shifting the vehicle out of P (Park).

∙ The alarm sounds due to illegal entry

into the vehicle.

∙ Pushing the ignition switch without the

Intelligent Key in the vehicle.

∙ Not pressing the brake pedal while

pressing the ignition switch with the In-
telligent Key in the vehicle.

CONDITIONS THE REMOTE ENGINE
START WILL NOT WORK

The Remote Engine Start will not operate if
any of the following conditions are present:

∙ The ignition switch is placed in the ON

position.

∙ The hood is not securely closed.

∙ The hazard indicator lights are on.

∙ The engine is still running. The engine

must be completely stopped. Wait at
least 6 seconds if the engine goes from
running to off. This is not applicable
when extending engine run time.

∙ The

button is not pressed and

held for at least 2 seconds.

∙ The

button is not pressed and

held within 5 seconds of pressing the
lock button.

∙ The brake is pressed.

∙ The doors are not closed and locked.

∙ The liftgate is open.

∙ The Key System Error warning mes-

sage appears in the vehicle information
display.

∙ The alarm sounds due to illegal entry

into the vehicle.

∙ Two Remote Engine Starts, or a single

Remote Engine Start with an extension,
have already been used.

∙ The vehicle is not in P (Park).

∙ There is a detected registered key al-

ready inside of the vehicle.

∙ The Remote Engine Start feature has

been switched to the OFF using the “Ve-
hicle Settings” menu on the vehicle in-
formation display. For additional infor-
mation, refer to “Vehicle information
display” in the “Instruments and con-
trols” section of this manual.

The Remote Engine Start may display a
warning or indicator in the vehicle informa-
tion display. For additional information, re-
fer to “Vehicle information display” in the
“Instruments and controls” section of this
manual.

3-24

Pre-driving checks and adjustments

-------------------------------------------------------------------------------------------------------------------------------------------------------------

1. Pull the hood lock release handle

1

located below the instrument panel
until the hood springs up slightly.

2. Locate the lever

2

in between the

hood and grille and push the lever side-
ways with your fingertips.

3. Raise the hood

3

.

4. Remove the support rod

4

and insert

it into the slot

5

.

Hold the coated parts

A

when removing

or resetting the support rod. Avoid direct
contact with the metal parts, as they
may be hot immediately after the engine
has been stopped.

When closing the hood, return the support
rod to its original position, lower the hood
to approximately 12 in (30 cm) above the
latch and release it. This allows proper en-
gagement of the hood latch.

WARNING

∙ Make sure the hood is completely

closed and latched before driving.
Failure to do so could cause the hood
to fly open and result in an accident.

∙ If you see steam or smoke coming

from the engine compartment, to
avoid injury do not open the hood.

LPD3017

HOOD

Pre-driving checks and adjustments

3-25

-------------------------------------------------------------------------------------------------------------------------------------------------------------

WARNING

∙ Always be sure the liftgate has been

closed securely to prevent it from
opening while driving.

∙ Do not drive with the liftgate open.

This could allow dangerous exhaust
gases to be drawn into the vehicle. For
additional information, refer to “Ex-
haust gas (carbon monoxide)” in the
“Starting and driving” section of this
manual.

∙ To help avoid risk of injury or death

through unintended operation of the
vehicle and/or its systems, including
entrapment in windows or inadver-
tent door lock activation, do not leave
children, people who require the as-
sistance of others or pets unattended
in your vehicle. Additionally, the tem-
perature inside a closed vehicle on a
warm day can quickly become high
enough to cause a significant risk of
injury or death to people and pets.

∙ Always be sure that hands and feet

are clear of the door frame to avoid
injury while closing the liftgate.

CAUTION

Do not use accessory carriers that at-
tach to the liftgate. Doing so will cause
damage to the vehicle.

OPERATING THE MANUAL
LIFTGATE (if so equipped)

The power door lock system allows you to
lock or unlock all doors including the lift-
gate simultaneously.

To open the liftgate, push the liftgate
opener switch

A

and pull up on the

handle.

To close, lower and push the liftgate down
securely.

LPD2655

LIFTGATE

3-26

Pre-driving checks and adjustments

-------------------------------------------------------------------------------------------------------------------------------------------------------------

OPERATING THE POWER LIFTGATE
(if so equipped)

WARNING

∙ Make sure that all passengers have

their hands, etc., inside the vehicle be-
fore closing the liftgate.

∙ To help avoid risk of injury or death

through unintended operation of the
vehicle and/or its systems, including
entrapment in windows or inadver-
tent door lock activation, do not leave
children, people who require the as-
sistance of others or pets unattended
in your vehicle. Additionally, the tem-
perature inside a closed vehicle on a
warm day can quickly become high
enough to cause a significant risk of
injury or death to people and pets.

NOTE:

To open, close or reverse the power lift-
gate, the shift lever must be in P (Park).
Also, the power liftgate will not operate if
battery voltage is low.

Power Open:
The power liftgate automatically moves
from the fully closed position to the fully
open position in approximately five – eight
seconds. The power open feature can be
activated by the button on the key fob, the
instrument panel switch or the liftgate open
switch. A chime sounds to indicate the
power open sequence has been started.

LPD2900

Instrument panel switch

LPD2212

Pre-driving checks and adjustments

3-27

-------------------------------------------------------------------------------------------------------------------------------------------------------------

∙ When the vehicle is locked, the liftgate

can be opened with the instrument
panel switch or key fob.

∙ The key fob button must be held for

1 second before the liftgate opens.

∙ The liftgate must be unlocked (or the

key fob must be within range) to open
with the liftgate open switch

A

.

A warning chime will sound if the shift lever
is moved out of P (Park) and the vehicle is
beginning to move, during a power open
operation.

Power Close:
The power liftgate automatically moves
from the fully open position to the second-
ary position. When the liftgate reaches the
secondary position, the cinching motor en-
gages and pulls the liftgate to its primary
latch position. Power close takes approxi-
mately seven – ten seconds. The power
close feature can be activated by the but-
ton on the key fob, the instrument panel
switch or the liftgate close switch

B

. A

chime sounds to indicate the power close
sequence has been started.

∙ If the liftgate open switch

A

is acti-

vated while the cinching motor is en-
gaged, the cinching motor will disen-
gage and release the latch.

∙ The key fob button must be held for

1 second before the liftgate closes.

Stop - Reverse:
During the open/close movement, the lift-
gate can be stopped, if the Intelligent Key,
instrument panel or liftgate switch (

A

or

B

) is pressed. The liftgate can be reversed

in the Intelligent Key, instrument panel or
liftgate switch (

A

or

B

) is pressed again.

Auto Reverse:
If an obstacle is detected during power
open or power close, a warning chime will
sound and the liftgate will reverse direction
and return to the full open or full close po-
sition. If a second obstacle is detected, the
liftgate motion will stop and the liftgate will
enter manual mode.

A pinch strip is mounted on each side of
the liftgate. If an obstacle is detected by a
pinch strip during power close, the liftgate
will reverse direction and return to the full
open position.

Liftgate opener switch

LPD2656

LPD2270

3-28

Pre-driving checks and adjustments

-------------------------------------------------------------------------------------------------------------------------------------------------------------

NOTE:

If the pinch strip is damaged or removed,
the power close function will not oper-
ate.

WARNING

There are some small distances imme-
diately before the closed position which
cannot be detected. Make sure that all
passengers have their hands, etc., in-
side the vehicle before closing the
liftgate.

Manual Mode:
If power operation is not available, the lift-
gate may be operated manually. Power op-
eration may not be available under the fol-
lowing conditions:

∙ Multiple obstacles have been detected

in a single power cycle

∙ Battery voltage is low

If the power liftgate open switch

A

is

pushed during power open or close, the
power operation will be canceled and the
liftgate can be operated manually.

To open the liftgate manually, push the lift-
gate open switch

A

and raise the liftgate.

To close, lower and push the liftgate down
securely.

MOTION-ACTIVATED LIFTGATE (if
so equipped)

The liftgate can be operated using a quick
kicking motion under the center of the rear
bumper.

To operate, the Intelligent Key must be
within 31.5 in (80 cm) of the liftgate.

NOTE:

Tow hitches are available as an acces-
sory for this vehicle. If a tow hitch is in-
stalled, the liftgate electronic control
unit (ECU) needs to be replaced with an
ECU programmed with towing logic for
the Motion-Activated Liftgate to func-
tion properly.

LPD2655

Pre-driving checks and adjustments

3-29

-------------------------------------------------------------------------------------------------------------------------------------------------------------

Proper operation technique

∙ While at the rear of the vehicle, begin

making a quick forward kicking motion.

∙ Raise your foot straight under the cen-

ter of the rear bumper then immedi-
ately return your foot to the ground in a
continuous motion.

∙ The kicking motion should be straight,

smooth and consistent.

∙ After your kick motion is complete, step

back

and

allow

the

liftgate

to

open/close.

∙ Three beeps will sound and the liftgate

will begin moving within two seconds
after the kick.

CAUTION

Before performing the kicking motion,
steady your stance to prevent any loss
of balance. Also, while making the kick-
ing motion, take caution around hot ex-
haust system parts. Otherwise, there
may be danger of injury.

WARNING

Prevent

unintentional

liftgate

opening/closing. There may be condi-
tions when opening/closing the liftgate
is not desired. Keep the Intelligent Key
out of range of the liftgate, (31.5 in or
80 cm), when washing or working
around the back of the vehicle.

Activation zone

LPD2762

DO: Quick forward kick and return while

the key fob is within range

LPD2948

DO NOT: Swing foot side to side or pause

during kick

LPD2764

3-30

Pre-driving checks and adjustments

-------------------------------------------------------------------------------------------------------------------------------------------------------------

CAUTION

∙ Interference or malfunction can be

caused by parking in close proximity
to radio or satellite towers.

∙ Intelligent Key interference could be

caused if you have your key fob stored
next to your cell phone or any RF-
enabled smart card. For additional in-
formation, refer to “NISSAN Intelligent
Key®” in this section.

LIFTGATE RELEASE

WARNING

∙ Always be sure the liftgate has been

closed securely to prevent it from
opening while driving.

∙ Do not drive with the liftgate open.

This could allow dangerous exhaust
gases to be drawn into the vehicle. For
additional information, refer to “Ex-
haust gas (carbon monoxide)” in the
“Starting and driving” section of this
manual.

∙ To avoid personal injury, do not at-

tempt to activate the power liftgate if
one or both of the liftgate struts are
removed.

CAUTION

∙ If the power liftgate does not stay

open or if the liftgate unexpectedly
closes at any time while a continuous
warning chime sounds, do not oper-
ate the liftgate. There may be a pres-
sure loss in one or both of the liftgate
struts. It is recommended that you
have the liftgate inspected. It is rec-
ommended that you visit a NISSAN
dealer for this service.

∙ Do not activate the power liftgate if

one or both of the liftgate struts are
removed. Damage to the liftgate or
power

liftgate

mechanisms

may

occur.

Manual liftgate release (if so
equipped)

The liftgate release mechanism allows the
liftgate to be opened in the event of a dis-
charged battery.

To release the liftgate from the inside of the
vehicle, perform the following operations:

1. Fold the rear seats down. For additional

information, refer to “Folding the rear
bench seat” in the “Safety—Seats, seat
belts and supplemental restraint sys-
tem” section of this manual.

LPD2375

Pre-driving checks and adjustments

3-31

-------------------------------------------------------------------------------------------------------------------------------------------------------------


Content      ..     10      11      12      13     ..