Nissan Quest (2017 year). Instruction - part 13
4-6
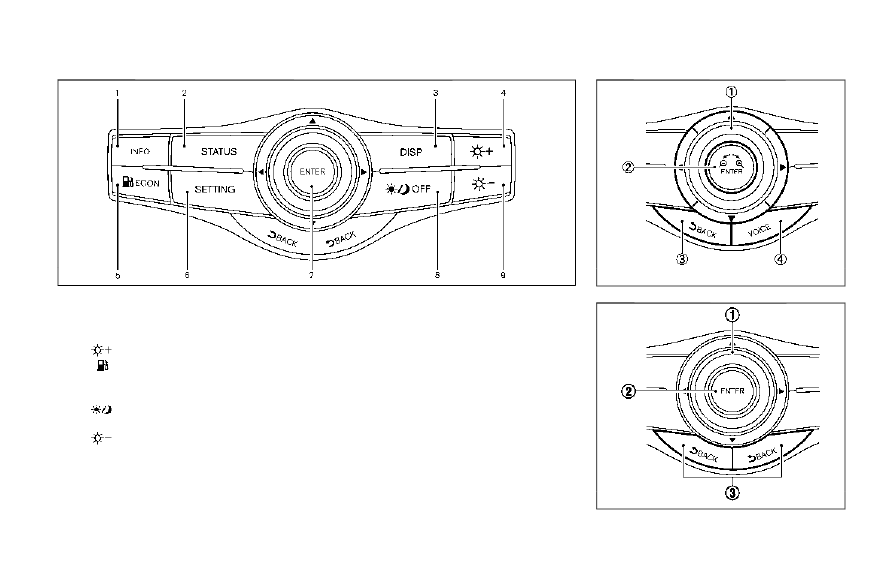
Monitor, heater, air conditioner, audio, phone and voice recognition systems
SAA3613
Models without navigation system
1.
“INFO” button (P.4-11)
2.
“STATUS” status display button (P.4-10)
3.
“DISP” display setting button (P.4-10)
4.
“
” brightness UP button (P.4-10)
5.
“
ECON” button (P.4-11)
6.
“SETTING” button (P.4-15)
7.
Multi-function controller (P.4-7)
8.
“
OFF” brightness control and display ON/
OFF button (P.4-10)
9.
“
” brightness DOWN button (P.4-10)
When you use this system, make sure the
engine is running.
If you use the system with the engine not
running (ignition ON or ACC) for a long
time, it will discharge the battery and the
engine may not start.
SAA3025
Models with navigation system
SAA3614
Models without navigation system