Nissan Frontier D40. Manual - part 791
INTERIOR ROOM LAMP
INL-119
< ON-VEHICLE REPAIR >
[WITHOUT POWER DOOR LOCKS]
C
D
E
F
G
H
I
J
K
M
A
B
INL
N
O
P
ON-VEHICLE REPAIR
INTERIOR ROOM LAMP
Removal and Installation
INFOID:0000000005567996
FRONT ROOM/MAP LAMP ASSEMBLY
Removal
The map lamp is replaced as part of the overhead console assembly.
Refer to
INT-24, "Removal and Installation"
.
: Vehicle front
: Metal clip
Installation
Installation is in the reverse order of removal.
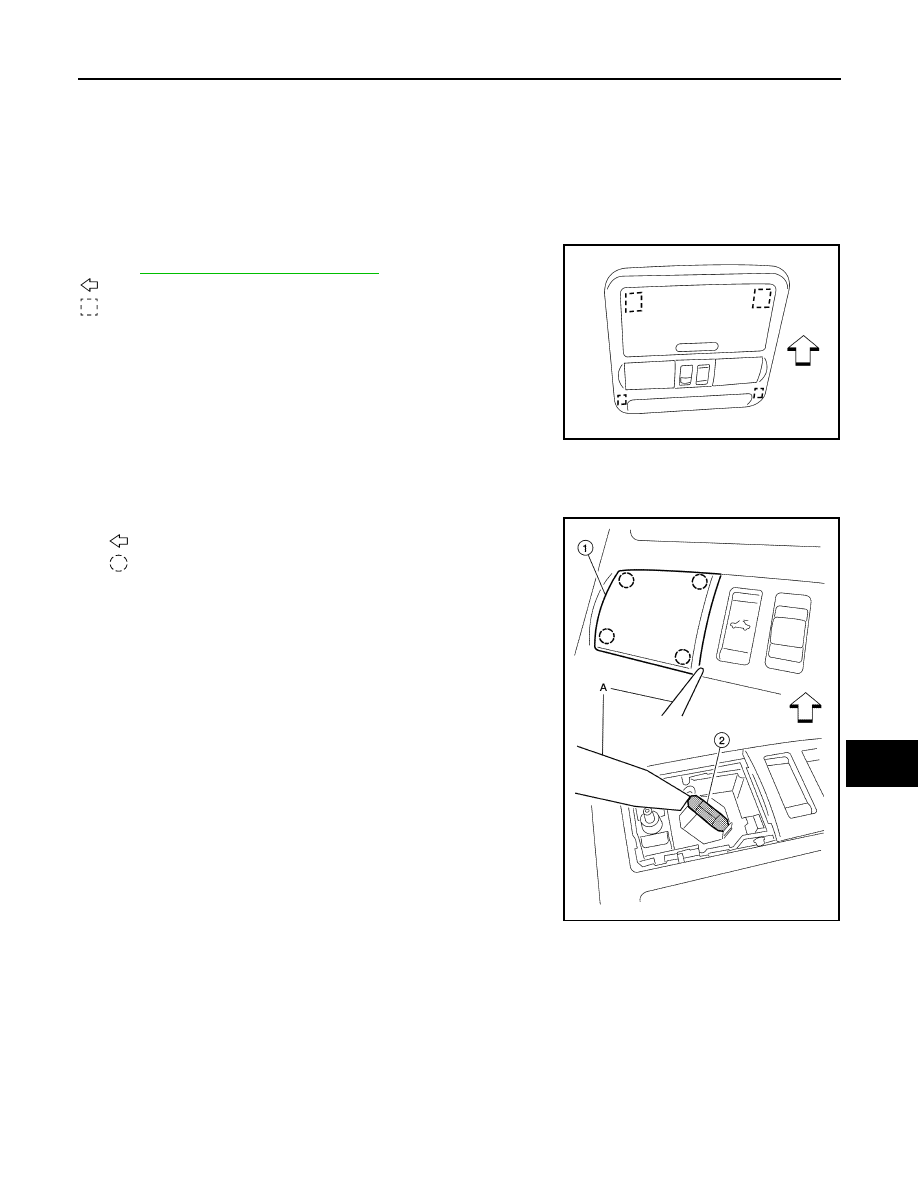
Bulb Replacement
1.
Using a suitable tool (A), remove map lamp lens (1).
: Vehicle front
: Pawl
CAUTION:
Wrap a cloth around tool to protect the housing and lens.
2.
Release one side of the bulb (2) from the tab, then pull straight
downward to remove.
VANITY MIRROR LAMP
Removal
AWLIA0867ZZ
Map lamp bulb
: 12V - 8W
AWLIA1667ZZ