Nissan Frontier D40. Manual - part 1012


  Index      Nissan     Nissan Frontier D40 (2010 year) - Service and Repair Manual


Search            


Content   ..  1010  1011  1012  1013   ..


Nissan Frontier D40. Manual - part 1012


STEERING WHEEL

ST-11

< REMOVAL AND INSTALLATION >

C

D

E

F

H

I

J

K

L

M

A

B

ST

N

O

P

REMOVAL AND INSTALLATION

STEERING WHEEL

Removal and Installation

INFOID:0000000005276022

REMOVAL

1.

Set the front wheels in the straight-ahead position.

2.

Remove the driver air bag module. Refer to 

SR-4, "Removal and Installation"

.

3.

Disconnect the steering wheel switches.

4.

Remove the steering wheel center nut.

5.

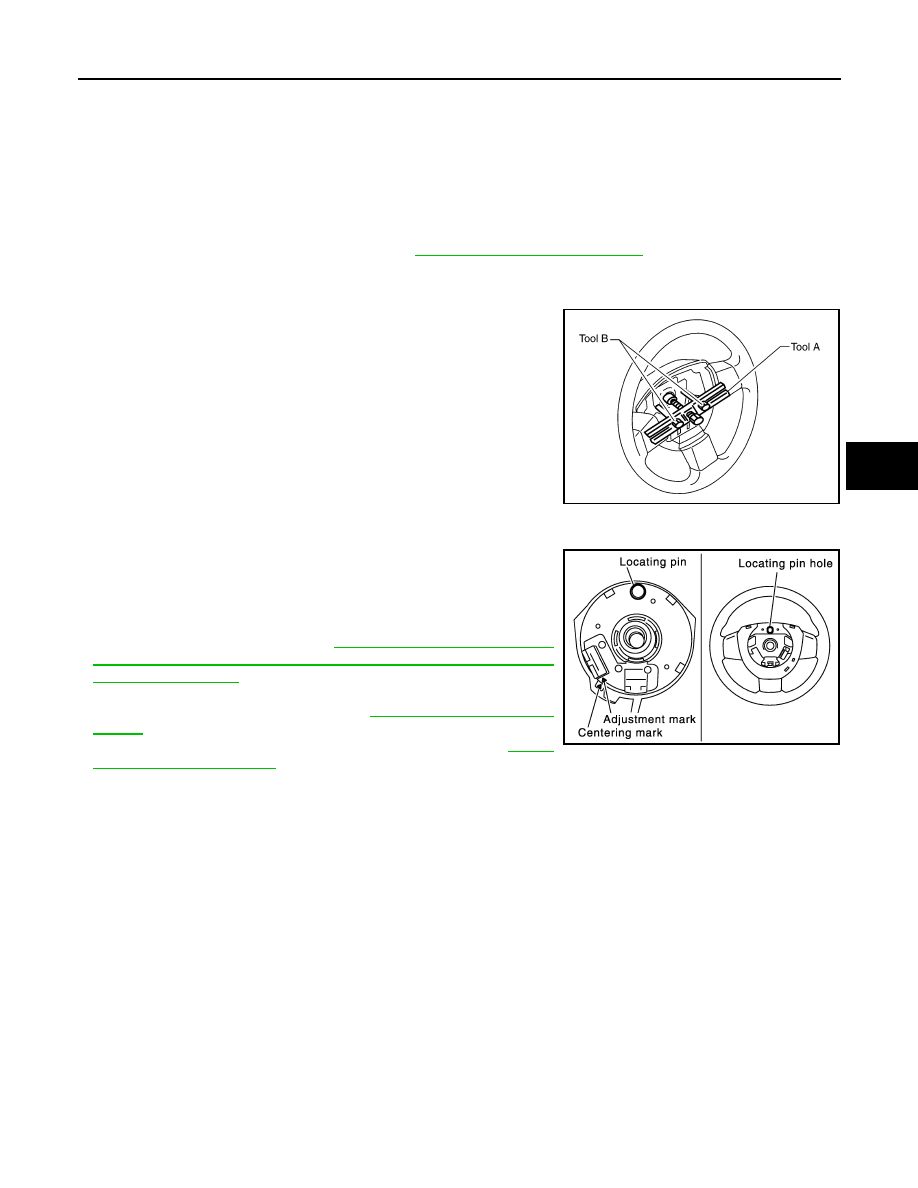
Remove the steering wheel, using Tools.

6.

Inspect the steering wheel near the puller holes for damage. If
damage is found, replace the steering wheel.
• Remove the steering wheel rear cover and steering wheel

switches, if required.

CAUTION:

Place a piece of tape across the spiral cable so it will not be
rotated out of position.

INSTALLATION

Installation is in the reverse order of removal.
• Align spiral cable correctly when installing steering wheel. Make

sure that the spiral cable is in the neutral position. The neutral
position is detected by turning left 2.5 revolutions from the right
end position and ending with the locating pin at the top.

• If equipped with VDC, refer to 

BRC-189, "ADJUSTMENT OF

STEERING ANGLE SENSOR NEUTRAL POSITION : Special
Repair Requirement"

 for steering angle sensor adjustment.

• After the work is completed, perform self-diagnosis to make sure

no malfunction is detected. Refer to 

SRC-13, "SRS Operation

Check"

.

• Tighten steering wheel center nut to specification. Refer to 

ST-12,

"Removal and Installation"

.

CAUTION:

• The spiral cable may snap due to steering operation if the cable is not installed in the correct posi-

tion.

• With the steering linkage disconnected, the cable may snap by turning the steering wheel beyond

the limited number of turns. The spiral cable can be turned counterclockwise about 2.5 turns from
the neutral position.

Tool number

A: KV481J0010 (J-1859A)

B: KV481J0020 (J-42578)

WHIA0124E

PHIA0275E

ST-12

< REMOVAL AND INSTALLATION >

STEERING COLUMN

STEERING COLUMN

Removal and Installation

INFOID:0000000005276023

CAUTION:

• Do not exert any axial load or impact to the steering column.
• Do not move the steering gear while the steering column assembly is removed.
• Any time the ignition switch has been removed or installed, the keys must be re-registered in the

BCM Refer to CONSULT-III operation manual IVIS/NVIS.

REMOVAL

1.

Remove the spiral cable with the combination switches attached from the steering column assembly.
Refer to 

SR-6, "Removal and Installation"

.

2.

Remove the lower instrument panel LH. Refer to 

IP-10, "Exploded View"

.

3.

Disconnect the following:
• Ignition key lamp
• Immobilizer
• Ignition switch

4.

Disconnect key interlock from steering column (if equipped). Refer to 

TM-290, "Removal and Installation"

.

1.

Driver air bag module

2.

Steering wheel center nut

3.

Steering wheel

4.

Combination switch and spiral cable 5.

Steering column assembly and 
ignition switch

6.

Collar

7.

Hole cover seal

8.

Clamp

9.

Hole cover mounting plate

10. Hole cover

11. Upper joint

12. Upper shaft

13. Boot clamp

14. Lower joint shaft

15. Boot and clips (plastic)

AWGIA0128GB

STEERING COLUMN

ST-13

< REMOVAL AND INSTALLATION >

C

D

E

F

H

I

J

K

L

M

A

B

ST

N

O

P

5.

Remove the lock nut and bolt from the upper joint, then separate
the upper joint from the upper shaft.

CAUTION:

• Do not reuse the lock nut.

6.

Remove the three nuts and bolt from the steering column
assembly, then remove the steering column assembly from the
steering member.

7.

Remove the bolt from the lower joint of the lower joint shaft, then
remove the lower joint shaft from the vehicle.

CAUTION:

• Do not damage the lower joint.

INSPECTION AFTER REMOVAL

• Check for damage to the steering column jacket tube. If damage is found, replace the steering column with a

new one.

CAUTION:

• Do not exert any axial load or impact to the steering column.
• Replace the column if it is depleted of grease, worn, damaged, or if any scratches or coating sepa-

ration is present on the shaft seal area.

• If the vehicle has been in a collision, or if noises are heard coming from the steering column, check column

length. If out of specification, replace the steering column as an assembly.

INSTALLATION

Installation is in the reverse order of removal.

CAUTION:

When installing the steering column, finger-tighten all of the lower bracket and joint bolts; then tighten
them to specification. Do not apply undue stress to the steering column.
NOTE:

LGIA0027E

LGIA0028E

LGIA0029E

Steering column 
length

Refer to 

ST-29, "Steering Col-

umn"

ST-14

< REMOVAL AND INSTALLATION >

STEERING COLUMN

• With the wheels in the straight ahead position, align the slit of the

lower joint with the projection on the dust cover. Insert the joint until
surface (A) contacts surface (B).

• After installation, inspect the steering column for proper operation.

INSPECTION AFTER INSTALLATION

• Check the tilt device for proper tilt range.

• Check that the steering wheel turns smoothly to the left and right

locks.

• Check that the number of turns are the same from the straight-for-

ward position to the left and right locks.

• Check that the steering wheel is in the neutral position when driv-

ing straight ahead.

SST491C

Tilt range (A)

Refer to 

ST-29, "Steering 

Column"

WGIA0083E


Content   ..  1010  1011  1012  1013   ..