Nissan Titan A60. Manual - part 819
 

  Index      Nissan     Nissan Titan A60 (2011 year) - Service and Repair Manual


Search            


Content   ..  817  818  819  820   ..


Nissan Titan A60. Manual - part 819


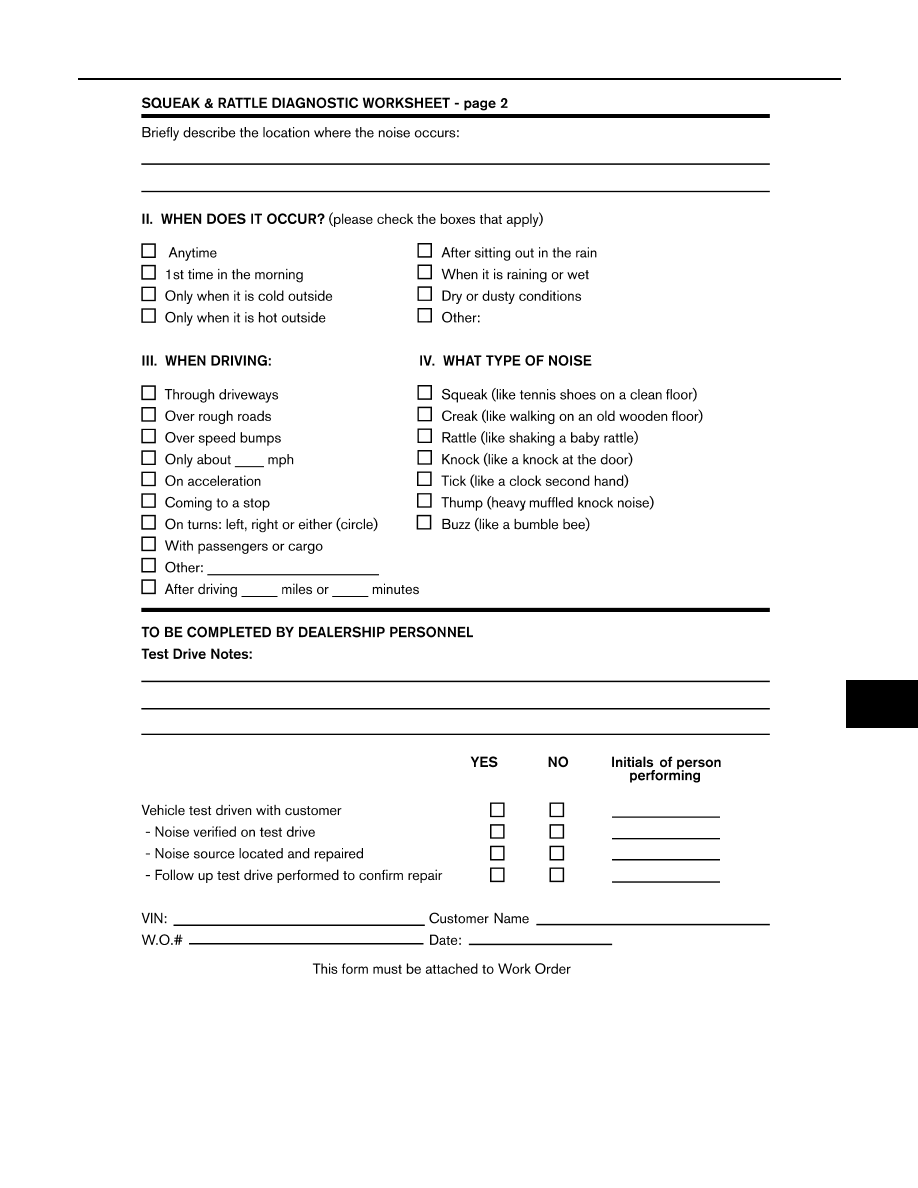
SQUEAK AND RATTLE TROUBLE DIAGNOSES

RF-43

< SYMPTOM DIAGNOSIS >

C

D

E

F

G

H

I

J

L

M

A

B

RF

N

O

P

LAIA0071E

RF-44

< PRECAUTION >

PRECAUTIONS

PRECAUTION

PRECAUTIONS

Precaution for Supplemental Restraint System (SRS) "AIR BAG" and "SEAT BELT 
PRE-TENSIONER"

INFOID:0000000006163253

The Supplemental Restraint System such as “AIR BAG” and “SEAT BELT PRE-TENSIONER”, used along

with a front seat belt, helps to reduce the risk or severity of injury to the driver and front passenger for certain

types of collision. This system includes seat belt switch inputs and dual stage front air bag modules. The SRS

system uses the seat belt switches to determine the front air bag deployment, and may only deploy one front

air bag, depending on the severity of a collision and whether the front occupants are belted or unbelted.

Information necessary to service the system safely is included in the SR and SB section of this Service Man-

ual.

WARNING:

• To avoid rendering the SRS inoperative, which could increase the risk of personal injury or death in

the event of a collision which would result in air bag inflation, all maintenance must be performed by

an authorized NISSAN/INFINITI dealer.

• Improper maintenance, including incorrect removal and installation of the SRS, can lead to personal

injury caused by unintentional activation of the system. For removal of Spiral Cable and Air Bag

Module, see the SR section.

• Do not use electrical test equipment on any circuit related to the SRS unless instructed to in this

Service Manual. SRS wiring harnesses can be identified by yellow and/or orange harnesses or har-

ness connectors.

PRECAUTIONS WHEN USING POWER TOOLS (AIR OR ELECTRIC) AND HAMMERS

WARNING:

• When working near the Airbag Diagnosis Sensor Unit or other Airbag System sensors with the Igni-

tion ON or engine running, DO NOT use air or electric power tools or strike near the sensor(s) with a

hammer. Heavy vibration could activate the sensor(s) and deploy the air bag(s), possibly causing

serious injury.

• When using air or electric power tools or hammers, always switch the Ignition OFF, disconnect the

battery, and wait at least 3 minutes before performing any service.

Precaution for Work

INFOID:0000000006709591

• When removing or disassembling each component, be careful not to damage or deform it. If a component

may be subject to interference, be sure to protect it with a shop cloth.

• When removing (disengaging) components with a screwdriver or similar tool, be sure to wrap the component

with a shop cloth or vinyl tape to protect it.

• Protect the removed parts with a shop cloth and prevent them from being dropped.

• Replace a deformed or damaged clip.

• If a part is specified as a non-reusable part, always replace it with new one.

• Be sure to tighten bolts and nuts securely to the specified torque.

• After installation is complete, be sure to check that each part works properly.

• Follow the steps below to clean components.

- Water soluble dirt: Dip a soft cloth into lukewarm water, and wring the water out of the cloth to wipe the dirty

area.

Then rub with a soft and dry cloth.

- Oily dirt: Dip a soft cloth into lukewarm water with mild detergent (concentration: within 2 to 3%), and wipe

the dirty area.

Then dip a cloth into fresh water, and wring the water out of the cloth to wipe the detergent off. Then rub with

a soft and dry cloth.

• Do not use organic solvent such as thinner, benzene, alcohol, or gasoline.

• For genuine leather seats, use a genuine leather seat cleaner.

PREPARATION

RF-45

< PREPARATION >

C

D

E

F

G

H

I

J

L

M

A

B

RF

N

O

P

PREPARATION

PREPARATION

Special Service Tool

INFOID:0000000006163255

The actual shapes of Kent-Moore tools may differ from those of special service tools illustrated here.

Commercial Service Tool

INFOID:0000000006163256

Tool number
(Kent-Moore No.)
Tool name

Description

(J-39570)
Chassis ear

Locating the noise

(J-43980)
NISSAN Squeak and
Rattle Kit

Repairing the cause of noise

SIIA0993E

SIIA0994E

(Kent-Moore No.)
Tool name

Description

(J-39565)
Engine ear

Locating the noise

SIIA0995E

RF-46

< REMOVAL AND INSTALLATION >

SUNROOF SYSTEM

REMOVAL AND INSTALLATION

SUNROOF SYSTEM

Inspection

INFOID:0000000006163257

WIND DEFLECTOR

1. Open glass lid assembly fully.
2. Visually check for proper installation, damaged/deteriorated components, or foreign objects within mecha-

nism. Correct as required for smooth operation.

3. Check for grease at the wind deflector arm (1) and pivot areas. If

necessary, apply a sufficient amount of grease for non-binding

operation.

:Vehicle front 

4. Check that the wind deflector (1) moves freely within the sunroof

unit assembly while manually pressing down and releasing. If a

malfunction is detected, remove the sunroof unit assembly and

visually inspect. If damage is found, replace either wind deflec-

tor (1) or sunroof unit assembly as required.

:Vehicle front 

WEATHERSTRIP

Visually check weatherstrip for any damage, deterioration, or flattening. 

• In the case of leakage around glass lid, close glass lid and pour water around it to find the damaged or

gaped portion, remove glass lid assembly.

• If any damage is found, replace glass lid assembly.

CAUTION:

Do not remove the weatherstrip.

LINK AND WIRE ASSEMBLY

NOTE:

Before replacing any suspect part, carefully ensure it is the source of the noise being experienced.
1. Visually check to determine if a sufficient amount of petroleum jelly has been applied to the wire or rail

groove. If not, add petroleum jelly as required.

2. Check wire for any damage or deterioration. If any damage is found, remove rear guide, then replace

wire.

DRAIN HOSES

LIIA2336E

WIIA0849E


Content   ..  817  818  819  820   ..