Nissan Quest E52. Manual - part 626
EXL-108
< REMOVAL AND INSTALLATION >
[XENON TYPE]
OPTICAL SENSOR
OPTICAL SENSOR
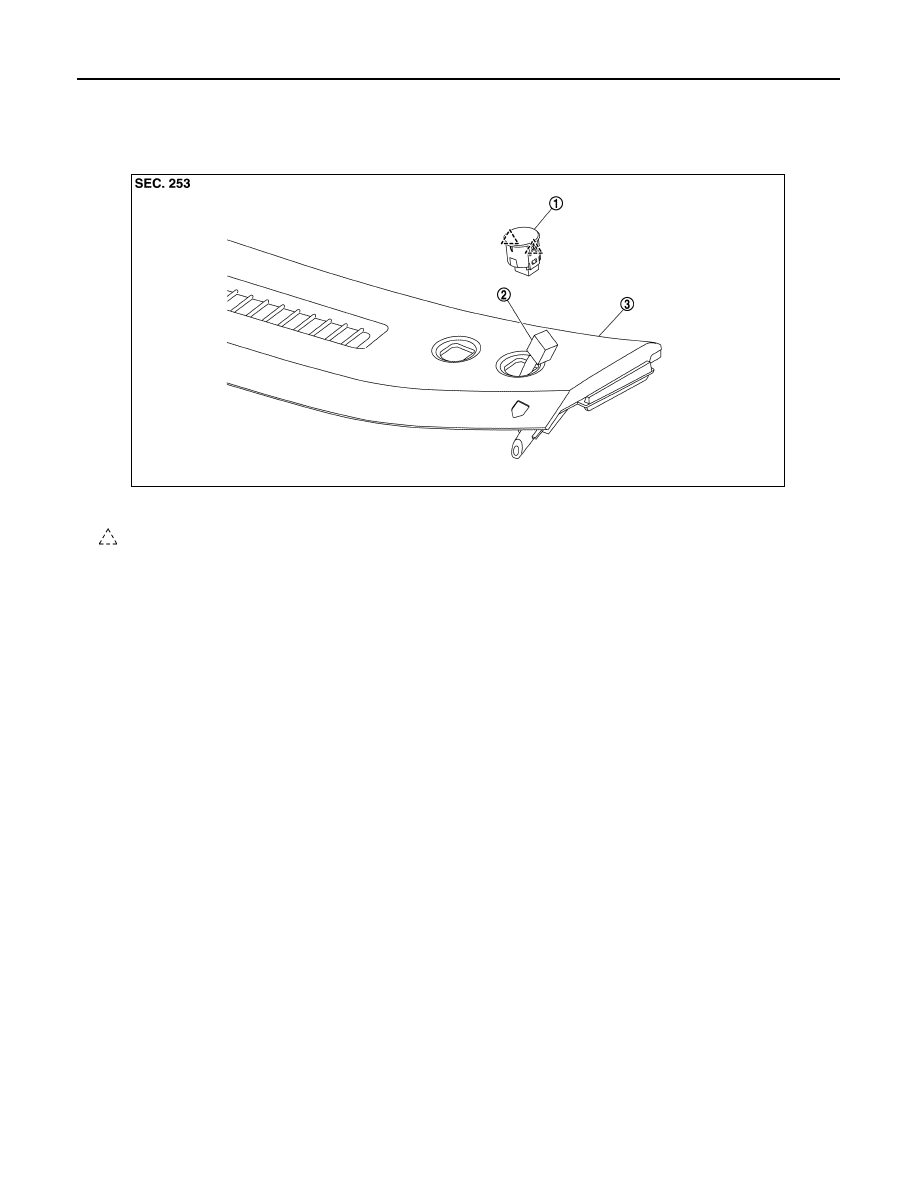
Exploded View
INFOID:0000000009653094
Removal and Installation
INFOID:0000000009653095
REMOVAL
1.
Insert an appropriate tool between the optical sensor and the instrument upper garnish. Pull out the opti-
cal sensor upward.
2.
Disconnect the optical sensor connector, and then remove optical sensor.
INSTALLATION
Install in the reverse order of removal.
1.
Optical sensor
2.
Harness connector
3.
Instrument upper garnish
: Pawl
JMLIA2174ZZ