Nissan Versa Note. Manual - part 33


  Index      Nissan     Nissan Versa Note (2014 year) - Service and Repair Manual


Search            


Content   ..  31  32  33  34   ..


Nissan Versa Note. Manual - part 33


AV-124

< REMOVAL AND INSTALLATION >

[DISPLAY AUDIO]

BLUETOOTH® ANTENNA

BLUETOOTH® ANTENNA

Removal and Installation 

INFOID:0000000009541254

REMOVAL

1. Remove the luggage side lower finisher (RH). Refer to 

INT-34, "LUGGAGE SIDE LOWER FINISHER :

Removal and Installation"

.

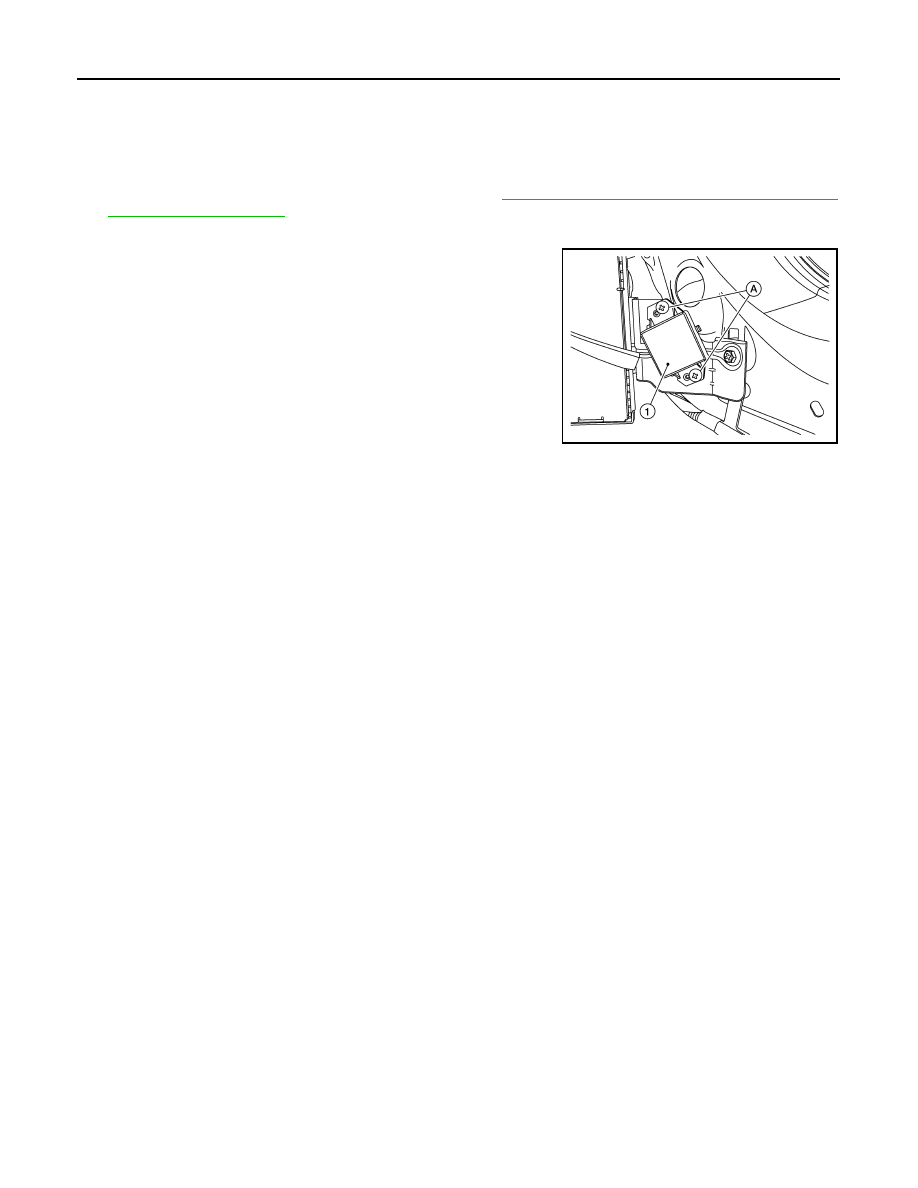
2. Disconnect the Bluetooth® antenna harness connector from the Bluetooth® control unit.
3. Remove the Bluetooth® antenna screws (A) and the Bluetooth®

antenna (1).

INSTALLATION

Installation is in the reverse order of removal.

AWNIA3095ZZ

AV

STEERING SWITCH

AV-125

< REMOVAL AND INSTALLATION >

[DISPLAY AUDIO]

C

D

E

F

G

H

I

J

K

L

M

B

A

O

P

STEERING SWITCH

Removal and Installation

INFOID:0000000009541280

REMOVAL

1. Remove the steering wheel. Refer to 

ST-8, "Removal and Installation"

.

2. Remove the steering wheel rear finisher (1) by releasing pawls

(A).

3. Remove the steering wheel audio control switch screws (A) from

the back of the steering wheel.

4. Remove the steering wheel audio control switches from the steering wheel.

INSTALLATION

Installation is in the reverse order of removal.

AWNIA3063ZZ

AWNIA3064ZZ

AV-126

< REMOVAL AND INSTALLATION >

[DISPLAY AUDIO]

MICROPHONE

MICROPHONE

Removal and Installation

INFOID:0000000009541281

REMOVAL

1. Remove the microphone finisher from the headlining by releas-

ing pawls (A) using a suitable tool.

2. Disconnect the harness connector from microphone and remove.
3. Separate the microphone from the finisher by releasing pawls

(A) using a suitable tool.

INSTALLATION

Installation is in the reverse order of removal.

NOTE:

Make sure to align the rib on the finisher with the slot in the microphone.

Make sure to install the microphone with the arrows pointing toward the RH side of the vehicle.

AWNIA3153ZZ

AWNIA3154ZZ

AV

ROD ANTENNA

AV-127

< REMOVAL AND INSTALLATION >

[DISPLAY AUDIO]

C

D

E

F

G

H

I

J

K

L

M

B

A

O

P

ROD ANTENNA

Exploded View

INFOID:0000000009541282

Removal and Installation

INFOID:0000000009541283

REMOVAL

1. Lower the rear portion of the headlining. Refer to 

INT-31, "Removal and Installation"

.

2. Disconnect the harness connectors from the antenna (satellite radio model shown).
3. Remove the antenna nut (A) and remove the antenna.

INSTALLATION

Installation is in the reverse order of removal.

CAUTION:

If the antenna nut is tightened less than the specified torque this will lower the sensitivity of the

antenna. If the antenna nut is tightened more than the specified torque this will deform the roof panel.

AWNIA3124ZZ

1. Antenna rod

2. Antenna base

A. Antenna nut

AWNIA3115ZZ


Content   ..  31  32  33  34   ..