Nissan Rogue. Manual - part 738
HA-20
< SYMPTOM DIAGNOSIS >
COMPRESSOR SYSTEM SYMPTOMS
COMPRESSOR SYSTEM SYMPTOMS
Symptom Table
INFOID:0000000011279480
Follow the next table and perform trouble diagnosis if there is a compressor unit malfunction (internal noise,
insufficient cooling).
*1: First conduct inspection according to trouble diagnosis for each malfunction.
*2: Applicable to variable capacity compressor only.
Symptom
Inspection method
Check list
Result
Action
Noise from compressor unit
When A/C is ON.
(rattling or rolling sound)
Cooker system in-
ternal pressure
Check with manifold gauge
Both high- and low-
pressure sides are
high.
*2
Recharge with proper
amount of refrigerant.
High/low-pressures
hunt.
*2
Replace compressor
only.
Check compressor
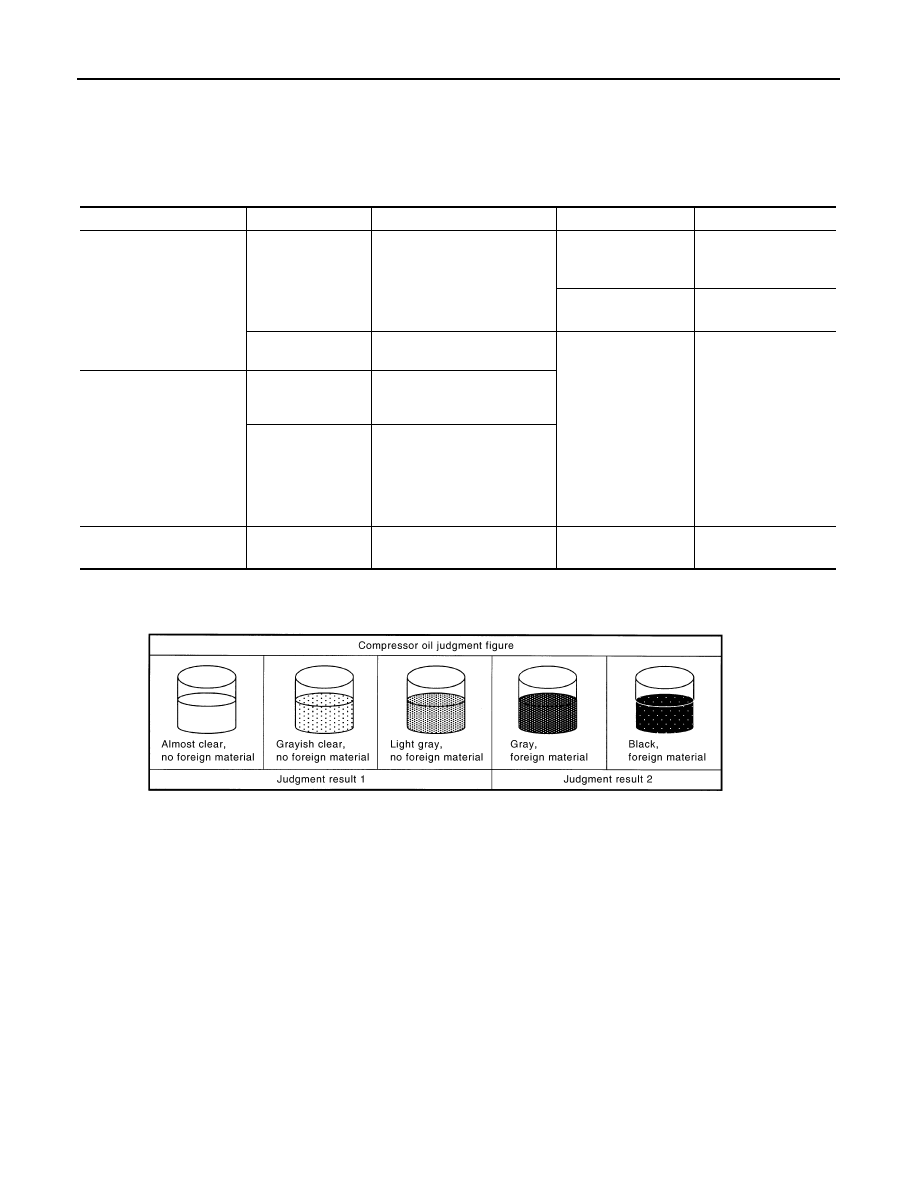
oil condition.
Sample compressor oil and
judge.
Refer to the criteria
shown in compressor
lubricant.
Judgment result 1: Re-
place compressor only.
Judgment result 2: Re-
place compressor and
liquid tank.
Insufficient cooling
*1
Compressor body
Check rotation of compressor.
If sized or stuck, sample com-
pressor oil and judge.
Cooler system inter-
nal pressure
Check with a manifold gauge.
Sample compressor oil and
judge if the difference between
high-pressure and low-pres-
sure is small or if they are al-
most the same.
Outlet air temperature rises
temporarily while driving.
*2
—
—
—
Replace compressor
only.
JSIIA0927GB