Nissan Maxima. Manual - part 299
CO-8
< SYSTEM DESCRIPTION >
[VQ35DE]
COOLING SYSTEM
COOLING SYSTEM
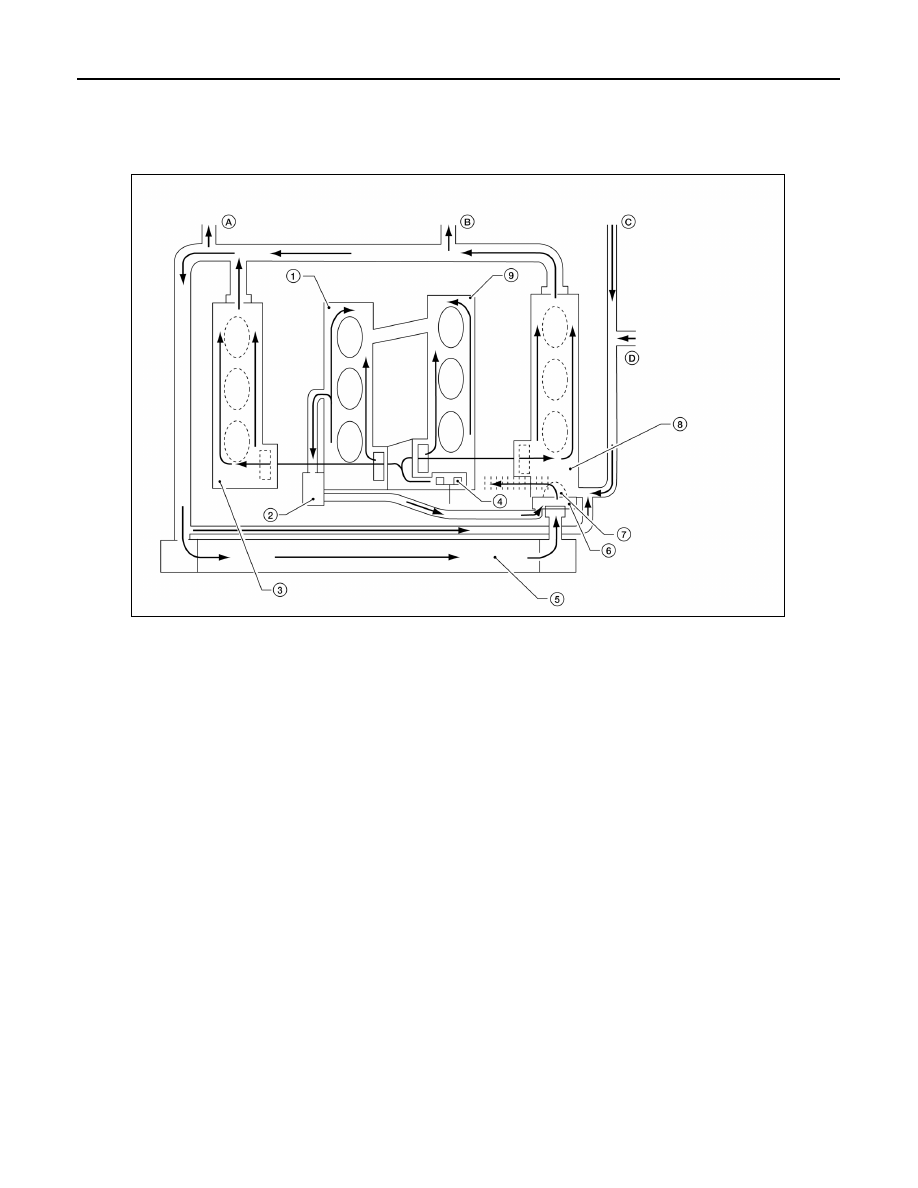
Cooling Circuit
INFOID:0000000009469262
1.
Cylinder block (RH)
2.
Oil cooler
3.
Cylinder head (RH)
4.
Water pump
5.
Radiator
6.
Water inlet
7.
Thermostat
8.
Cylinder head (LH)
9.
Cylinder block (LH)
A.
To heater
B.
To electric throttle control actuator
C. From heater
D.
From electric throttle control actuator
AWBIA1460ZZ