Nissan Maxima. Manual - part 168
AV-492
< REMOVAL AND INSTALLATION >
[COLOR DISPLAY - W/ BOSE]
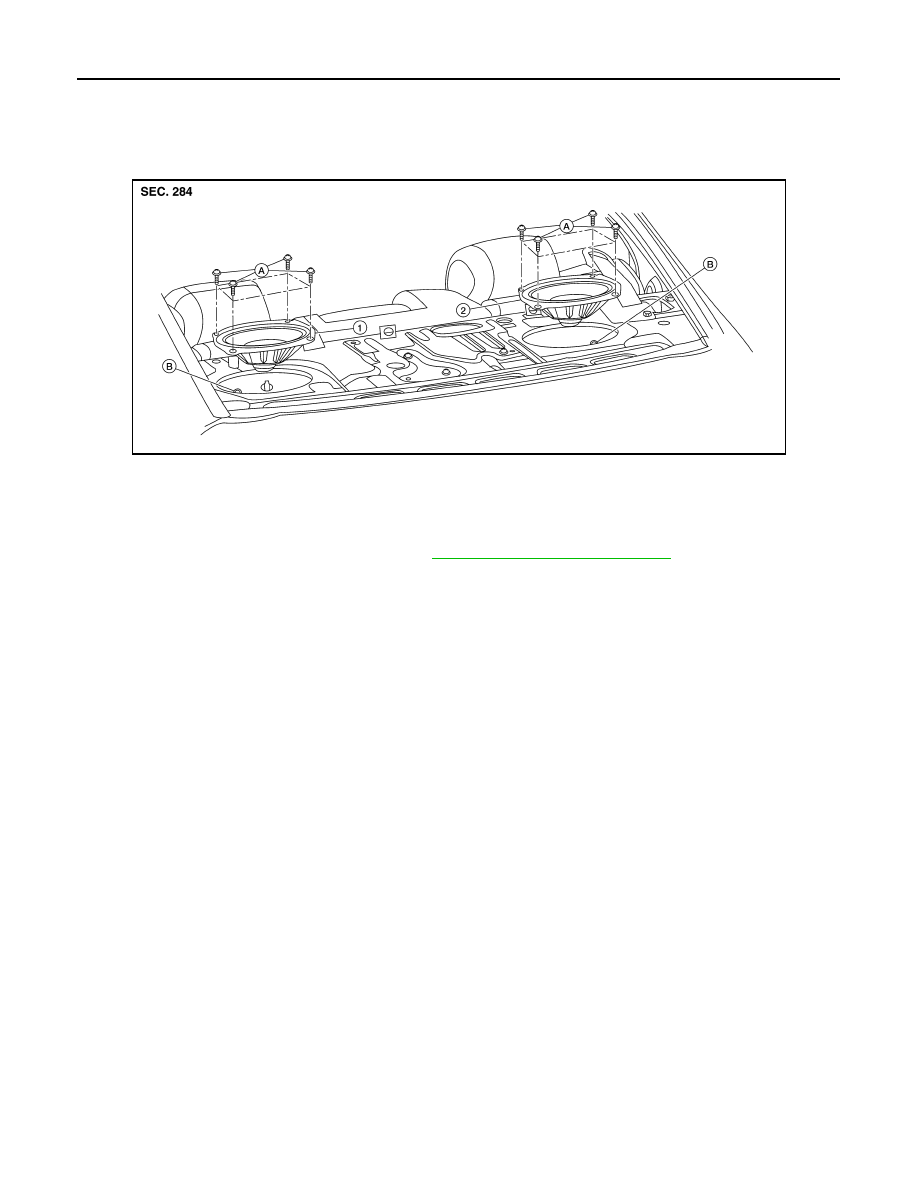
SUBWOOFER
SUBWOOFER
Removal and Installation
INFOID:0000000009471406
REMOVAL
1. Remove the rear parcel shelf finisher. Refer to
INT-28, "Removal and Installation"
.
2. Remove the subwoofer screws.
3. Pull out the subwoofer, disconnect the harness connector from the subwoofer and remove.
INSTALLATION
Installation is in the reverse order of removal.
ALNIA1134ZZ
1.
Subwoofer (LH)
2.
Subwoofer (RH)
A.
Subwoofer screws
B.
Subwoofer connectors