Nissan Frontier. Manual - part 739
INTAKE MANIFOLD
EM-145
< REMOVAL AND INSTALLATION >
[VQ40DE]
C
D
E
F
G
H
I
J
K
L
M
A
EM
N
P
O
INTAKE MANIFOLD
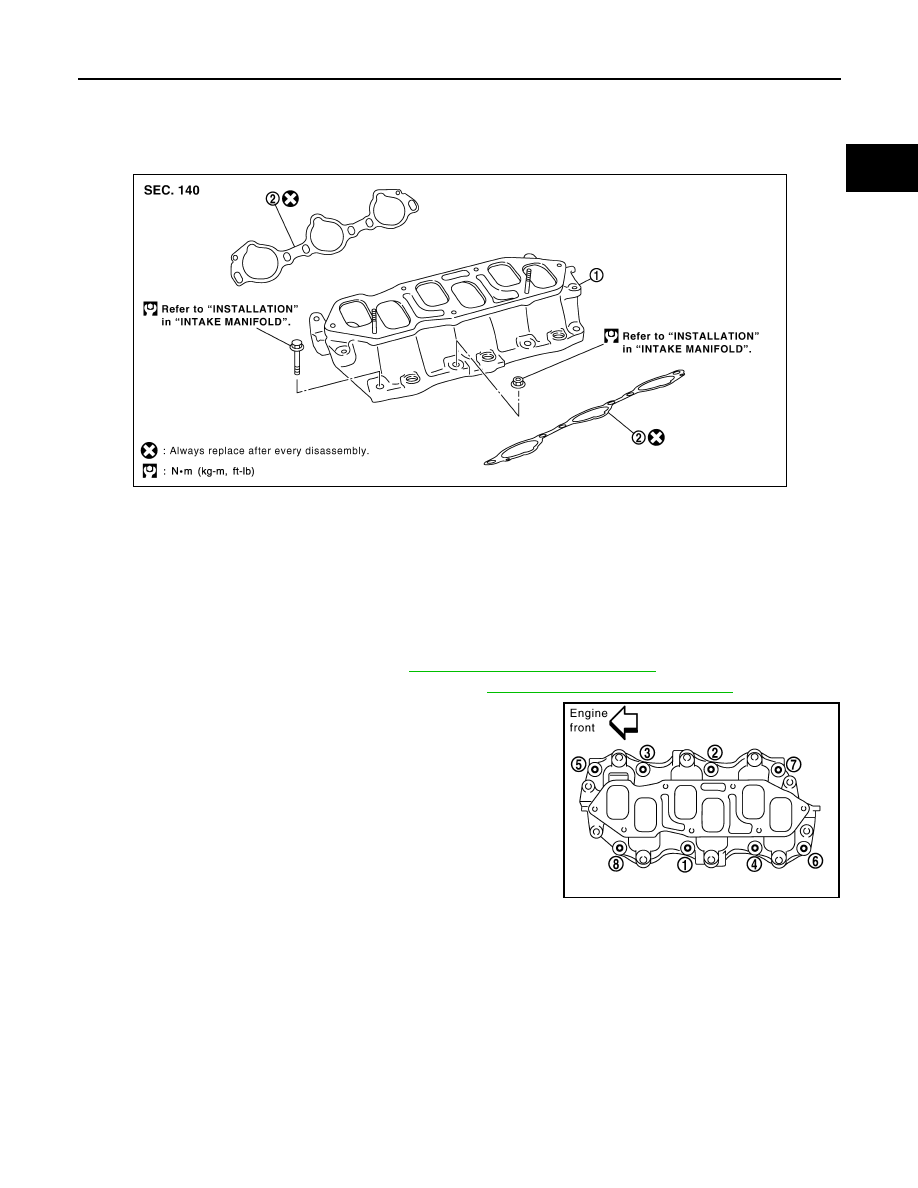
Exploded View
INFOID:0000000009478111
Removal and Installation
INFOID:0000000009478112
NOTE:
When removing components such as hoses, tubes/lines, etc., cap or plug openings to prevent fluid from spill-
ing.
REMOVAL
1. Remove intake manifold collector. Refer to
EM-142, "Removal and Installation"
2. Remove fuel tube and fuel injector assembly. Refer to
EM-162, "Removal and Installation"
.
3. Loosen nuts and bolts with power tool in reverse order as shown
to remove intake manifold.
4. Remove gaskets.
CAUTION:
Cover engine openings to avoid entry of foreign materials.
INSPECTION AFTER REMOVAL
Surface Distortion
1.
Intake manifold
2.
Gasket
PBIC2878E
PBIC2879E