Nissan Frontier. Manual - part 699


  Index      Nissan     Nissan Frontier (2014 year) - Service and Repair Manual


Search            


Content   ..  697  698  699  700   ..


Nissan Frontier. Manual - part 699


REFRIGERANT PRESSURE SENSOR

EC-1367

< DTC/CIRCUIT DIAGNOSIS >

[VQ40DE FOR MEXICO]

C

D

E

F

G

H

I

J

K

L

M

A

EC

N

P

O

OK or NG

OK

>> GO TO 3.

NG

>> Repair or replace ground connections.

3.

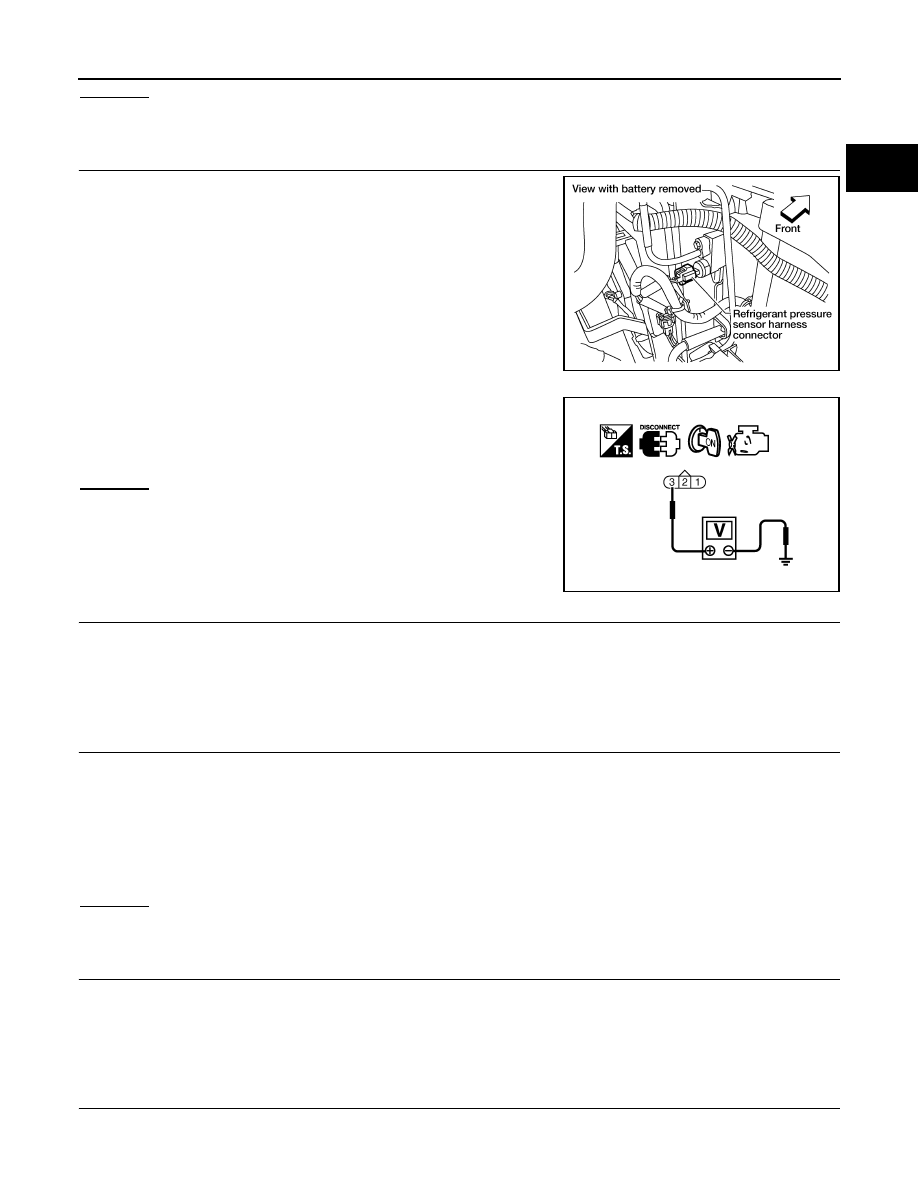
CHECK REFRIGERANT PRESSURE SENSOR POWER SUPPLY CIRCUIT

1. Disconnect refrigerant pressure sensor harness connector.

2. Turn ignition switch ON.

3. Check voltage between refrigerant pressure sensor terminal 3

and ground with CONSULT or tester.

OK or NG

OK

>> GO TO 5.

NG

>> GO TO 4.

4.

DETECT MALFUNCTIONING PART

Check the following.

• Harness connectors E5, F14

• Harness for open or short between ECM and refrigerant pressure sensor

>> Repair harness or connectors.

5.

CHECK REFRIGERANT PRESSURE SENSOR GROUND CIRCUIT FOR OPEN AND SHORT

1. Turn ignition switch OFF.

2. Disconnect ECM harness connector.

3. Check harness continuity between refrigerant pressure sensor terminal 1 and ECM terminal 67.

Refer to Wiring Diagram.

4. Also check harness for short to ground and short to power.
OK or NG

OK

>> GO TO 7.

NG

>> GO TO 6.

6.

DETECT MALFUNCTIONING PART

Check the following.

• Harness connectors E5, F14

• Harness for open or short between ECM and refrigerant pressure sensor

>> Repair open circuit or short to ground or short to power in harness or connectors.

7.

CHECK REFRIGERANT PRESSURE SENSOR INPUT SIGNAL CIRCUIT FOR OPEN AND SHORT

1. Check harness continuity between ECM terminal 70 and refrigerant pressure sensor terminal 2.

Refer to Wiring Diagram.

BBIA0564E

Voltage: Approximately 5V

PBIB1872E

Continuity should exist.

EC-1368

< DTC/CIRCUIT DIAGNOSIS >

[VQ40DE FOR MEXICO]

REFRIGERANT PRESSURE SENSOR

2. Also check harness for short to ground and short to power.
OK or NG

OK

>> GO TO 9.

NG

>> GO TO 8.

8.

DETECT MALFUNCTIONING PART

Check the following.

• Harness connectors E5, F14

• Harness for open or short between ECM and refrigerant pressure sensor

>> Repair open circuit or short to ground or short to power in harness or connectors.

9.

CHECK INTERMITTENT INCIDENT

Refer to 

GI-42, "Intermittent Incident"

.

OK or NG

OK

>> Replace refrigerant pressure sensor. Refer to 

HA-36, "Removal and Installation"

.

NG

>> Repair or replace. 

Continuity should exist.

VIAS

EC-1369

< DTC/CIRCUIT DIAGNOSIS >

[VQ40DE FOR MEXICO]

C

D

E

F

G

H

I

J

K

L

M

A

EC

N

P

O

VIAS

Diagnosis Procedure

INFOID:0000000009482047

1.

CHECK OVERALL FUNCTION

 With CONSULT

1. Start engine and warm it up to normal operating temperature.

2. Perform “VIAS S/V-1” in “ACTIVE TEST” mode with CONSULT.

3. Turn VIAS control solenoid valve “ON” and “OFF”, and make

sure that power valve actuator rod moves.

 Without CONSULT

1. Start engine and warm it up to normal operating temperature.

2. Rev engine up to between 2,200 and 3,300 rpm and make sure

that power valve actuator rod moves.

OK or NG

OK

>> INSPECTION END

NG (With CONSULT) >>GO TO 2.

NG (Without CONSULT) >>GO TO 3.

2.

CHECK VACUUM EXISTENCE

 With CONSULT

1. Stop engine and disconnect vacuum hose connected to power valve actuator.

2. Start engine and let it idle.

3. Perform “VIAS S/V-1” in “ACTIVE TEST” mode with CONSULT.

4. Turn VIAS control solenoid valve “ON” and “OFF”, and check vacuum existence under the following condi-

tions.

OK or NG

OK

>> Repair or replace power valve actuator.

NG 

>> GO TO 4.

3.

CHECK VACUUM EXISTENCE

 Without CONSULT

1. Stop engine and disconnect vacuum hose connected to power valve actuator.

2. Disconnect VIAS control solenoid valve harness connector.

3. Start engine and let it idle.

BBIA0570E

BBIA0570E

VIAS SOL VALVE

Vacuum

ON

Should exist.

OFF

Should not exist.

EC-1370

< DTC/CIRCUIT DIAGNOSIS >

[VQ40DE FOR MEXICO]

VIAS

4. Apply 12V of direct current between VIAS control solenoid valve

terminals 1 and 2.

5. Check vacuum existence under the following conditions.

OK or NG

OK

>> Repair or replace power valve actuator.

NG

>> GO TO 4.

4.

CHECK VACUUM HOSE

1. Stop engine.

2. Check hoses and tubes between intake manifold and power

valve actuator for cracks, clogging, improper connection or dis-

connection. Refer to 

EC-996, "Vacuum Hose Drawing"

.

OK or NG

OK

>> GO TO 5.

NG

>> Repair hoses or tubes.

5.

CHECK VACUUM TANK

Refer to 

EC-1371, "Component Inspection"

.

OK or NG

OK

>> GO TO 6.

NG

>> Replace vacuum tank. Refer to 

EM-142, "Exploded View"

.

6.

CHECK VIAS CONTROL SOLENOID VALVE POWER SUPPLY CIRCUIT

1. Turn ignition switch OFF.

2. Disconnect VIAS control solenoid valve harness connector.

3. Turn ignition switch ON.

4. Check voltage between terminal 1 and ground with CONSULT

or tester.

OK or NG

OK

>> GO TO 8.

NG

>> GO TO 7.

Condition

Vacuum

12V direct current supply

Should exist.

No supply

Should not exist.

PBIB0845E

SEF109L

BBIA0569E

Voltage: Battery voltage

PBIB0173E


Content   ..  697  698  699  700   ..