Content .. 1119 1120 1121 1122 ..
Nissan Frontier. Manual - part 1121
FRONT SEAT
SE-29
< REMOVAL AND INSTALLATION >
C
D
E
F
G
H
I
K
L
M
A
B
SE
N
O
P
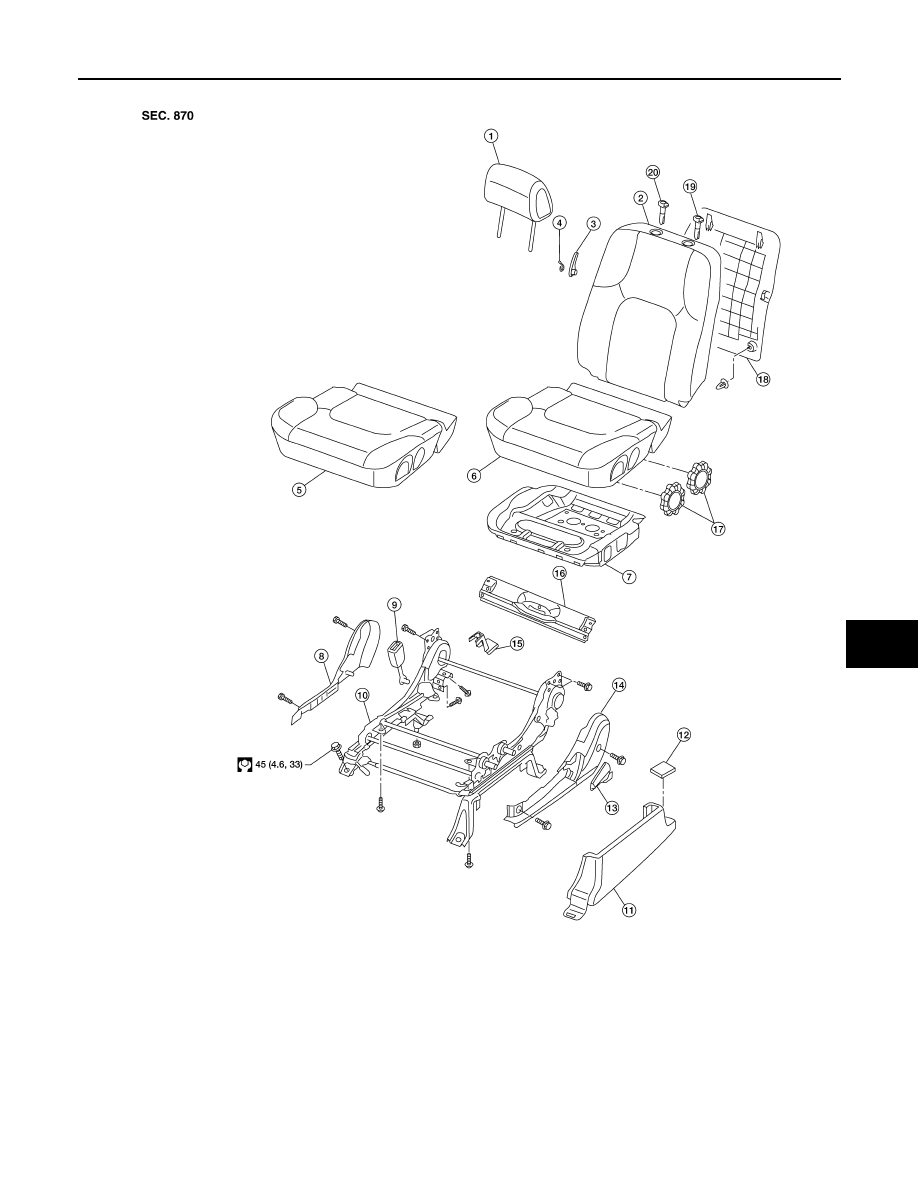
Manual Driver Seat
AWJIA0467GB
1.
Headrest
2.
Seatback assembly
3.
Lumbar support lever knob
4.
Snap ring
5.
Seat cushion trim cover
6.
Seat cushion pad
7.
Seat cushion frame
8.
Seat cushion inner finisher
9.
Seat belt buckle assembly
10. Seat frame assembly
11. Leg cover
12. Bolt cover
13. Recline lever
14. Seat cushion outer finisher
15. Leg cover