Nissan Sentra. Manual - part 623
LU-12
< REMOVAL AND INSTALLATION >
[MRA8DE]
OIL COOLER
REMOVAL AND INSTALLATION
OIL COOLER
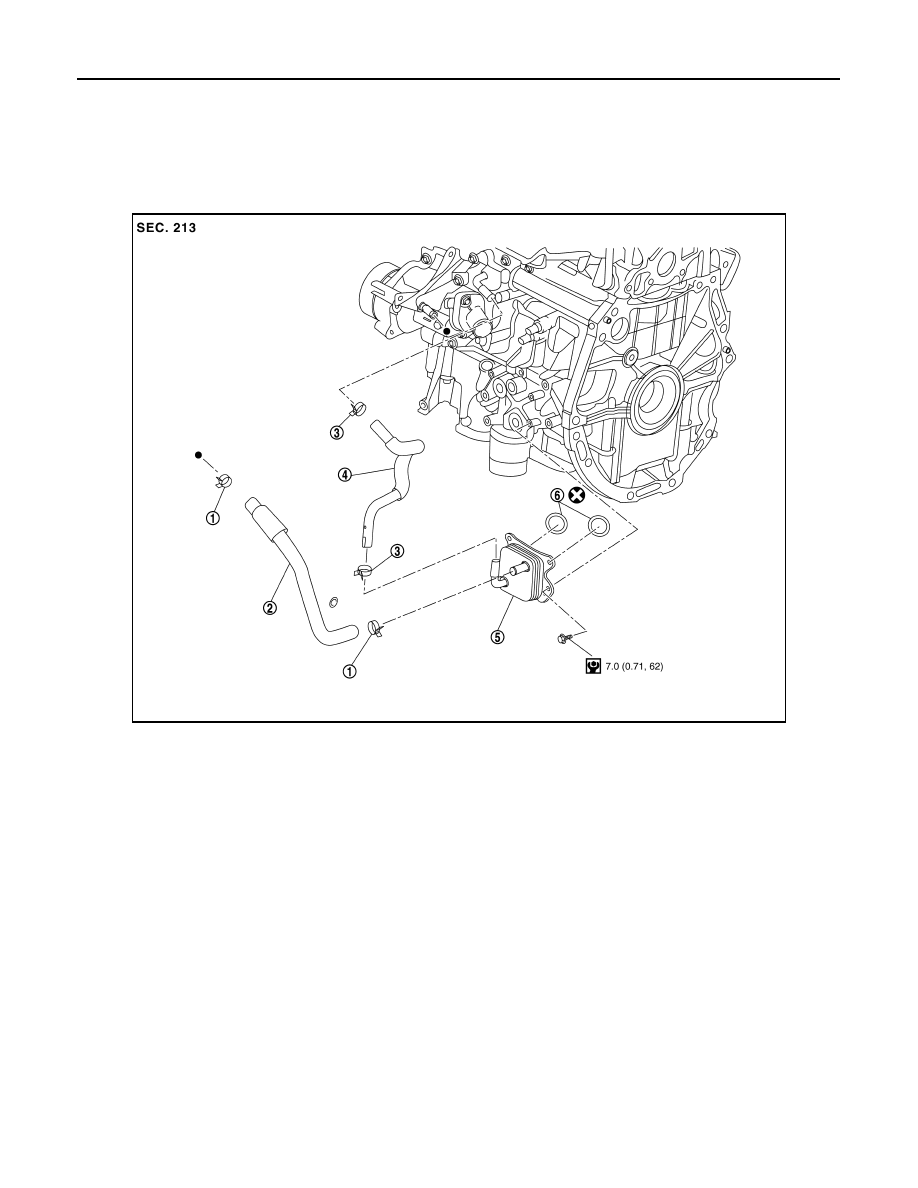
Exploded View
INFOID:0000000009756259
M/T models
JSBIA2840ZZ
1.
Clamp
2.
Water hose
3.
Clamp
4.
Water hose
5.
Oil cooler
6.
O-rings