Nissan Sentra. Manual - part 258


  Index      Nissan     Nissan Sentra (2014 year) - Service and Repair Manual


Search            


Content   ..  256  257  258  259   ..


Nissan Sentra. Manual - part 258


DLK-148

< SYMPTOM DIAGNOSIS >

[WITH INTELLIGENT KEY SYSTEM]

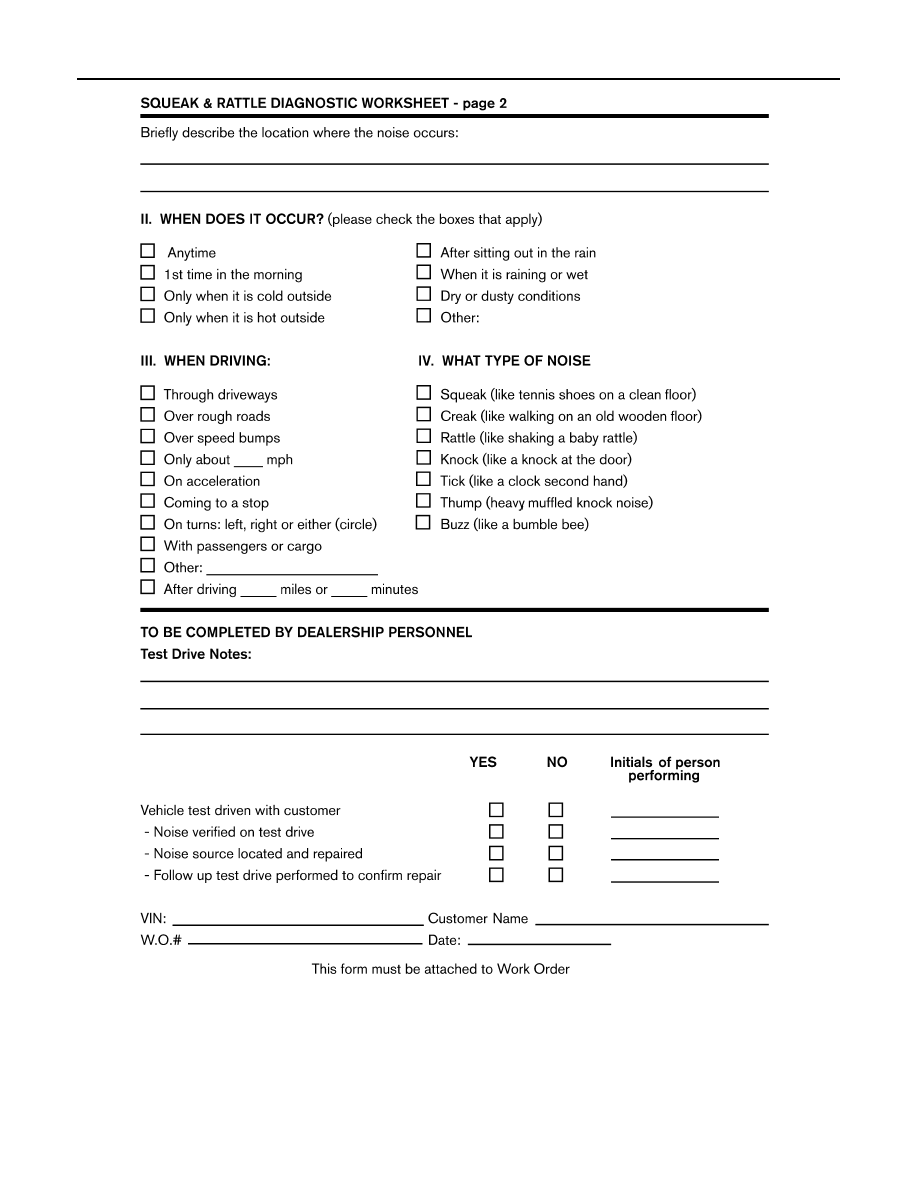
SQUEAK AND RATTLE TROUBLE DIAGNOSES

LAIA0071E

HOOD

DLK-149

< REMOVAL AND INSTALLATION >

[WITH INTELLIGENT KEY SYSTEM]

C

D

E

F

G

H

I

J

L

M

A

B

DLK

N

O

P

REMOVAL AND INSTALLATION

HOOD

HOOD ASSEMBLY
HOOD ASSEMBLY : Exploded View

INFOID:0000000009756464

HOOD ASSEMBLY : Removal and Installation

INFOID:0000000009756465

CAUTION:

• Use two people when removing or installing hood assembly due to its heavy weight.

• Use protective tape or shop cloths to protect surrounding components from damage during removal

and installation of hood assembly.

REMOVAL

1. Support the hood assembly using a suitable tool. 

WARNING:

Bodily injury may occur if hood assembly is not supported properly when removing hood assem-

bly.

2. Disconnect front washer nozzle and tube.

1.

Hood hinge (LH/RH)

2.

Hood assembly

3.

Hood bumper rubber

4.

Hood seal

5.

Hood insulator

6.

Hood support rod

7.

Hood support rod clamp

A.

Clip

AWKIA2152ZZ

DLK-150

< REMOVAL AND INSTALLATION >

[WITH INTELLIGENT KEY SYSTEM]

HOOD

3. Remove hood hinge to hood nuts (A) and then remove the hood

assembly (1).

INSTALLATION

Installation is in the reverse order of removal.

Tighten hood hinge to hood nuts to specified torque. Refer to 

DLK-149, "HOOD ASSEMBLY : Exploded View"

.

CAUTION:

• Before installing the hood hinge, apply anticorrosive agent onto the surface of the vehicle.

• After installation, perform the hood assembly adjustment procedure. Refer to 

DLK-150, "HOOD

ASSEMBLY : Adjustment"

.

HOOD ASSEMBLY : Adjustment

INFOID:0000000009756466

Check the clearance and the surface height between hood and each part by visual inspection and tactile feel.

If the clearance and the surface height are out of specification, adjust them according to the adjustment proce-

dures.

AWKIA2157ZZ

1.

Hood assembly

2.

Front grille

3. Front combination lamp

4.

Front fender

5.

Hood lock assembly

AWKIA2154ZZ

HOOD

DLK-151

< REMOVAL AND INSTALLATION >

[WITH INTELLIGENT KEY SYSTEM]

C

D

E

F

G

H

I

J

L

M

A

B

DLK

N

O

P

Unit: mm (in)

CLEARANCE ADJUSTMENT

1. Loosen hood hinge (LH/RH) nuts and bolts.

NOTE:

The anticorrosive agent applied between the hoodledge and the hood hinges also acts as an adhesive.

This seal must be broken before the hinges will move.

2. Remove the radiator core support upper cover clips (A) and

bolts (B) and remove.

3. Loosen the hood lock assembly bolts.
4. Adjust the hood assembly so the clearance measurements are within specifications provided. Then

tighten the hood hinge nuts and bolts to specified torque. Refer to 

DLK-149, "HOOD ASSEMBLY :

Exploded View"

.

5. Tighten the hood lock assembly bolts to specified torque. Refer to 

DLK-154, "HOOD LOCK CONTROL :

Exploded View"

.

6. Install the radiator core support upper cover.

HEIGHT ADJUSTMENT

1. Remove the radiator core support upper cover clips (A) and

bolts (B) and remove.

2. Loosen the hood lock assembly bolts.

Section

Item

Measurement

Standard

Parallelism

Equality

A – A

D

Clearance

6.2 

±2.2 (0.24 ±0.09)

2.0

E

Surface height

B – B

F

Clearance

3.5 

±2.0 (0.14 ±0.08)

2.0

3.0

G

Surface height

3.6 

±2.0 (0.14 ±0.08)

2.0

2.0

C – C

H

Clearance

3.7 

±1.0 (0.15 ±0.04)

2.0

2.0

J

Surface height

0.0 

±1.0 (0.00 ±0.04)

AWKIA2156ZZ

AWKIA2156ZZ


Content   ..  256  257  258  259   ..