Nissan Leaf. Manual - part 869
FRONT DOOR FINISHER
INT-21
< REMOVAL AND INSTALLATION >
C
D
E
F
G
H
I
K
L
M
A
B
INT
N
O
P
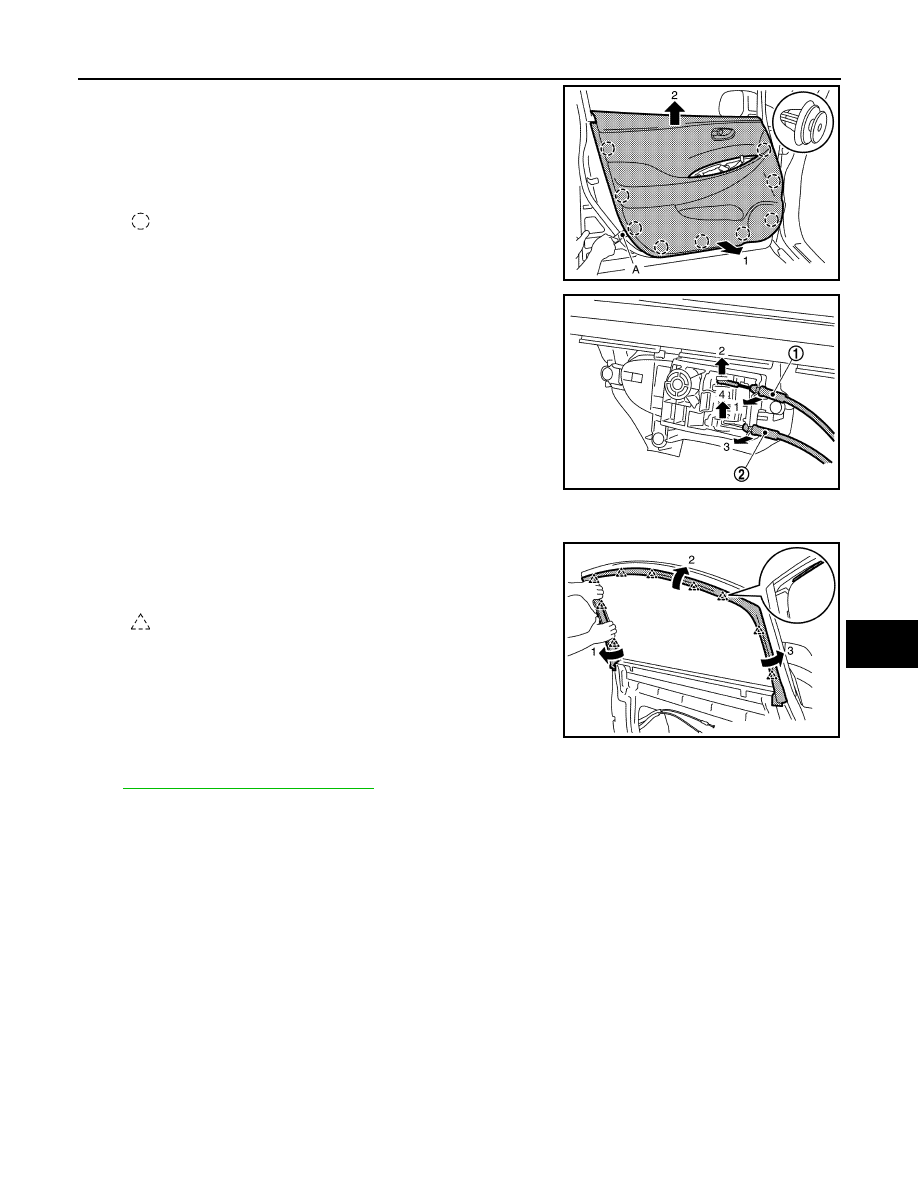
b. Disengage front door finisher fixing clips with a suitable tool (A).
CAUTION:
Insert a suitable tool between door panel and disengage
clips to prevent damage to the parts.
c. Remove front door finisher according to the numerical order 1
→
2 as shown in the figure.
d. Disconnect lock knob cable (1) and inside handle cable (2)
according to the numerical order 1
→ 4 as shown in the figure,
and then remove front door finisher.
5. Remove the following parts after removing the front door finisher.
• Remove front door sash inner cover.
Disengage front door sash inner cover fixing pawls according
to the numerical order 1
→ 3 as shown in the figure, and then
remove front door sash inner cover.
• Remove front power window main switch (driver) or front power window switch (passenger). Refer to
PWC-61, "Removal and Installation"
INSTALLATION
Note the following items, and install in the reverse order of removal.
CAUTION:
• Replace any deformed or damaged clips with same type and color.
• When installing, check in advance that clips are accurately aligned with the holes on door side, and
then install by pressing in.
: Clip
JMJIA5119ZZ
JMJIA5120ZZ
: Pawl
JMJIA5121ZZ