Content .. 1238 1239 1240 1241 ..
Nissan Leaf. Manual - part 1240
QUICK CHARGE PORT
VC-127
< REMOVAL AND INSTALLATION >
D
E
F
G
H
I
J
K
L
M
A
B
VC
N
O
P
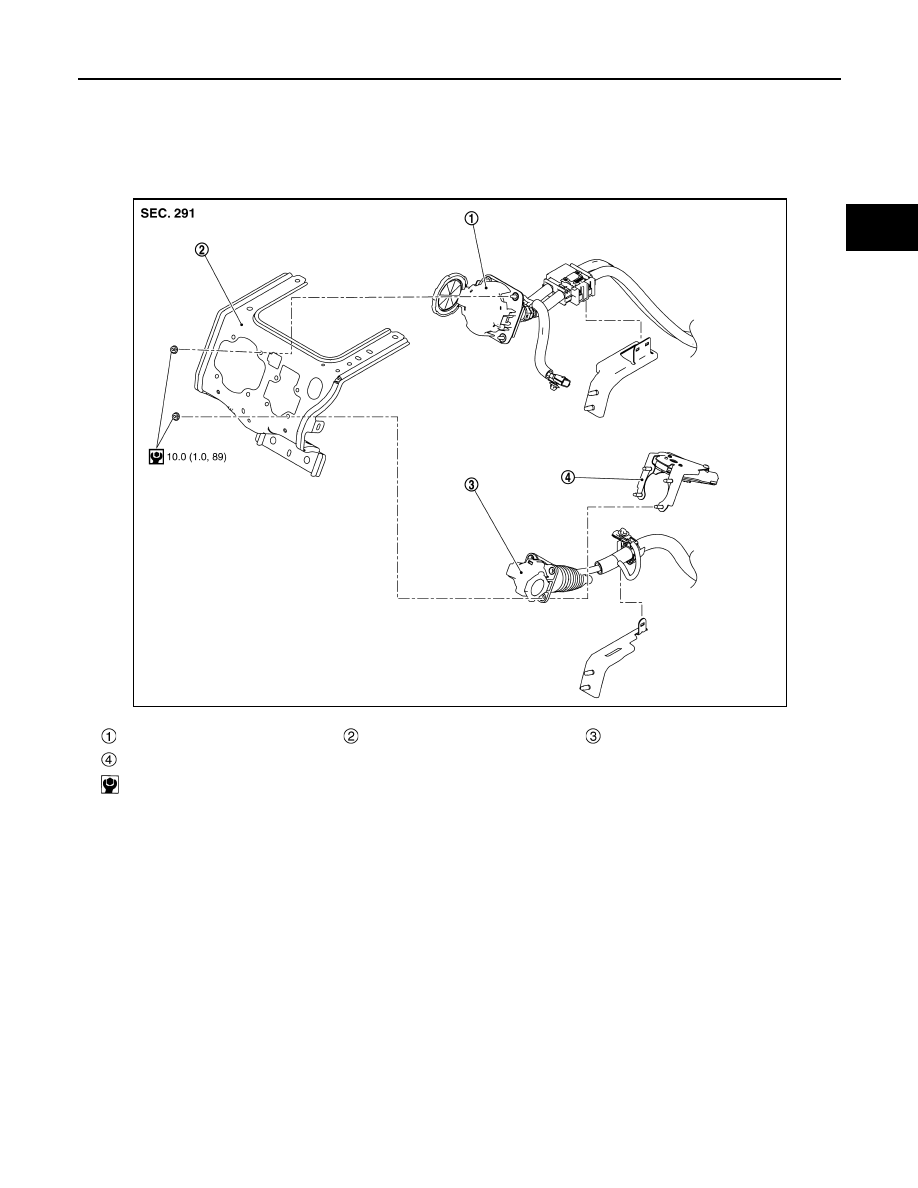
QUICK CHARGE PORT
Exploded View
INFOID:0000000010121296
REMOVAL
DISASSEMBLY
Quick charge port
Charge port bracket
Normal charge port
Charge connector lock actuator
: N·m (kg-m, in-lb)
JPCIA0318GB