Nissan Primera P11. Manual - part 417


  Index      Nissan     Nissan Primera P11 (2001 year) - Service and Repair Manual


Search            


Content   ..  415  416  417  418   ..


Nissan Primera P11. Manual - part 417


7.

Crank engine and read compression gauge indication.

Cranking speed: 200 rpm
Compression pressure: kPa (bar, kg/cm

2

, psi)

Standard

3,138 (31.4, 32, 455)

Limit

2,452 (24.5, 25, 356)

Limit of difference between cylinders

490 (4.9, 5, 71)

8.

If the pressure appears low, pour about 3 m


(0.11 Imp fl oz)

of engine oil through nozzle holes and repeat test.
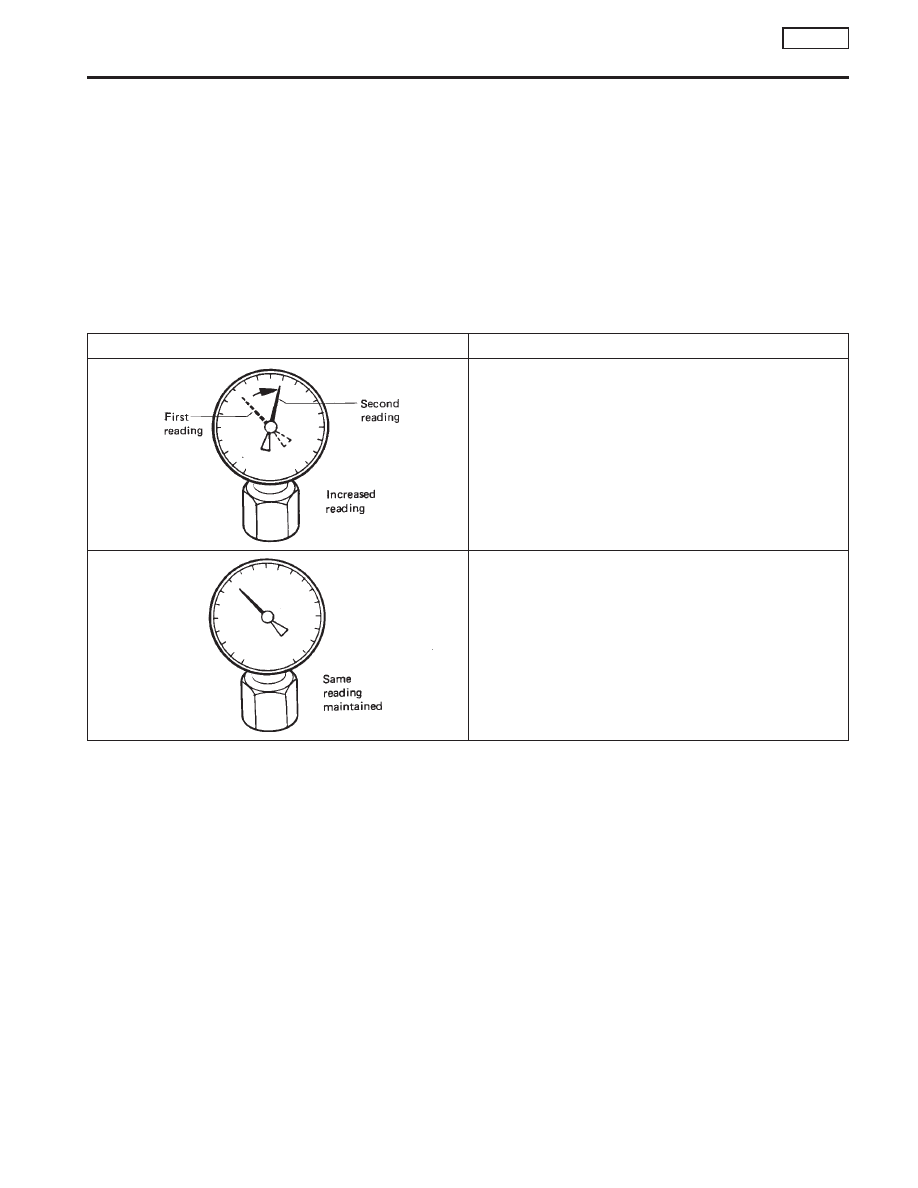
For indications of test, refer to the following table.

Gauge indication during tests

Trouble diagnosis

Piston rings are worn or damaged.

If two adjacent cylinders are low, gasket is damaged.

Valve is sticking.

Valve seat or valve contact surface is incorrect.

COMPRESSION PRESSURE

CD20T

EM-127

9.

Replace nozzle gaskets and re-install injection nozzles.

New nozzle gaskets must be installed in the direction shown.

Nozzle to cylinder head:

: 54 - 64 N·m (5.5 - 6.5 kg-m, 40 - 47 ft-lb)

10. Install injection tubes using two wrenches as shown.

Injection tubes:

: 22 - 25 N·m (2.2 - 2.5 kg-m, 16 - 18 ft-lb)

11. Install spill hoses.
12. Initialize the ECM.
Refer to EC-section (“HOW TO ERASE DTC”).

NEM244

Nozzle side

Combustion
chamber side

SEM501D

NEM242

NEM241

COMPRESSION PRESSURE

CD20T

EM-128

Removal

1.

Drain oil.

2.

Remove oil pan using tool as illustrated.

1)

Insert Tool between oil pan and cylinder block.

I

Do not drive seal cutter into oil pump or rear oil seal
retainer portion, or aluminum mating surfaces will be
damaged.

I

Do not insert screwdriver, or oil pan flange will be
deformed.

2)

Slide Tool by tapping it with a hammer, and remove oil pan.

Installation

1.

Before installing oil pan, remove all traces of liquid gasket from
mating surface using a scraper.

I

Also remove traces of liquid gasket from mating surface of
cylinder block.

I

Be sure liquid gasket is 3.5 to 4.5 mm (0.138 to 0.177 in) wide.

Use Genuine Liquid Gasket or equivalent.

2.

Apply liquid gasket to inner sealing surface as shown at left.

SEM230D

SEM231D

SEM350B

Scraper

SLC906

SEM909B

OIL PAN

CD20T

Removal

EM-129

3.

Apply liquid gasket to oil pan front oil seal and rear oil seal.

4.

Apply a continuous bead of liquid gasket to mating surface of
oil pan.

I

Attaching should be done within 5 minutes after coating.

5.

Install oil pan and tighten bolts in the order shown in the fig-
ure.

Wait at least 30 minutes before refilling engine oil.

Oil pan bolts:

: 6.3 - 8.3 N·m (0.64 - 0.85 kg-m, 55.8 - 73.5 in-lb)

SEM894BA

SEM351B

Tube presser

SEM369D

Engine
front

OIL PAN

CD20T

Installation (Cont’d)

EM-130


Content   ..  415  416  417  418   ..