Nissan Primera P11. Manual - part 249
DTC Confirmation Procedure
NCEC0166
CAUTION:
Always drive vehicle at a safe speed.
NOTE:
If “DTC Confirmation Procedure ” has been previously conducted,
always turn ignition switch “OFF” and wait at least 9 seconds
before conducting the next test.
TESTING CONDITION:
I
Always perform at a temperature above −10°C (14°F).
I
Never stop engine during this procedure. If the engine is
stopped, retry this procedure from step 2.
With CONSULT-II
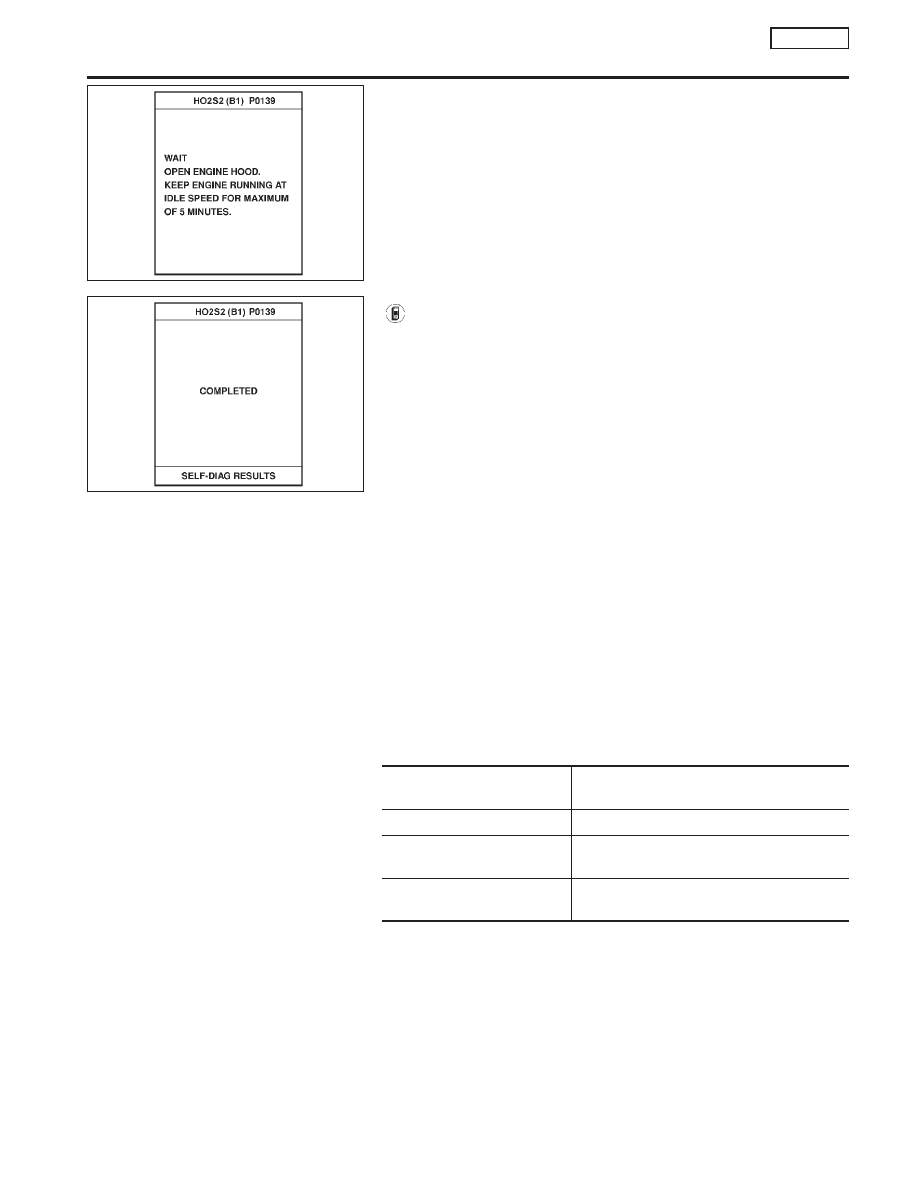
NOTE:
The figure on the left will be displayed on the CONSULT-II
screen when you start the DTC Work Support. Ignore the first
figure and start the test.
“COMPLETED” will be displayed on the screen as the second
figure when the test is completed properly.
1)
Start engine and warm it up to normal operating temperature.
2)
Turn ignition switch “OFF” and wait at least 9 seconds.
3)
Turn ignition switch “ON” and select “HO2S2 (B1) P0139” of
“HO2S2” in “DTC WORK SUPPORT” mode with CONSULT-II.
4)
Touch “START”.
5)
Start engine and let it idle for at least 30 seconds.
6)
Rev engine up to 2,000 rpm 2 or 3 times quickly under no load.
If “COMPLETED” appears on CONSULT-II screen, go to step
10.
If “COMPLETED” does not appear on CONSULT-II screen, go
to the following step.
7)
Drive vehicle at a speed of more than 70 km/h (43 MPH) for 2
consecutive minutes.
8)
Additionally, “COMPLETED” will be displayed on the CON-
SULT-II screen when the accelerator pedal is completely
released after the vehicle is driven for 60 seconds or more
under the following conditions.
(It will take approximately 5 seconds.)
ENG SPEED
1,650 - 3,600 rpm (CVT)
1,500 - 3,600 rpm (M/T)
Vehicle speed
68 - 130 km/h (42 - 81 MPH)
B/FUEL SCHDL
3.2 - 15.0 msec (CVT)
3.2 - 13.5 msec (M/T)
Selector lever
D position (CVT)
4th gear position (M/T)
NOTE:
I
If “COMPLETED” appears on CONSULT-II screen, go to
step 10.
I
If “COMPLETED” does not appear on CONSULT-II screen,
go to the following step.
9)
Stop the vehicle and let it idle until “COMPLETED” is displayed
on the CONSULT-II screen. (It will take 6 minutes at the most.)
NOTE:
If “COMPLETED” is not displayed after 6 minutes, retry from
step 2.
10) Make sure that “OK” is displayed after touching “SELF-DIAG
SEF688X
SEF690X
DTC P0139 HEATED OXYGEN SENSOR 2
(REAR) (RESPONSE MONITORING)
SR20DE
DTC Confirmation Procedure
EC-195