Nissan Frontier D22. Manual - part 210
 

  Index      Nissan     Nissan Frontier D22 Pickup (1998-2004 year) - Service and Repair Manual


Search            


Content   ..  208  209  210  211   ..


Nissan Frontier D22. Manual - part 210


ENGINE COOLANT

CO-23

[VG33E and VG33ER]

C

D

E

F

G

H

I

J

K

L

M

A

CO

ENGINE COOLANT

PFP:KQ100

System Check

EBS00GVT

WARNING:

Never remove the radiator cap when the engine is hot. Serious burns could occur from high pres-
sure coolant escaping from the radiator.

Wrap a thick cloth around the cap. Slowly turn it a quarter turn to allow built-up pressure to
escape. Carefully remove the cap by turning it all the way.

CHECKING COOLING SYSTEM HOSES

Check hoses for improper attachment, leaks, cracks, damage, loose connections, chafing and deterioration.

CHECKING RADIATOR

Check radiator for mud or clogging. If necessary, clean radiator as follows:

CAUTION:

Be careful not to bend or damage the radiator fins.

When radiator is cleaned without removal, remove all surrounding parts such as cooling fan, radi-
ator shroud and horns.

Tape the harness connectors to prevent water from entering.

1.

Apply water by hose to the back side of the radiator core vertically downward.

2.

Apply water again to all radiator core surfaces once per minute.

3.

Stop washing when water flows clear coming out from the radiator.

4.

Blow air into the back side of radiator core vertically downward.

Use compressed air lower than 490 kPa (5 kg/cm

2

 , 71 psi) and keep the air hose end more than 30 cm

(11.8 in) away from the core.

5.

Blow air again into all the radiator core surfaces once per minute until no water blows out and the core is
dry.

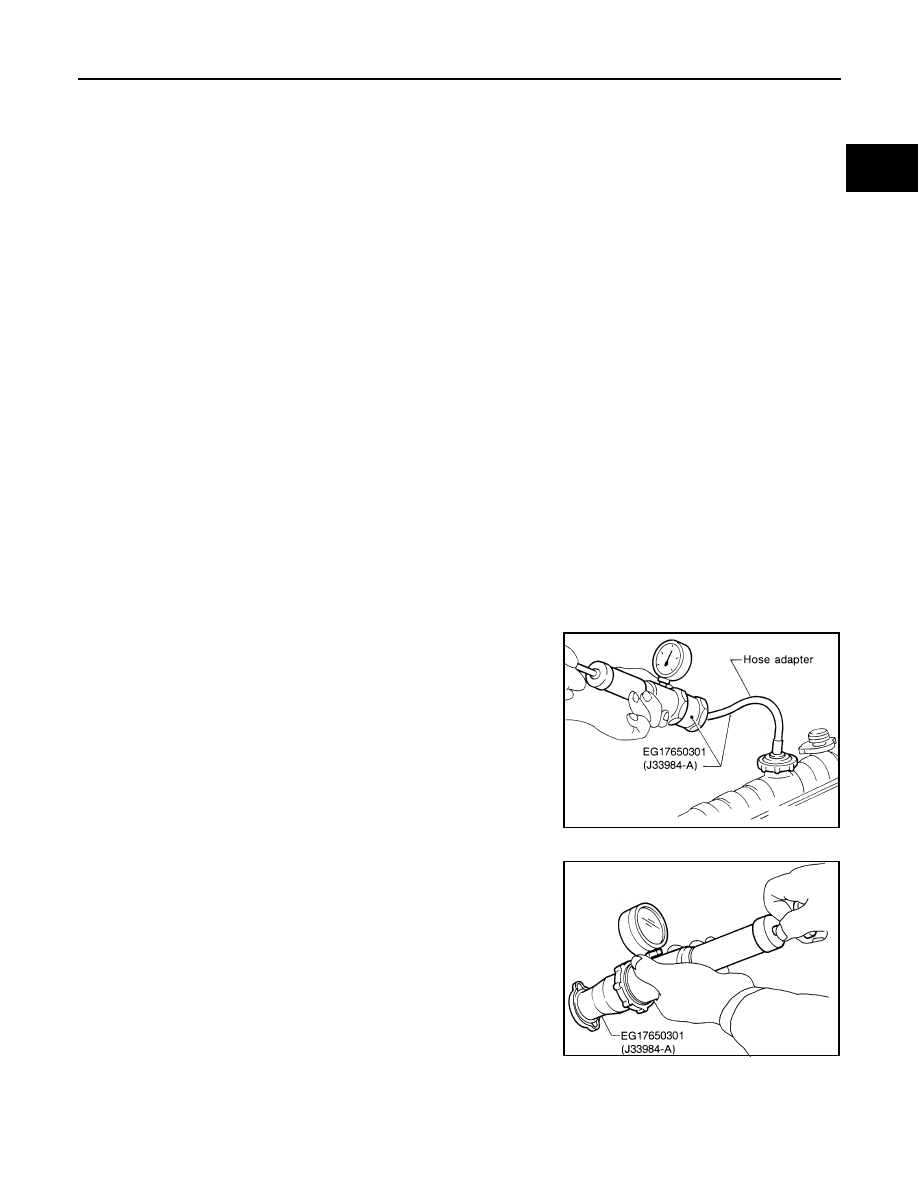
CHECKING COOLING SYSTEM FOR LEAKS

To check for leakage, apply pressure to the cooling system with
a radiator cap tester.

CAUTION:

Higher pressure than specified may cause radiator damage.

CHECKING RADIATOR CAP

To check radiator cap, apply pressure to cap with a radiator cap
tester.

Testing pressure

: 157 kPa (1.6 kg/cm

2

 , 23 psi)

SLC756A

Radiator cap relief pressure

Standard

: 78 - 98 kPa (0.8 - 1.0 kg/cm

2

 , 11 - 14 psi)

Limit

: 59 kPa (0.6 kg/cm

2

 , 9 psi)

SLC755A

CO-24

[VG33E and VG33ER]

ENGINE COOLANT

Pull the negative pressure valve to open it.
Check that it closes completely when released.

Refilling Engine Coolant

EBS00GVU

For details on refilling the engine cooling system, refer to 

MA-26, "REFILLING ENGINE COOLANT"

 .

SMA967B

WATER PUMP

CO-25

[VG33E and VG33ER]

C

D

E

F

G

H

I

J

K

L

M

A

CO

WATER PUMP

PFP:21020

Removal 

EBS00GVV

CAUTION:

When removing water pump assembly, be careful not to get coolant on timing belt.

Water pump cannot be disassembled and should be replaced as a unit.

After installing water pump, connect hose and clamp securely, then check for leaks using radiator
cap tester.

To avoid deforming timing cover, make sure there is adequate clearance between it and the hose
clamp.

1.

Rubber seal

2.

Gasket

3.

Water pump

4.

Water pump pulley

5.

Fan coupling

6.

Cooling fan

LBIA0328E

CO-26

[VG33E and VG33ER]

WATER PUMP

1.

Drain coolant from drain plugs on both sides of cylinder block
and radiator. Refer to 

MA-26, "DRAINING ENGINE COOLANT"

.

2.

Remove radiator hoses (upper and lower) and fan shroud. Refer to 

CO-30, "RADIATOR"

 .

3.

Remove fan coupling with fan.

4.

Remove drive belts. Refer to 

MA-24, "Checking Drive Belts"

 .

5.

Remove water pump pulley.

6.

Remove crankshaft pulley and front (upper and lower) belt cover. Refer to 

EM-91, "TIMING BELT"

 .

7.

Remove water pump.

Inspection

EBS00GVW

1.

Check for badly rusted or corroded body assembly and vanes.

2.

Check for rough operation due to excessive end play.

Installation

EBS00GVX

1.

Use a scraper to remove liquid gasket from water pump.

Also remove traces of liquid gasket from mating surface
of cylinder block.

SMA207CA

SMA208CA

ALC123

SLC188A


Content   ..  208  209  210  211   ..