Nissan Xterra. Manual - part 449
 

  Index      Nissan     Nissan Xterra (2014 year) - Service and Repair Manual


Search            


Content   ..  447  448  449  450   ..


Nissan Xterra. Manual - part 449


GW-18

< UNIT REMOVAL AND INSTALLATION >

REAR DOOR GLASS AND REGULATOR

REAR DOOR GLASS AND REGULATOR

Rear Door Glass

INFOID:0000000009484314

REMOVAL

1. Remove the rear door finisher. Refer to 

INT-14, "Removal and Installation"

.

2. Remove the rear door handle bracket. 
3. Remove the vapor barrier. 
4. Temporarily reconnect the power window switch.
5. Remove the glass run from the partition glass.
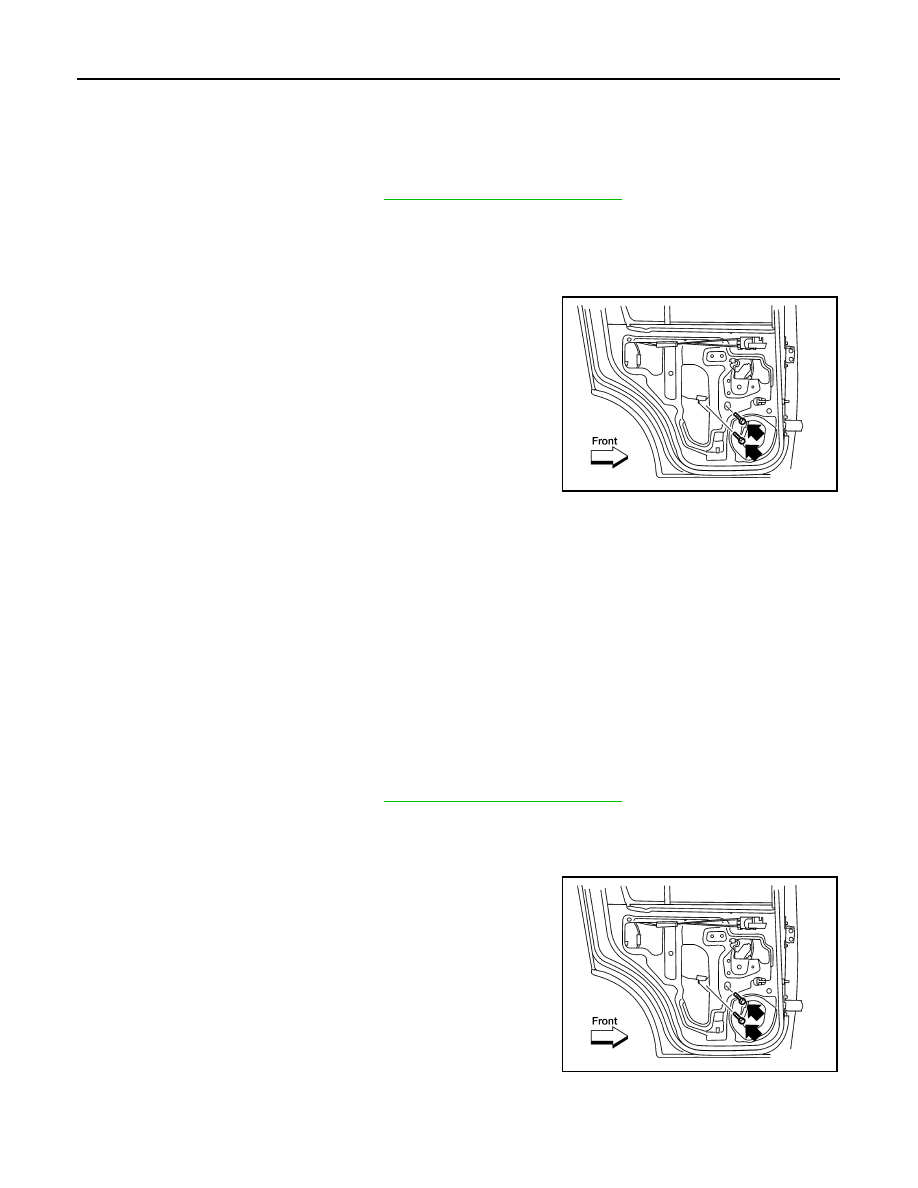
6. Operate the power window switch to raise/lower the door win-

dow until the glass bolts can be seen.

7. Remove the partition sash bolt (lower) and screw (upper) to

remove the sash.

8. Remove the bolts and the glass.

INSTALLATION

Installation is in the reverse order of removal.

• Check the glass alignment. Follow the FITTING INSPECTION procedure.

FITTING INSPECTION

• Check that the glass is securely fit into the glass run groove.

• Lower the glass slightly [approximately 10 to 20 mm (0.39 to 0.79 in)], and check that the clearance to the

sash is parallel. If the clearance between the glass and sash is not parallel, loosen the regulator bolts, guide

rail bolts, and glass carrier plate bolts to correct the glass position. 

Rear Door Glass Regulator

INFOID:0000000009484315

REMOVAL

1. Remove the rear door finisher. Refer to 

INT-14, "Removal and Installation"

.

2. Remove the rear door handle bracket.
3. Position the vapor barrier aside. 
4. Temporarily reconnect the power window switch.
5. Operate the power window switch to raise/lower the door win-

dow until the glass bolts can be seen.

LIIA1689E

Glass bolts : 6.1 N·m (0.62 kg-m, 54 in-lb)

LIIA1689E

REAR DOOR GLASS AND REGULATOR

GW-19

< UNIT REMOVAL AND INSTALLATION >

C

D

E

F

G

H

I

J

L

M

A

B

GW

N

O

P

6. Raise the rear door glass and hold it in place with suitable tool

(A).

7. Remove the bolts and the regulator assembly.

• Disconnect the harness connector from the regulator assembly.

INSPECTION AFTER REMOVAL

Check the regulator assembly for the following items. If a malfunction is detected, replace or grease it.

• Gear wear

• Regulator deformation

• Spring damage

• Grease condition for each sliding part

INSTALLATION

PIIB3511J

Front

WIIA1034E

GW-20

< UNIT REMOVAL AND INSTALLATION >

REAR DOOR GLASS AND REGULATOR

1. Connect the harness connector and install the regulator assembly.
a. Loosely install the top rear regulator bolt to use along with the temporary holds on the window motor to

install the assembly in the door.

b. Install the top front regulator bolt.
c.

Install the bottom regulator bolt.

d. Tighten the top rear regulator bolt.
e. Install the top window motor bolt.
f.

Install the lower window motor bolt.

g. Install the front window motor bolt.

2. Lower the glass and ensure that it is in both the front and rear

glass channels. Tighten the bolts.

3. Install the partition sash.
4. Check the glass alignment.
5. Install the rear door handle bracket.
6. Reposition the vapor barrier.
7. Install the rear door finisher. Refer to 

INT-14, "Removal and Installation"

.

Front

Regulator assembly

: 7.5 N·m (0.77 kg-m, 66 in-lb)

Glass bolts

: 6.1 N·m (0.62 kg-m, 54 in-lb)

WIIA1034E

LIIA1689E

SIDE WINDOW GLASS

GW-21

< UNIT REMOVAL AND INSTALLATION >

C

D

E

F

G

H

I

J

L

M

A

B

GW

N

O

P

SIDE WINDOW GLASS

Removal and Installation

INFOID:0000000009484316

1.

Glass

2.

Primer area

3.

Body side outer

4.

Rear door assembly

5.

Back door assembly 

6.

Locating clips

7.

Urethane

a.

15 mm (0.59 in)

b.

42.5 mm (1.67 in)

WIIA1035E


Content   ..  447  448  449  450   ..