Nissan March K13. Manual - part 537


  Index      Nissan     Nissan March K13 - Service and Repair Manual)


Search            


Content   ..  535  536  537  538   ..


Nissan March K13. Manual - part 537


PG-136

< BASIC INSPECTION >

BATTERY INSPECTION

3.

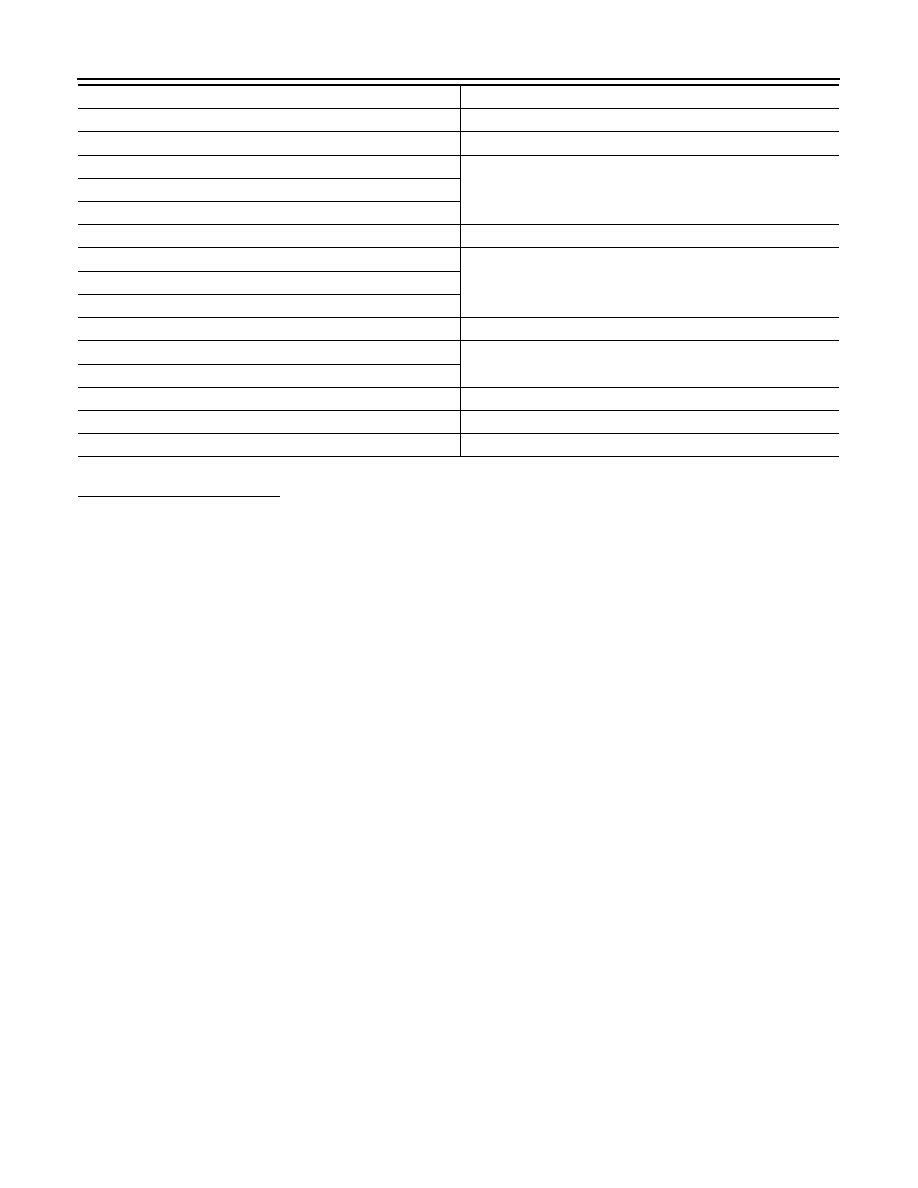
Read load tester voltage when specified discharging current flows through battery for 15 seconds.

Is the voltage 9.6 V or more?

YES

>> Ready for use.

NO

>> Replace battery.

50D23L/R

150

55D23L/R

180

80D23L/R

195

65D26L/R

80D26L/R

75D31L/R

210

95D31L/R

240

115D31L/R

025 [YUASA type code]

027 [YUASA type code]

285

110D26L/R

300

95E41L/R

067 [YUASA type code]

325

130E41L/R

330

096 [YUASA type code]

375

Type

Current (A)

PG

FUSE INSPECTION

PG-137

< BASIC INSPECTION >

C

D

E

F

G

H

I

J

K

L

B

A

O

P

N

FUSE INSPECTION

How To Check

INFOID:0000000005911876

• If fuse is blown, be sure to eliminate cause of malfunction before

installing new fuse.

• Use fuse of specified rating. Never use fuse of more than specified

rating.

• Do not partially install fuse; always insert it into fuse holder prop-

erly.

• Remove fuse for “ELECTRICAL PARTS (BAT)” if vehicle is not

used for a long period of time.

CEL083

PG-138

< BASIC INSPECTION >

FUSIBLE LINK INSPECTION

FUSIBLE LINK INSPECTION

How To Check

INFOID:0000000005911877

A melted fusible link can be detected either by visual inspection or by feeling with finger tip. If its condition is
questionable, use circuit tester or test lamp.

CAUTION:

• If fusible link should melt, it is possible that critical circuit (power supply or large current carrying

circuit) is shorted. In such a case, carefully check and eliminate cause of malfunction.

• Never wrap outside of fusible link with vinyl tape. Important: Never let fusible link touch any other

wiring harness, vinyl or rubber parts.

1.

 Fusible link

JSMIA0234ZZ

PG

BATTERY CHARGING CHART

PG-139

< BASIC INSPECTION >

C

D

E

F

G

H

I

J

K

L

B

A

O

P

N

BATTERY CHARGING CHART

Slow Charge

INFOID:0000000005911878

1.

DETERMINE INITIAL CHARGING CURRENT

1.

Determine initial charging current from specific gravity.

2.

Check battery type and determine the specified current using the table.

NOTE:
After starting charging, adjustment of charging current is not necessary.

Initial Charging Current Setting (Slow Charge)

>> GO TO 2.

2.

CHARGE BATTERY

1.

Charge battery.

2.

Check charge voltage 30 minutes after starting the battery charge.

Is the voltage between 12 V and 15 V?

YES

>> GO TO 3.

NO

>> Replace battery.

3.

CHARGE BATTERY

Continue to charge for 12 hours.

>> GO TO 4.

4.

CHECKING SPECIFIC GRAVITY

Check specific gravity. Refer to 

PG-130, "How to Handle Battery"

.

Is the specific gravity 1.240 or more?

YES

>> Complete slow charge. Perform “CAPACITY TEST”. Refer to 

PG-132, "Work Procedure"

.

NO

>> GO TO 5.

5.

CONDUCT ADDITIONAL CHARGE

Add charging time depending on specific gravity.

Additional Charge (Slow Charge)

>> Complete slow charge. Perform “CAPACITY TEST”. Refer to 

PG-132, "Work Procedure"

.

CAUTION:

• Set charging current to value specified in “Initial Charging Current Setting (Slow Charge)”. If charger

is not capable of producing specified current value, set its charging current as close to that value as
possible.

CONVERTED 

SPECIFIC 

GRAVITY

BATTERY TYPE

28

B1

9L

/R

34

B1

9L

/R

46

B2

4L

/R

55

B2

4L

/R

50

D2

3L

/R

55

D2

3L

/R

0

2

5

 [YUAS

A

 type

 cod

e

]

0

2

7

 [YUAS

A

 type

 cod

e

]

80

D2

3L

/R

65

D2

6L

/R

80

D2

6L

/R

0

6

7

 [YUAS

A

 type

 cod

e

]

0

9

6

 [YUAS

A

 type

 cod

e

]

75

D3

1L

/R

95

D3

1L

/R

1

1

5D31

L/

R

1

1

0D26

L/

R

95

E4

1L

/R

13

0E4

1

L

/R

Below 1.100

4.0 (A)

5.0 (A)

7.0 (A)

8.0 (A)

8.5 
(A)

9.0 
(A)

10.0 (A)

14.0 

(A)

SPECIFIC GRAVITY

CHARGING TIME (h)

Below 1.150

5

1.150 - 1.200

4

1.200 - 1.240

2


Content   ..  535  536  537  538   ..