Nissan March K13. Manual - part 324
EXT-18
< REMOVAL AND INSTALLATION >
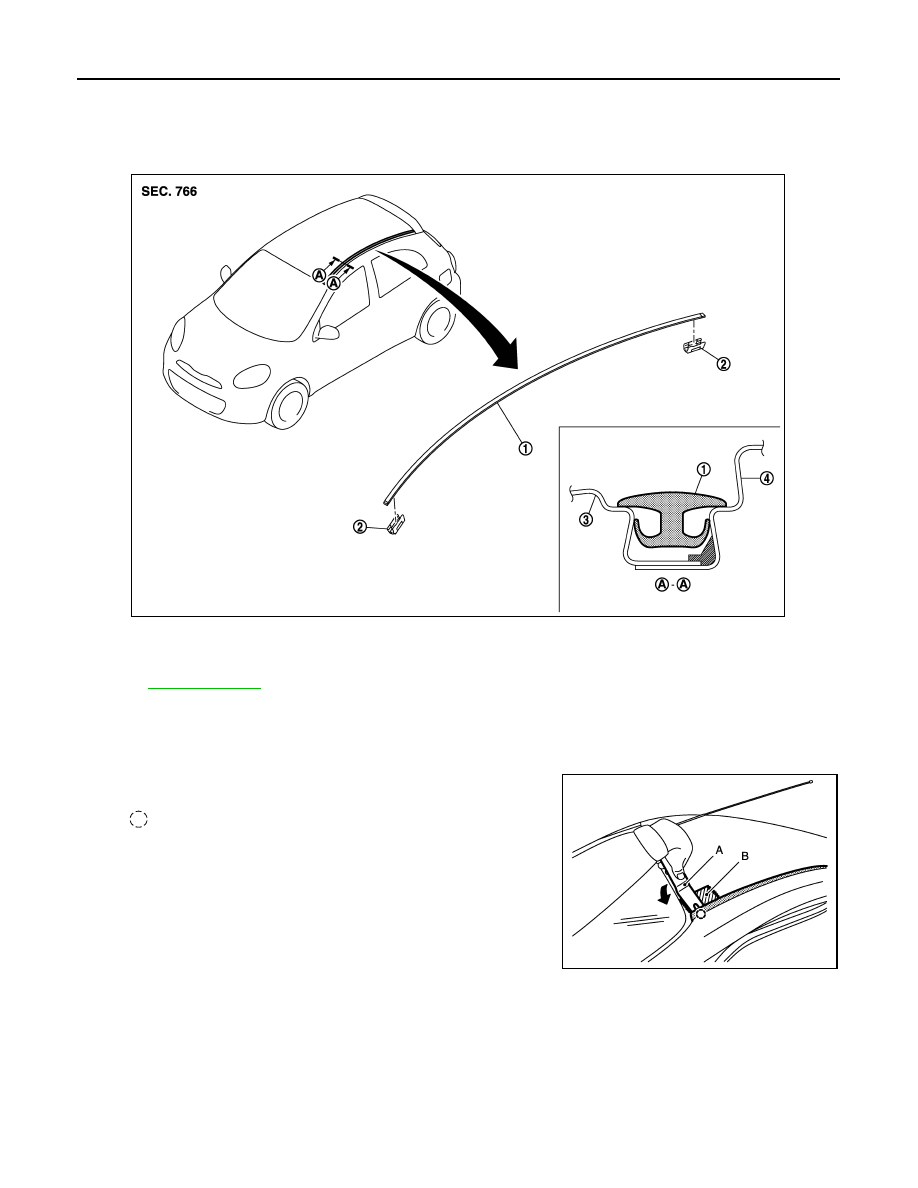
ROOF SIDE MOLDING
ROOF SIDE MOLDING
Exploded View
INFOID:0000000006052875
Removal and Installation
INFOID:0000000006052876
REMOVAL
1.
Disengage roof side molding fixing clip, using remover tool (A).
CAUTION:
Apply protective tape (B) on body to protect the painted
surface from damage.
2.
Remove roof side molding from front end.
CAUTION:
Never pull the roof side molding strongly.
INSTALLATION
Install in the reverse order of removal.
REMOVAL AND INSTALLATION OF ROOF SIDE MOLDING CLIP
1.
Roof side molding
2.
Roof side molding clip
3.
Roof panel
4.
Body side outer panel
Refer to
for symbols in the figure.
JMKIA5396ZZ
: Clip
JMKIA5401ZZ