Nissan Almera Tino V10. Manual - part 935
SMT727D
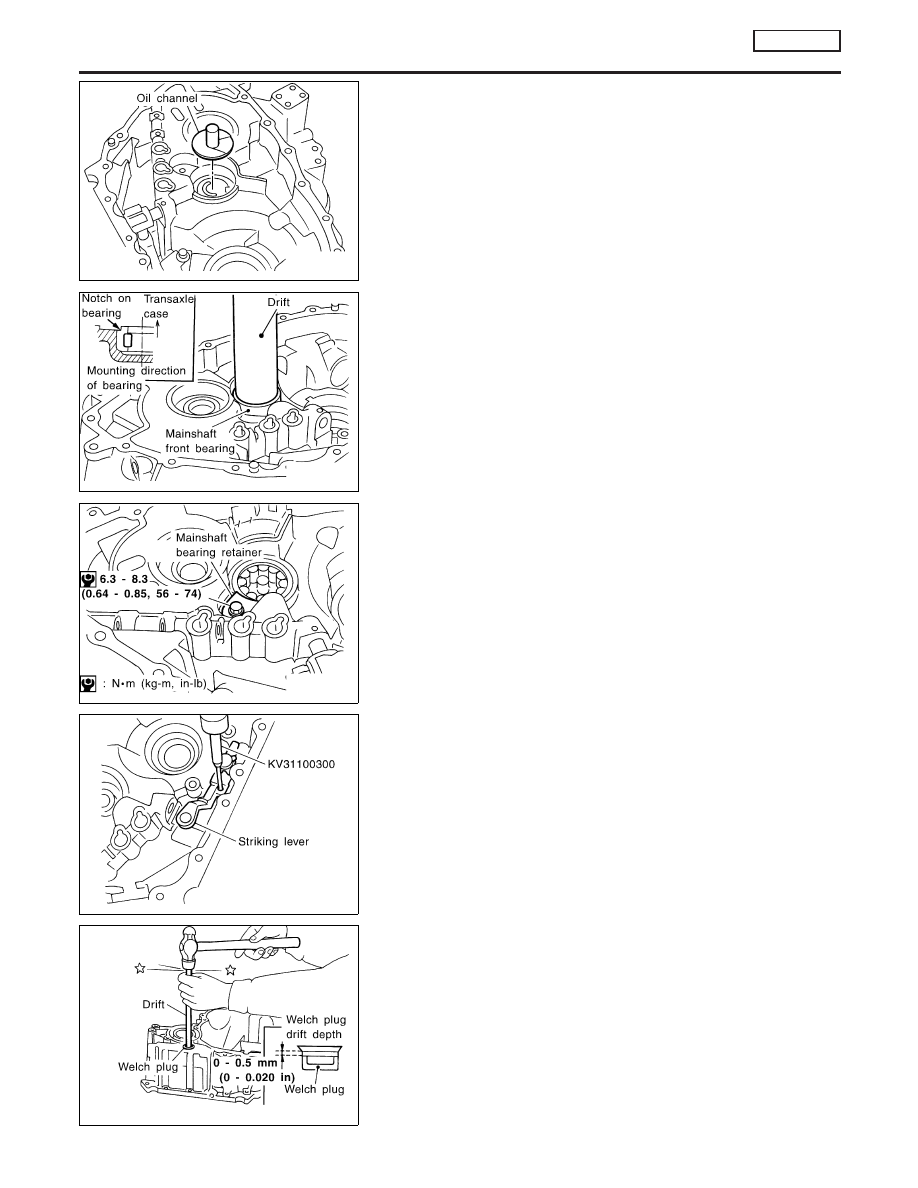
6.
Install new oil channel (mainshaft).
CAUTION:
Pay attention to installation direction of oil channel.
SMT728DA
7.
Align the notches on mainshaft front bearing and transaxle
case. Then, install mainshaft front bearing.
SMT729D
8.
Install mainshaft bearing retainer, and tighten bolts with speci-
fied torque.
SMT667DB
9.
Attach boot, striking rod, and striking lever to clutch housing.
And install retaining pin for selector lever.
CAUTION:
I
Before installing striking rod, wrap the end with a vinyl
tape or the like to prevent oil seal from being damaged.
I
Do not reuse retaining pin.
SMT730D
10. Hammer the welch plug (striking lever side) with a general-
purpose drift [OD: 12 mm (0.47 in)].
CAUTION:
Do not reuse welch plug.
ASSEMBLY
RS5F70A
Clutch Housing (Cont’d)
MT-54