содержание .. 331 332 333
Nissan GT-R. Manual - part 333
WW-24
< REMOVAL AND INSTALLATION >
WIPER BLADE
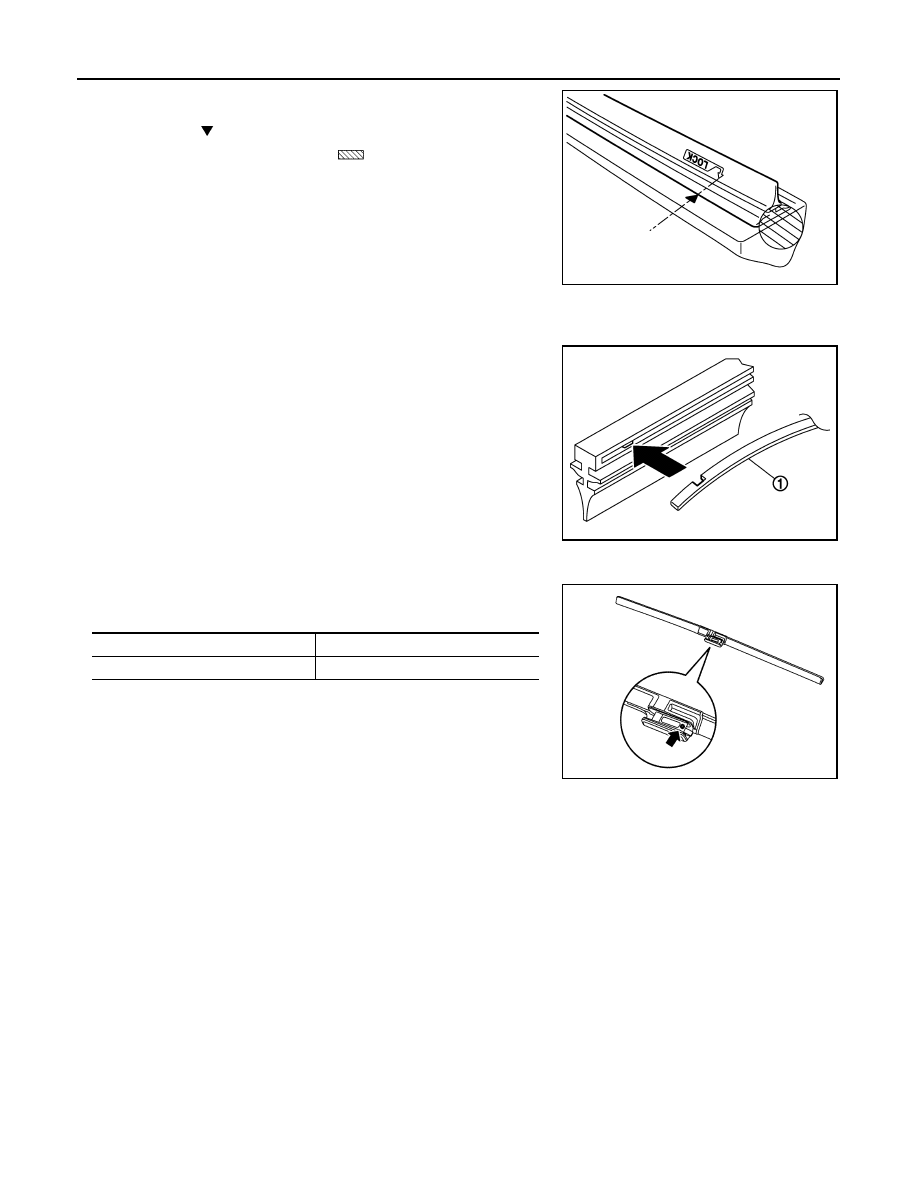
3.
Insert the wiper refill until the stopper at the rear end of wiper
refill fits in the tab. Check that “LOCK” mark on wiper refill is
aligned with “ ” mark on wiper blade.
4.
Untwist the twisted wiper refill (
) at the rear end of wiper
blade, if any.
5.
Check the following items after replacing wiper refill.
• Wiper refill is not twisted at all.
• Wiper refill thoroughly fits in the tab on wiper blade.
• Wiper refill is inserted from the proper direction.
NOTE:
When the vertebra is detached.
• Insert the vertebra (1) into the wiper blade to the same bending
direction.
• If a vertebra has a notch, fit it to a protrusion inside the wiper refill.
NOTE:
For the passenger side wiper blade there are two length types. They
can be identified by the arrow as shown in the figure.
JPLIA1585ZZ
JPLIA1586ZZ
Red paint mark
Without paint mark
475 mm (18.70 in)
525 mm (20.67 in)
JMLIA3779ZZ