Nissan Pathfinder (2007 year). Manual - part 276
FRONT DOOR GLASS AND REGULATOR
GW-61
C
D
E
F
G
H
J
K
L
M
A
B
GW
2007 Pathfinder
FRONT DOOR GLASS AND REGULATOR
PFP:80300
Front Door Glass
EIS007S0
REMOVAL
1.
Remove the front door finisher. Refer to
.
2.
Temporarily reconnect the power window switch.
3.
Operate the power window main switch to raise/lower the door
window until the glass bolts can be seen.
4.
Remove the inside seal.
5.
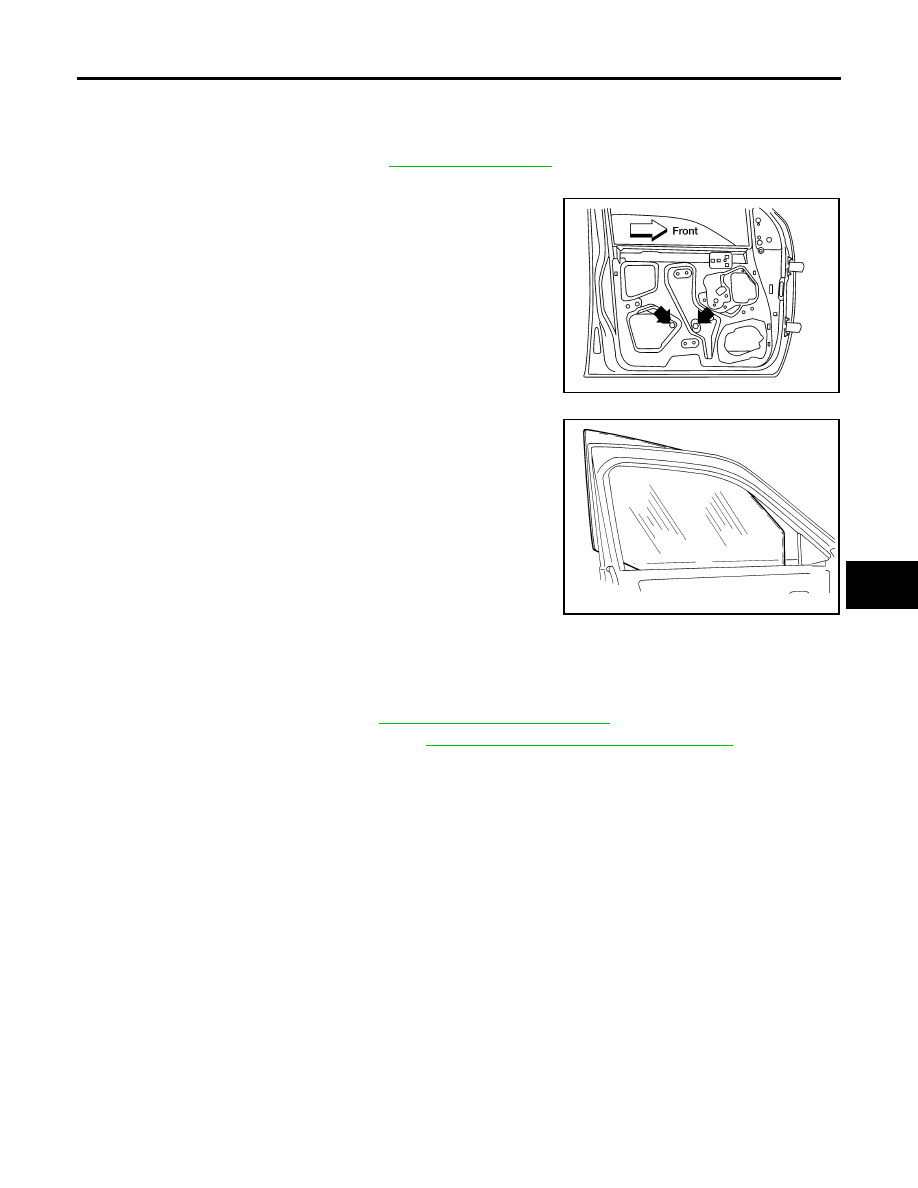
Remove the glass bolts.
6.
While holding the door window, raise it at the rear and pull the
glass out of the sash toward the outside of the door.
INSTALLATION
Installation is in the reverse order of removal.
●
Check the glass for proper fit. Refer to
●
On the drivers door, reset the motor. Refer to
GW-64, "SETTING AFTER INSTALLATION"
FITTING INSPECTION
●
Check that the glass is securely fit into the glass run groove.
●
Lower the glass slightly [approximately 10 to 20 mm (0.39 to 0.79 in)] and check that the clearance to the
sash is parallel. If the clearance between the glass and sash is not parallel, loosen the regulator bolts,
guide rail bolts, and glass and guide rail bolts to correct the glass position.
LIIA1686E
LIIA1687E
Glass bolts
: 6.1 N·m (0.62 kg-m, 54 in-lb)