Nissan Teana J32. Manual - part 1154


  Index      Nissan     Nissan Teana J32 (2008 year) - Service and Repair Manual


Search            


Content   ..  1152  1153  1154  1155   ..


Nissan Teana J32. Manual - part 1154


TM-140

< PREPARATION >

[CVT: RE0F09B]

PREPARATION

PREPARATION

PREPARATION

Special Service Tools

INFOID:0000000003849074

The actual shapes of Kent-Moore tools may differ from those of special service tools illustrated here.

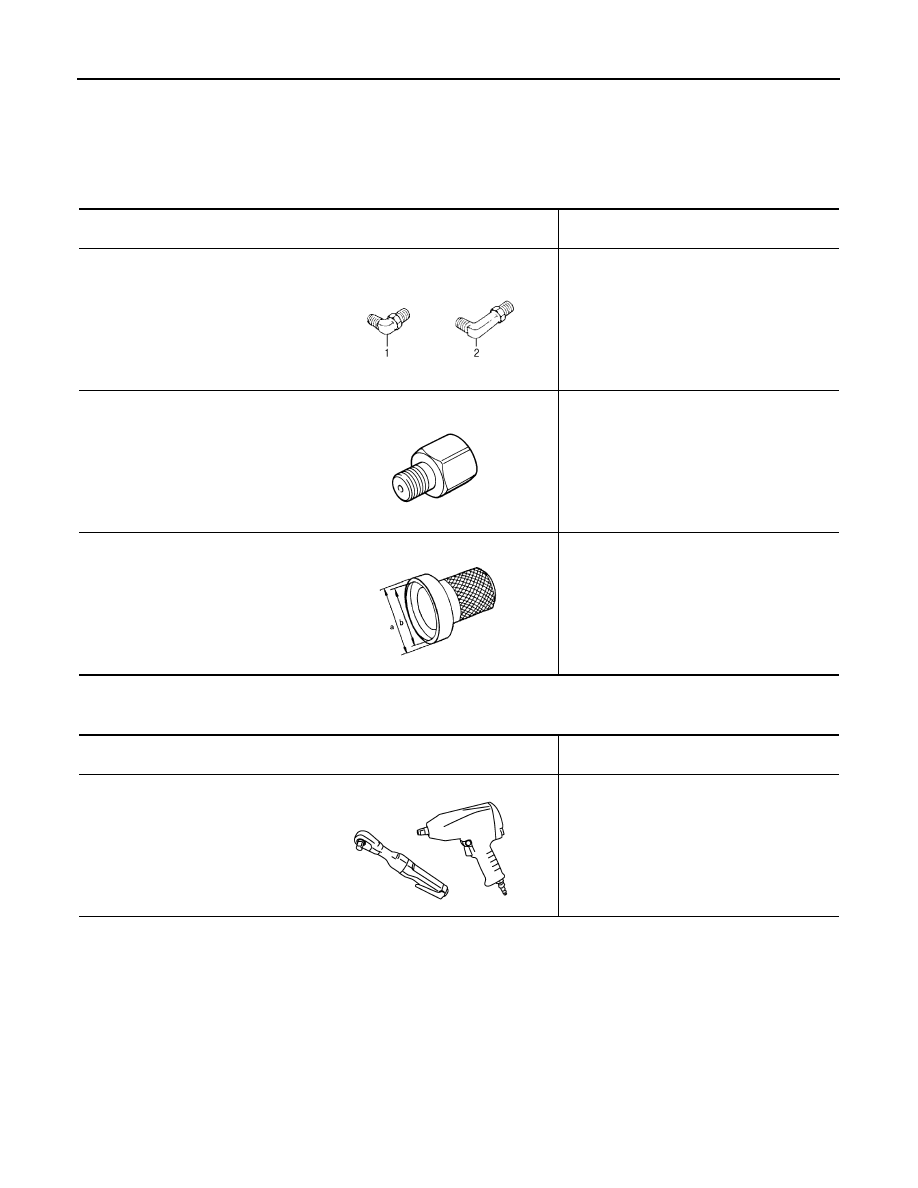
Commercial Service Tools

INFOID:0000000003849075

Tool number
Tool name

Description

1. ST25054000
Adapter
2. ST25055000
Adapter

Measuring line pressure

KV31103600
Joint pipe adapter
(With ST25054000)

Measuring line pressure

ST33400001
Drift
a: 60 mm (2.36 in) dia.
b: 47 mm (1.85 in) dia.

Installing differential side oil seal

SCIA8372J

ZZA1227D

ZZA0814D

Tool number
Tool name

Description

Power tool

Loosening nuts and bolts

PBIC0190E

PREPARATION

TM-141

< PREPARATION >

[CVT: RE0F09B]

C

E

F

G

H

I

J

K

L

M

A

B

TM

N

O

P

Oil pressure gauge set
1.Oil pressure gauge
2.Hose
3.Joint pipe

Measuring line pressure

31197CA000
Drive plate location guide
a: 14 mm (0.55 in) dia.

Installing transaxle assembly

Tool number
Tool name

Description

SCIA8373J

SCIA2013E

TM-142

< ON-VEHICLE MAINTENANCE >

[CVT: RE0F09B]

CVT FLUID

ON-VEHICLE MAINTENANCE

CVT FLUID

Inspection

INFOID:0000000003849076

CHECKING CVT FLUID

The fluid level should be checked with the fluid warmed up to 50 to 80

°

C (122 to 176

°

F). The fluid level check

procedure is as follows:
1.

Check for fluid leakage.

2.

With the engine warmed up, drive the vehicle in an urban area.
When ambient temperature is 20

°

C (68

°

F), it takes about 10

minutes for the CVT fluid to warm up to 50 to 80

°

C (122 to

176

°

F).

3.

Park the vehicle on a level surface.

4.

Apply parking brake firmly.

5.

With engine at idle, while depressing brake pedal, move shift
selector throughout the entire shift range.

6.

Pull out the CVT fluid level gauge from the CVT fluid charging
pipe after pressing the tab on the CVT fluid level gauge to
release the lock.

7.

Wipe fluid off the CVT fluid level gauge. Insert the CVT fluid
level gauge rotating 180

°

 from the originally installed position,

then securely push the CVT fluid level gauge until it meets the
top end of the CVT fluid charging pipe.

CAUTION:

When wiping away the CVT fluid level gauge, always use
lint-free paper, not a cloth rag.

8.

Place the selector lever in “P” or “N” and check that the fluid
level is within the specified range.

CAUTION:

When reinstalling CVT fluid level gauge, insert it into the
CVT fluid charging pipe and rotate it to the original installa-
tion position until securely locked.

CVT FLUID CONDITION

SMA146B

SCIA1933E

SCIA1931E

SCIA1932E

CVT FLUID

TM-143

< ON-VEHICLE MAINTENANCE >

[CVT: RE0F09B]

C

E

F

G

H

I

J

K

L

M

A

B

TM

N

O

P

Check CVT fluid condition.
• If CVT fluid is very dark or smells burned, check operation of CVT.

Flush cooling system after repair of CVT.

• If CVT fluid contains frictional material (clutches, brakes, etc.),

replace radiator and flush cooler line using cleaning solvent and
compressed air after repair of CVT. Refer to 

CO-13, "Exploded

View"

.

Changing

INFOID:0000000003849077

CAUTION:

Replace O-ring with new ones at the final stage of the operation when installing.

1.

Remove drain plug from oil pan.

2.

Remove drain plug gasket from drain plug.

3.

Install drain plug gasket to drain plug.

CAUTION:

Never reuse drain plug gasket.

4.

Install drain plug to oil pan.

5.

Fill CVT fluid from CVT fluid charging pipe to the specified level.

CAUTION:

• Use only Genuine NISSAN CVT Fluid NS-2. Never mix with other fluid.
• Using CVT fluid other than Genuine NISSAN CVT Fluid NS-2 will deteriorate in driveability and

CVT durability, and may damage the CVT, which is not covered by the warranty.

• When filling CVT fluid, take care not to scatter heat generating parts such as exhaust.
• Sufficiently shake the container of CVT fluid before using.
• Delete CVT fluid deterioration date with CONSULT-III after changing CVT fluid. Refer to 

TM-37,

"CONSULT-III Function (TRANSMISSION)"

.

6.

With the engine warmed up, drive the vehicle in an urban area.
NOTE:
When ambient temperature is 20

°

C (68

°

F), it takes about 10 minutes for the CVT fluid to warm up to 50 to

80

°

C (122 to 176

°

F).

7.

Check CVT fluid level and condition.

8.

Repeat steps 1 to 5 if CVT fluid has been contaminated.

Fluid status

Conceivable cause

Required operation

Varnished (viscous 
varnish state)

CVT fluid becomes 
degraded due to 
high temperatures.

Replace the CVT fluid and check the 
CVT main unit and the vehicle for 
malfunctions (wire harnesses, cool-
er pipes, etc.)

Milky white or 
cloudy

Water in the fluid

Replace the CVT fluid and check for 
places where water is getting in.

Large amount of 
metal powder mixed 
in

Unusual wear of 
sliding parts within 
CVT

Replace the CVT fluid and check for 
improper operation of the CVT.

ATA0022D

Drain plug – tightening torque

: Refer to 

TM-159, "Exploded View"

CVT fluid

Refer to 

TM-174, "General Specification"

.

Fluid capacity

Refer to 

TM-174, "General Specification"

.


Content   ..  1152  1153  1154  1155   ..