содержание .. 655 656 657 658 ..
Nissan Murano. Manual - part 657
EXL-40
< DTC/CIRCUIT DIAGNOSIS >
[XENON TYPE]
HEADLAMP (LO) CIRCUIT
Does continuity exist?
YES
>> GO TO 5.
NO
>> Repair the harnesses or connectors.
3.
CHECK HEADLAMP (LO) FUSE
1.
Turn the ignition switch OFF.
2.
Check that the following fuses are not fusing.
Is the fuse fusing?
YES
>> GO TO 4.
NO
>> Replace IPDM E/R.
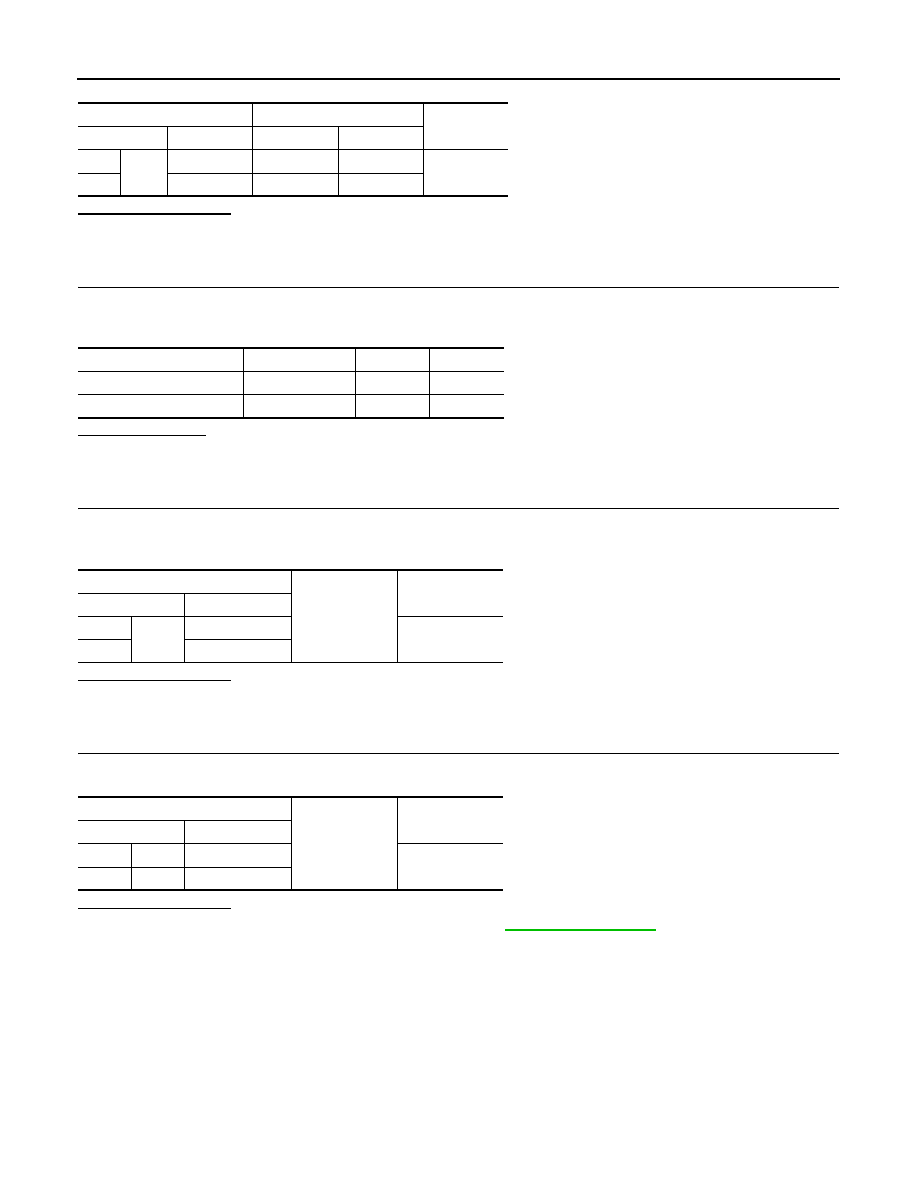
4.
CHECK HEADLAMP (LO) SHORT CIRCUIT
1.
Disconnect IPDM E/R connector.
2.
Check continuity between the IPDM E/R harness connector and the ground.
Does continuity exist?
YES
>> Repair the harnesses or connectors. And then replace the fuse.
NO
>> Replace the fuse. (Replace IPDM E/R if the fuse is fusing again.)
5.
CHECK HEADLAMP (LO) GROUND OPEN CIRCUIT
Check continuity between the headlamp harness connector and the ground.
Does continuity exist?
YES
>> Perform the xenon headlamp diagnosis. Refer to
.
NO
>> Repair the harnesses or connectors.
IPDM E/R
Headlamp
Continuity
Connector
Terminal
Connector
Terminal
RH
E345
83
E324
1
Existed
LH
84
E323
1
Unit
Lotion
Fuse No.
Capacity
Headlamp LO (RH)
IPDM E/R
#57
15 A
Headlamp LO (LH)
IPDM E/R
#56
15 A
IPDM E/R
Ground
Continuity
Connector
Terminal
RH
E345
83
Not existed
LH
84
Headlamp
Ground
Continuity
Connector
Terminal
RH
E324
2
Existed
LH
E323
2