содержание .. 564 565 566 567 ..
Nissan X-Trail 32. Manual - part 566
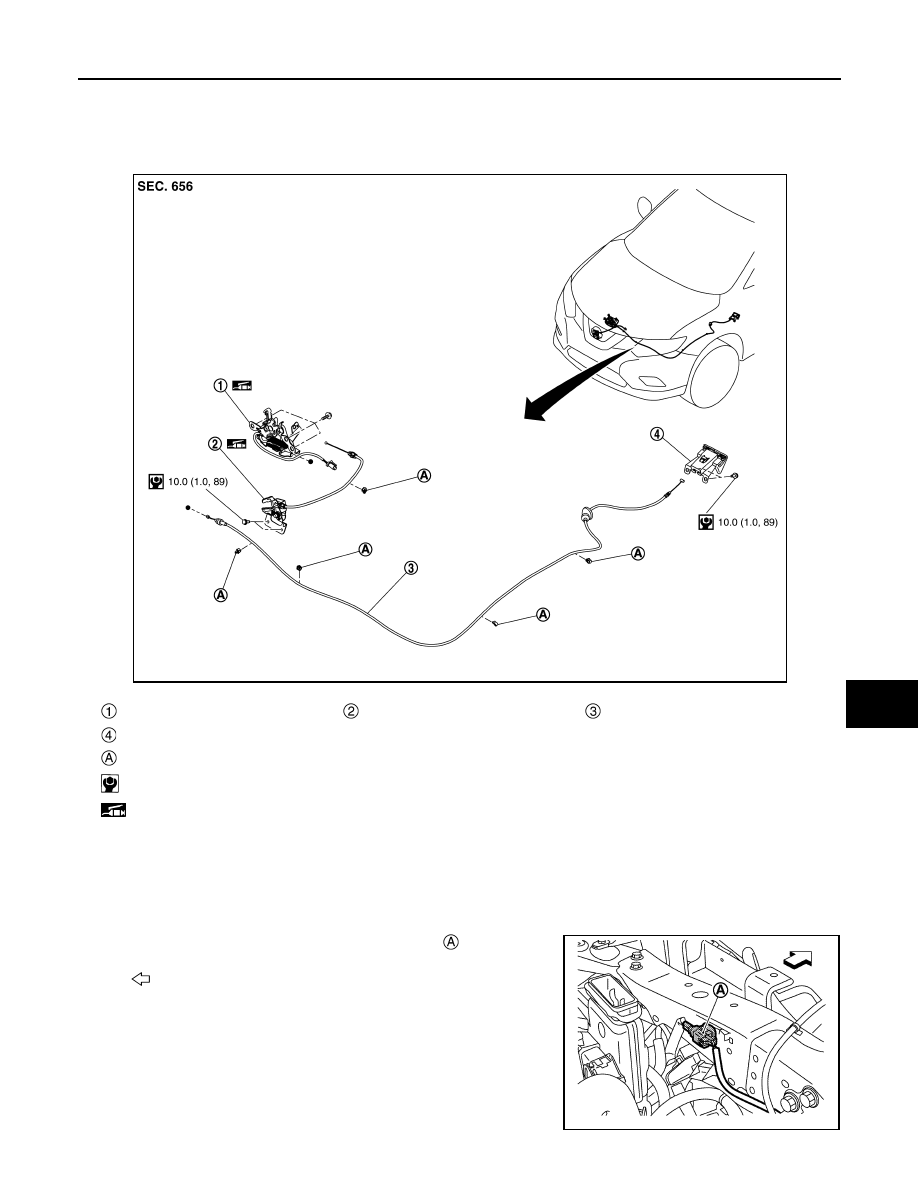
HOOD LOCK
DLK-605
< REMOVAL AND INSTALLATION >
[TYPE 2]
C
D
E
F
G
H
I
J
L
M
A
B
DLK
N
O
P
HOOD LOCK
Exploded View
INFOID:0000000010728147
HOOD LOCK
HOOD LOCK : Removal and Installation
INFOID:0000000010728148
REMOVAL
1.
Disconnect hood lock switch harness connector
(if equipped).
Hood lock assembly
Hood lock bell crank assembly
Hood lock control cable assembly
Hood lock control handle assembly
Cable clip
: N·m (kg-m, in-lb)
: Body grease
JMKIB3484GB
: Vehicle front
JMKIB2974ZZ