содержание .. 1485 1486 1487 1488 ..
Nissan X-Trail 32. Manual - part 1487
INSTRUMENT PANEL ASSEMBLY
IP-43
< REMOVAL AND INSTALLATION >
[RHD MODELS]
C
D
E
F
G
H
I
K
L
M
A
B
IP
N
O
P
a.
Disengage fixing pawls and metal clips, and then remove instru-
ment lower panel center.
b.
Disconnect harness connector and aspilator duct (if equipped).
4.
Remove instrument finisher E.
a.
Disengage fixing metal clips and pawl, and then remove instru-
ment finisher E.
b.
Remove push-button ignition switch harness connector. (with Intelligent Key System)
c.
Remove the following part after removing instrument finisher E. (with Intelligent Key System)
Push-button ignition switch: Refer to
PCS-116, "Removal and Installation"
5.
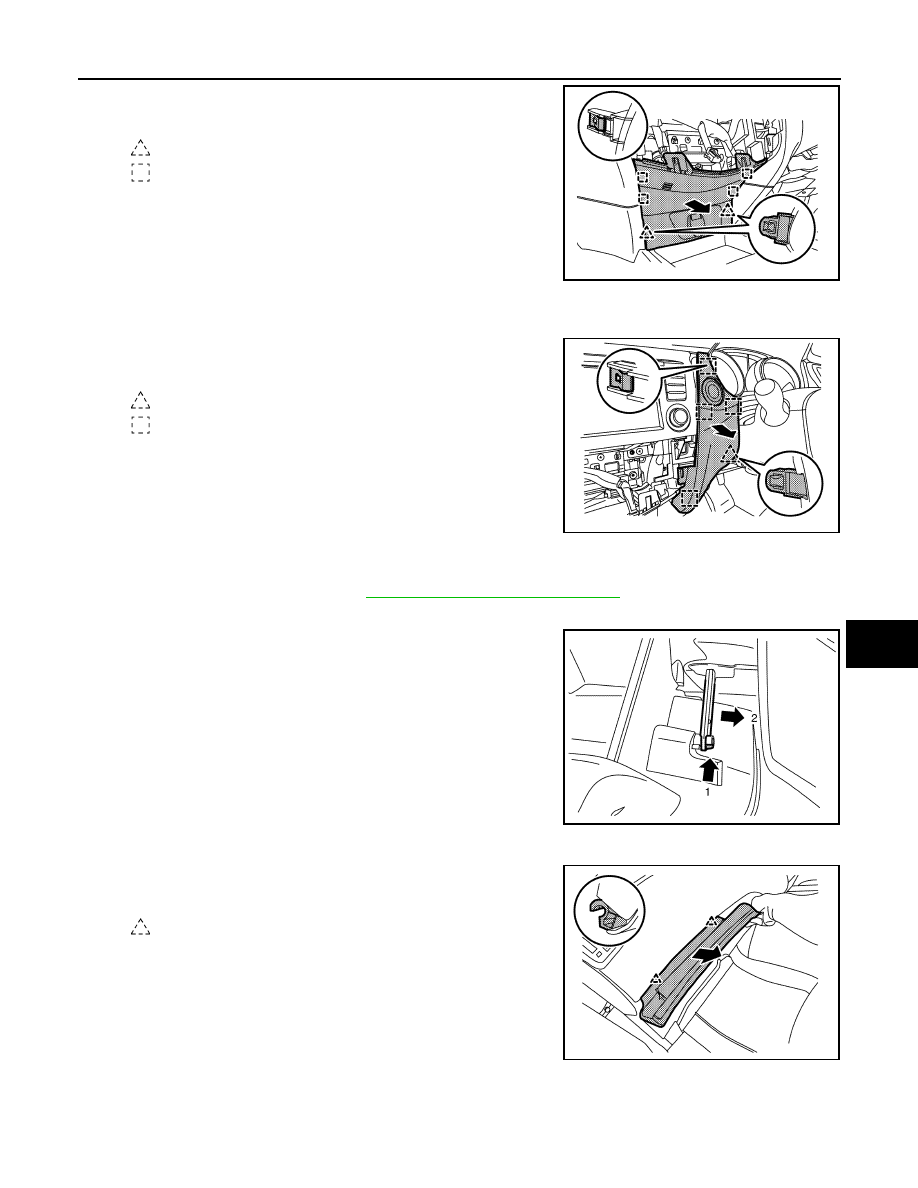
Remove glove box.
a.
Disengage glove box damper arm from glove box according to
the numerical order 1
→
2 indicated by arrows as shown in the
figure.
b.
Open the glove box approximately 50 mm.
c.
Pull up glove box toward the direction of arrow as shown in the
figure to disengage pawls from instrument panel.
: Pawl
: Metal clip
JMJIA9814ZZ
: Pawl
: Metal clip
JMJIA9749ZZ
JMJIA9817ZZ
: Pawl
JMJIA9819ZZ