Nissan X-Trail 32. Manual - part 1469


  Главная      Nissan     Nissan X-Trail 32 - Service Manual


поиск по сайту            


содержание   ..  1467  1468  1469  1470   ..


Nissan X-Trail 32. Manual - part 1469


REAR DOOR FINISHER

INT-21

< REMOVAL AND INSTALLATION >

C

D

E

F

G

H

I

K

L

M

A

B

INT

N

O

P

c.

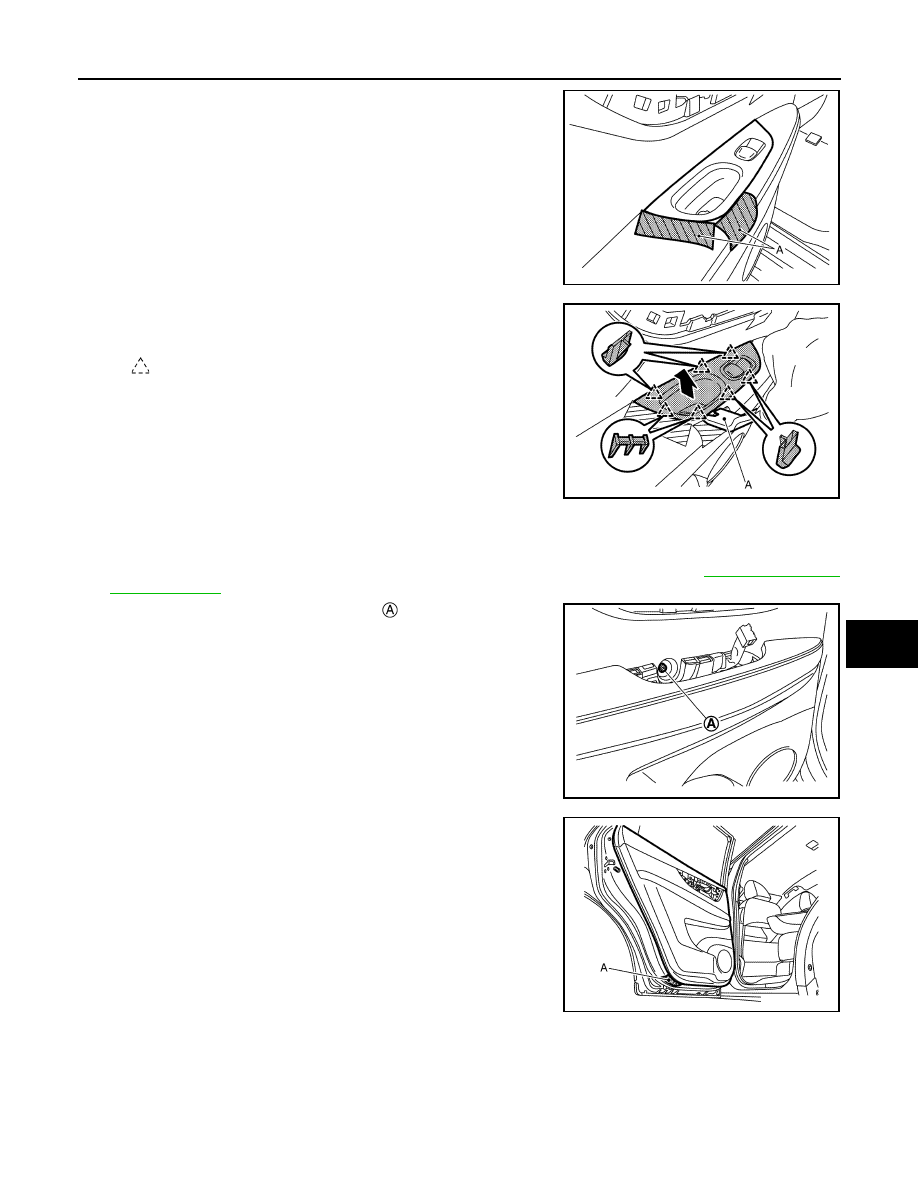
Apply protective tapes (A) on rear door finisher to protect it from
damage.

d.

Disengage power window switch finisher fixing pawls using a
remover tool (A).

e.

Disconnect power window switch harness connector, and then remove power window switch finisher and
power window switch as a set.
NOTE:
Remove power window switch after removing power window switch finisher. Refer to 

PWC-75, "Removal

and Installation"

.

3.

Remove rear door finisher fixing screw 

.

4.

Apply protective tape (A) on rear door panel to protect it from
damage.

JMJIB0160ZZ

: Pawl

JMJIB0161ZZ

JMJIB0162ZZ

JMJIB0163ZZ

INT-22

< REMOVAL AND INSTALLATION >

REAR DOOR FINISHER

5.

Disengage rear door finisher fixing clips using a remover tool
(A), and then remove rear door finisher according to numerical
order 1

2 indicated by arrows as shown in the figure.

CAUTION:

Insert a remover tool between rear door panel and fixing
clip.

INSTALLATION

Note the following items, and then install in the reverse order of removal.

CAUTION:

• Visually check clips for deformation and damage during installation. Replace with new ones if neces-

sary.

• Check in advance that clips and pawls are accurately aligned with the portions on rear door panel,

and then install by pressing in.

: Clip

JMJIB0164ZZ

BODY SIDE TRIM

INT-23

< REMOVAL AND INSTALLATION >

C

D

E

F

G

H

I

K

L

M

A

B

INT

N

O

P

BODY SIDE TRIM

Exploded View

INFOID:0000000010730549

FRONT PILLAR GARNISH

FRONT PILLAR GARNISH : Removal and Installation

INFOID:0000000010730550

CAUTION:

Never damage the body panel.

REMOVAL

1.

Release front pillar garnish portion of front body side welt.

Front pillar garnish

Front body side welt

Dash side finisher

Dash clip

Front kicking plate

Harness clip

Center pillar lower garnish

Seat belt cover

Metal clip

Rear kicking plate

Rear body side welt

Center pillar upper garnish

: Clip

: Pawl

: Always replace after every disassembly.

JMJIB0100ZZ

INT-24

< REMOVAL AND INSTALLATION >

BODY SIDE TRIM

2.

Disengage front pillar garnish fixing anchor clips according to
numerical order 1

2 indicated by arrows as shown in the figure.

3.

Cut anchor clip portion.

4.

Remove front pillar garnish.

5.

Remove front pillar garnish anchor clips from the body panel.

INSTALLATION

Note the following items, and then install in the reverse order of removal.

CAUTION:

• Always replace anchor clips with a new one after every removal.
• Be sure to install anchor clip to front pillar garnish before installing front pillar garnish.
• Check fixing portions of front pillar garnish bottom end portion are engaged to instrument panel,

and then engage anchor clips in order from upper side.

• Check in advance that anchor clips are accurately aligned with the portions on body panel, and then

install by pressing in.

KICKING PLATE

KICKING PLATE : Removal and Installation

INFOID:0000000010730551

CAUTION:

Never damage the body panel.

REMOVAL

Front Kicking Plate

: Anchor clip

JMJIA9603ZZ

JMJIA5130ZZ

JMJIA9604ZZ


содержание   ..  1467  1468  1469  1470   ..