содержание .. 1354 1355 1356 1357 ..
Nissan X-Trail 32. Manual - part 1356
CONDENSER
HA-83
< REMOVAL AND INSTALLATION >
[MR20DD]
C
D
E
F
G
H
J
K
L
M
A
B
HA
N
O
P
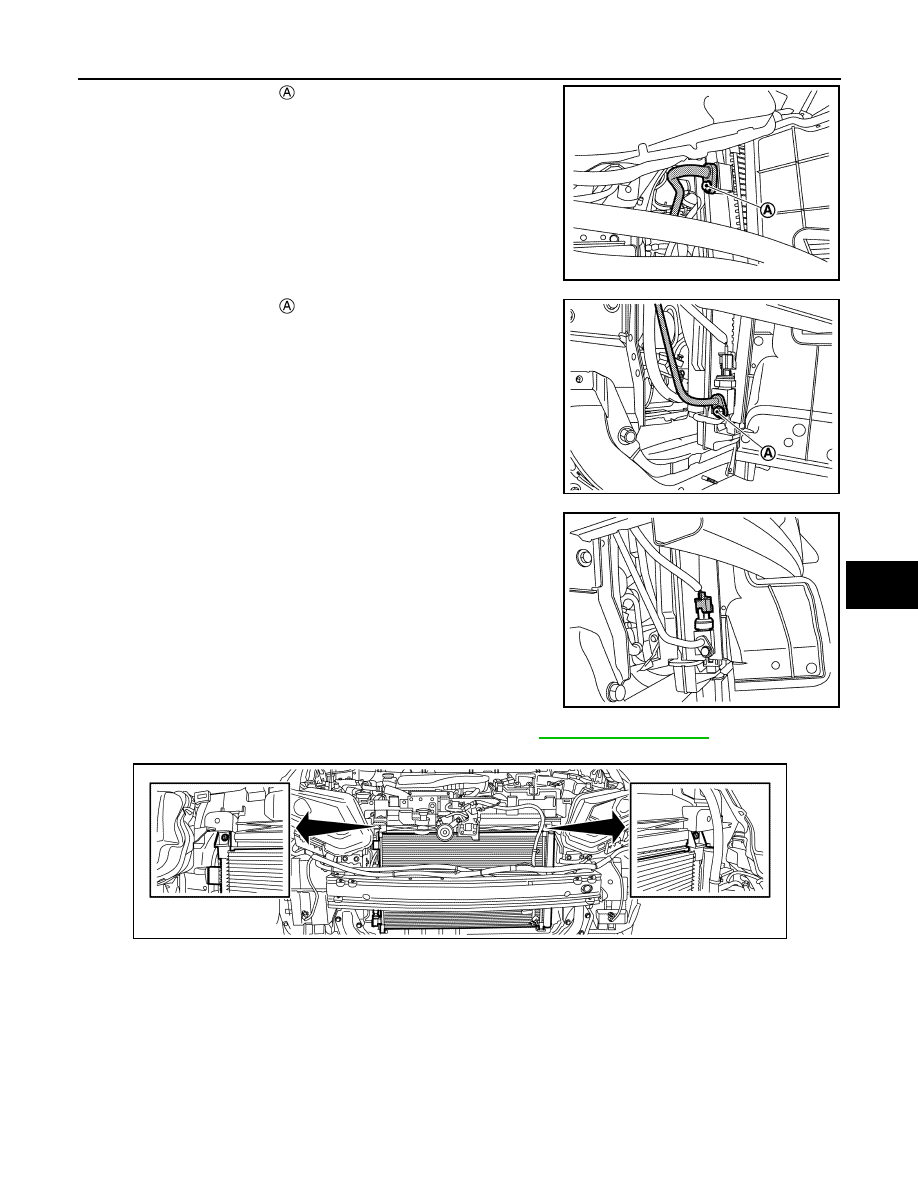
4.
Remove mounting bolt
, and then disconnect high-pressure
flexible hose from condenser & liquid tank assembly.
CAUTION:
Cap or wrap the joint of the A/C piping and condenser & liq-
uid tank assembly with suitable material such as vinyl tape
to avoid the entry of air.
5.
Remove mounting bolt
, and then disconnect high-pressure
pipe from condenser & liquid tank assembly.
CAUTION:
Cap or wrap the joint of the A/C piping and condenser & liq-
uid tank assembly with suitable material such as vinyl tape
to avoid the entry of air.
6.
Disconnect refrigerant pressure sensor harness connector.
7.
Remove mount bracket mounting bolt and fixing clip. Refer to
8.
Pull up mount bracket, and then remove condenser & liquid tank assembly mounting bolts.
JMIIA3326ZZ
JMIIA3327ZZ
JMIIA3366ZZ
JMIIA3350ZZ