содержание .. 1332 1333 1334 1335 ..
Nissan X-Trail 32. Manual - part 1334
GW-54
< REMOVAL AND INSTALLATION >
REAR DOOR GLASS
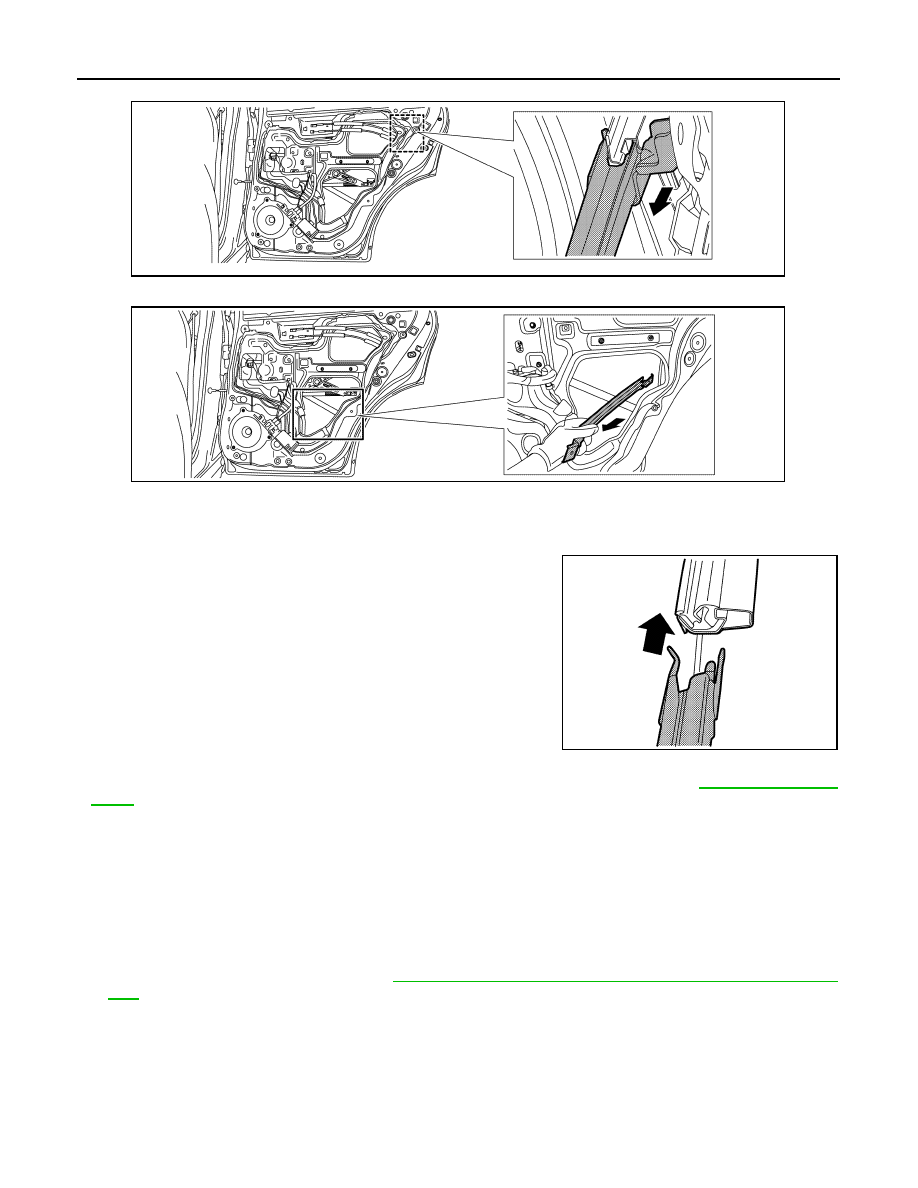
9.
Disengage rear door lower sash from open part of rear door panel as shown by the arrow in the figure.
10. Remove rear door lower sash from open part of rear door panel as shown by the arrow in the figure.
INSTALLATION
Note the following items, and then install in the reverse order of removal.
CAUTION:
• Make sure that rear door lower sash and rear door sash (door
panel side) are engaged.
• Tighten rear door lower sash mounting bolts to the specified torque. Refer to
REAR DOOR CORNER PIECE
REAR DOOR CORNER PIECE : Removal and Installation
INFOID:0000000010755119
REMOVAL
CAUTION:
Never damage rear door glass and rear door panel.
1.
Remove rear door lower sash. Refer to
GW-52, "REAR DOOR LOWER SASH : Removal and Installa-
2.
Fully open rear door glass.
JMKIB3166ZZ
JMKIB3167ZZ
JMKIB3142ZZ