содержание .. 1031 1032 1033 1034 ..
Nissan X-Trail 32. Manual - part 1033
DRIVE BELT AUTO-TENSIONER
EM-29
< REMOVAL AND INSTALLATION >
[MR20DD]
C
D
E
F
G
H
I
J
K
L
M
A
EM
N
P
O
REMOVAL AND INSTALLATION
DRIVE BELT AUTO-TENSIONER
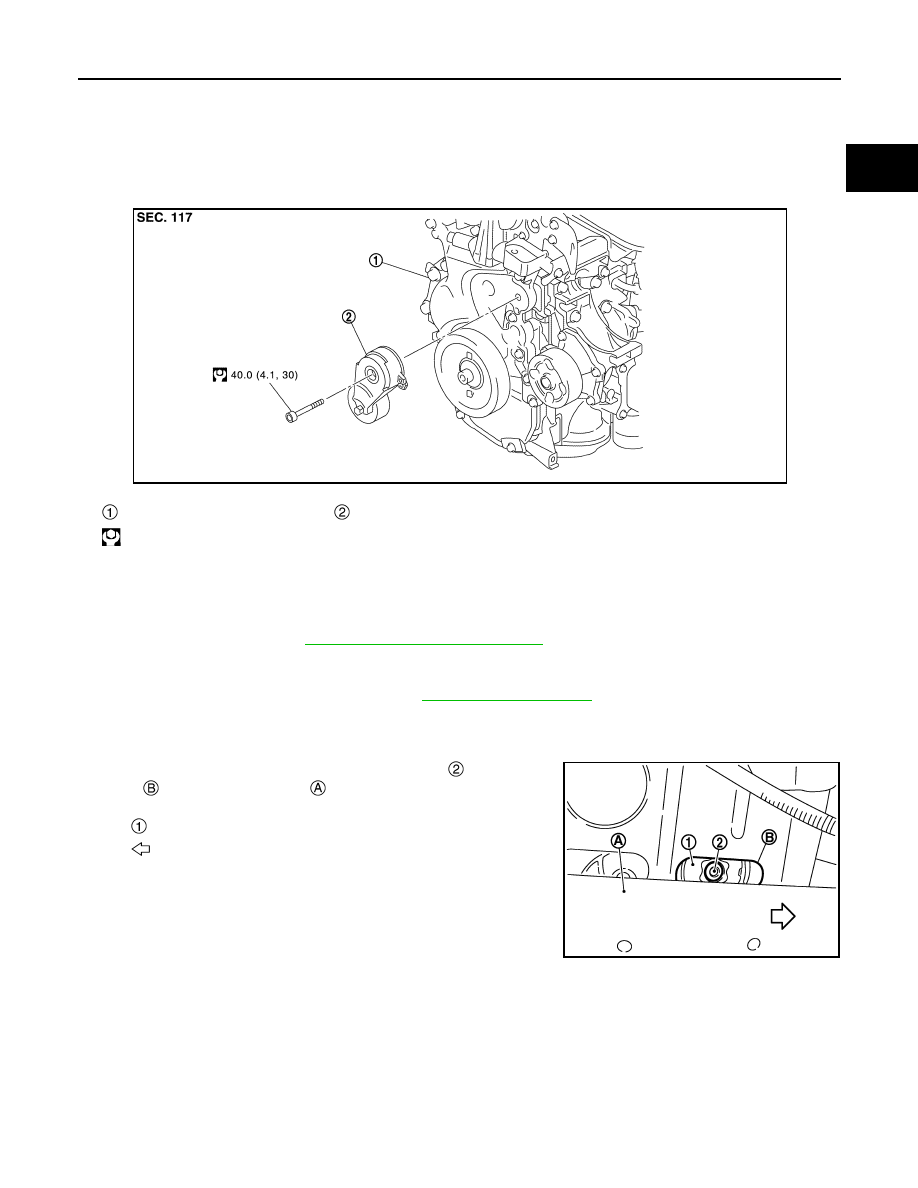
Exploded View
INFOID:0000000010783685
Removal and Installation
INFOID:0000000010783686
Removal
1.
Remove drive belt. Refer to
EM-22, "Removal and Installation"
.
• Keep each auto-tensioner pulley arm locked after drive belts are removed.
2.
Support the bottom surface of engine using a transmission jack, and then remove the rear torque rod and
the engine mounting insulator (RH). Refer to
.
CAUTION:
When using the jack, apply a piece of wood to the oil pan (lower) mounting bolt to protect the bot-
tom of engine from being scratched.
3.
Remove drive belt auto-tensioner mounting bolt
from service
hole
of right side member
.
NOTE:
Lift the front side of engine with a jack supporting the bottom of
engine and align drive belt auto-tensioner mounting bolt position
with the service hole.
4.
Remove drive belt auto-tensioner.
Installation
Install in the reverse order of removal.
CAUTION:
When installing drive belt auto-tensioner, be careful not to interfere with water pump pulley.
Front cover
Drive belt auto-tensioner
: N·m (kg-m, ft-lb)
JPBIA4304GB
: Drive belt auto-tensioner
: Vehicle front
PBIC3138J