содержание .. 113 114 115 116 ..
Nissan Primera P12. Manual - part 115
NATS (NISSAN ANTI-THEFT SYSTEM)
BL-169
C
D
E
F
G
H
J
K
L
M
A
B
BL
4.
PERFORM INITIALIZATION WITH CONSULT-II AGAIN
1.
Replace IMMU (Smart entrance control unit).
2.
Perform initialization with CONSULT-II.
For initialization, refer to “CONSULT-II operation manual NATS”.
NOTE:
If the initialization is not completed or fails, CONSULT-II shows
the above message on the screen.
Can the system be initialized?
Yes
>> System is OK. (IMMU is malfunctioning. Ref. part No. A
)
No
>>
●
ECM is malfunctioning.
Replace ECM. Ref. part No. B
Perform initialization with CONSULT-II.
For initialization, refer to “CONSULT-II operation man-
ual NATS”.
Diagnostic Procedure 8
EIS005JK
1.
CHECK HARNESS CONNECTOR CONNECTION
Perform initialization with CONSULT-II
Check harness connector connection between Dongle unit harness connector M93 and IMMU (Smart
entrance control unit) harness connector M41.
Then initialize NATS. For the initialization operation, refer to “CONSULT-II operation manual NATS”
Does the security indicator blink just after initialization?
Yes
>> System is OK. (The malfunction is caused by improper connector connection.)
No
>> GO TO 2
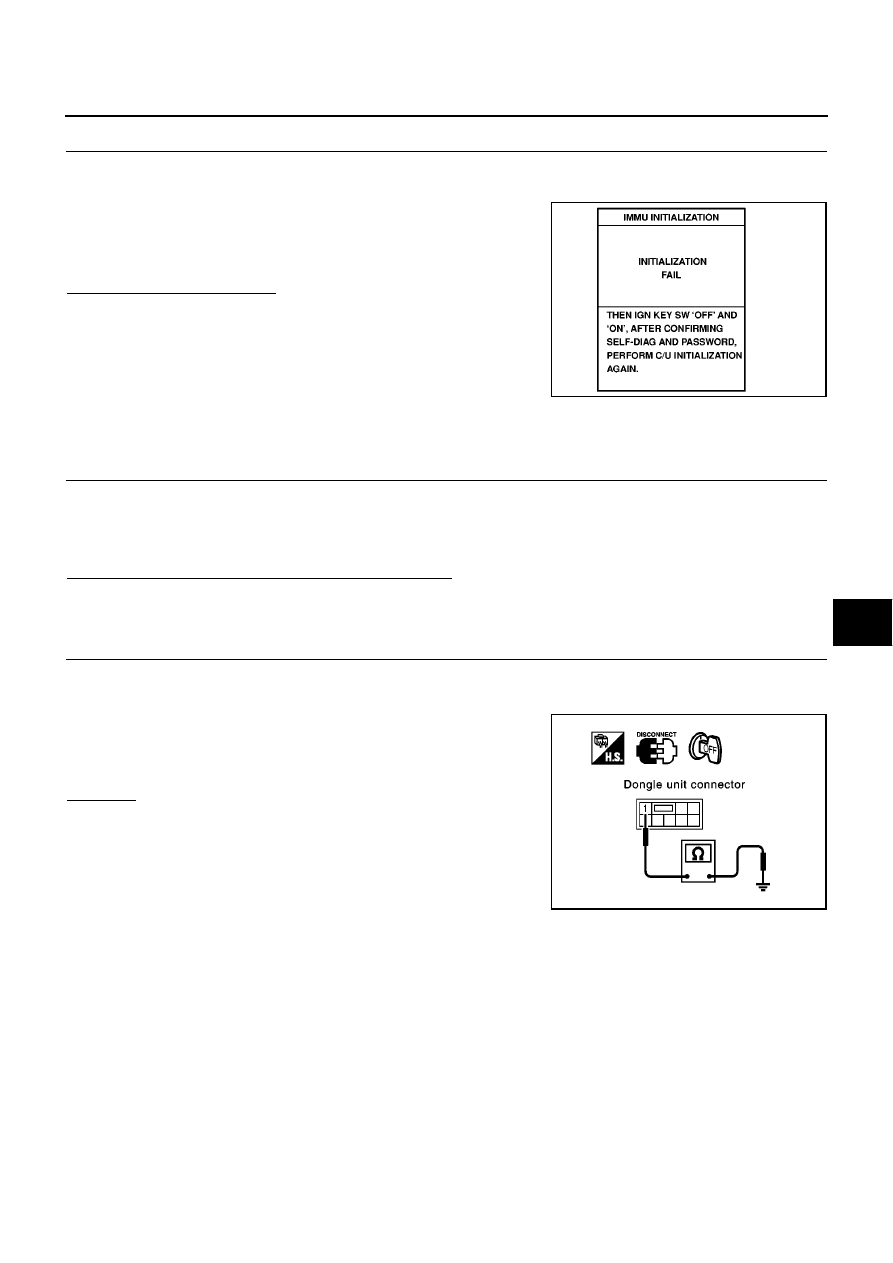
2.
CHECK GROUND CIRCUIT FOR DONGLE UNIT
1.
Turn ignition switch OFF.
2.
Disconnect dongle unit harness connector.
3.
Check continuity between dongle unit harness connector M93
terminal 1 and ground.
OK or NG
OK
>> GO TO 3
NG
>> Repair or replace harness.
SEL297W
1 (B) - Ground
: Continuity should exist.
SIIA1674E