Qashqai J11. Exterior - part 3
FENDER PROTECTOR
EXT-31
< REMOVAL AND INSTALLATION >
C
D
E
F
G
H
I
J
L
M
A
B
EXT
N
O
P
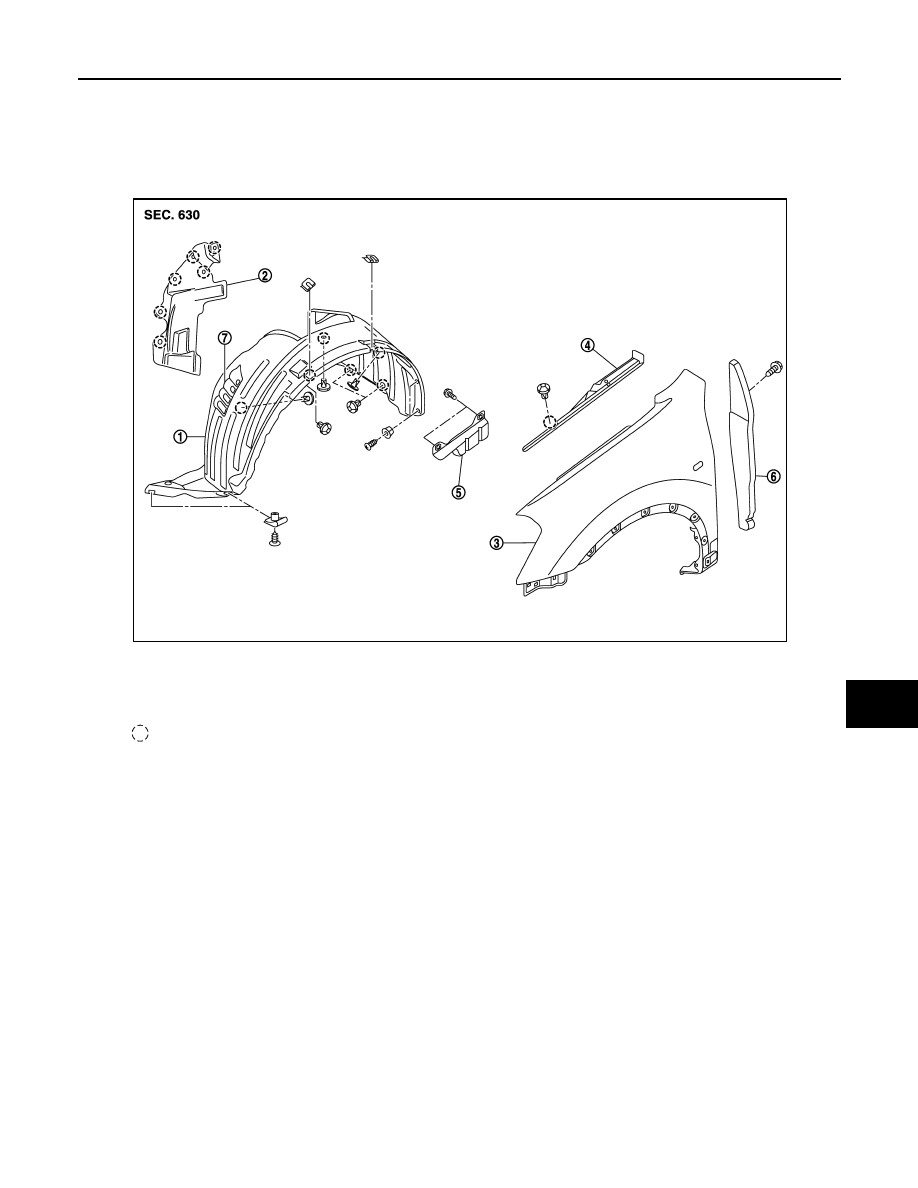
FENDER PROTECTOR
Exploded View
INFOID:0000000010377911
FENDER PROTECTOR
REAR WHEEL HOUSE PROTECTOR
1.
Front fender protector
2.
Hoodledge splashguard
3.
Front fender
4.
Front fender cover
5.
Front fender bracket
6.
Front fender seal
7.
Louvered cover
Clip
E1KIA0082ZZ