Qashqai J11. Exterior - part 2
ACTIVE GRILLE SHUTTER
EXT-15
< WIRING DIAGRAM >
C
D
E
F
G
H
I
J
L
M
A
B
EXT
N
O
P
WIRING DIAGRAM
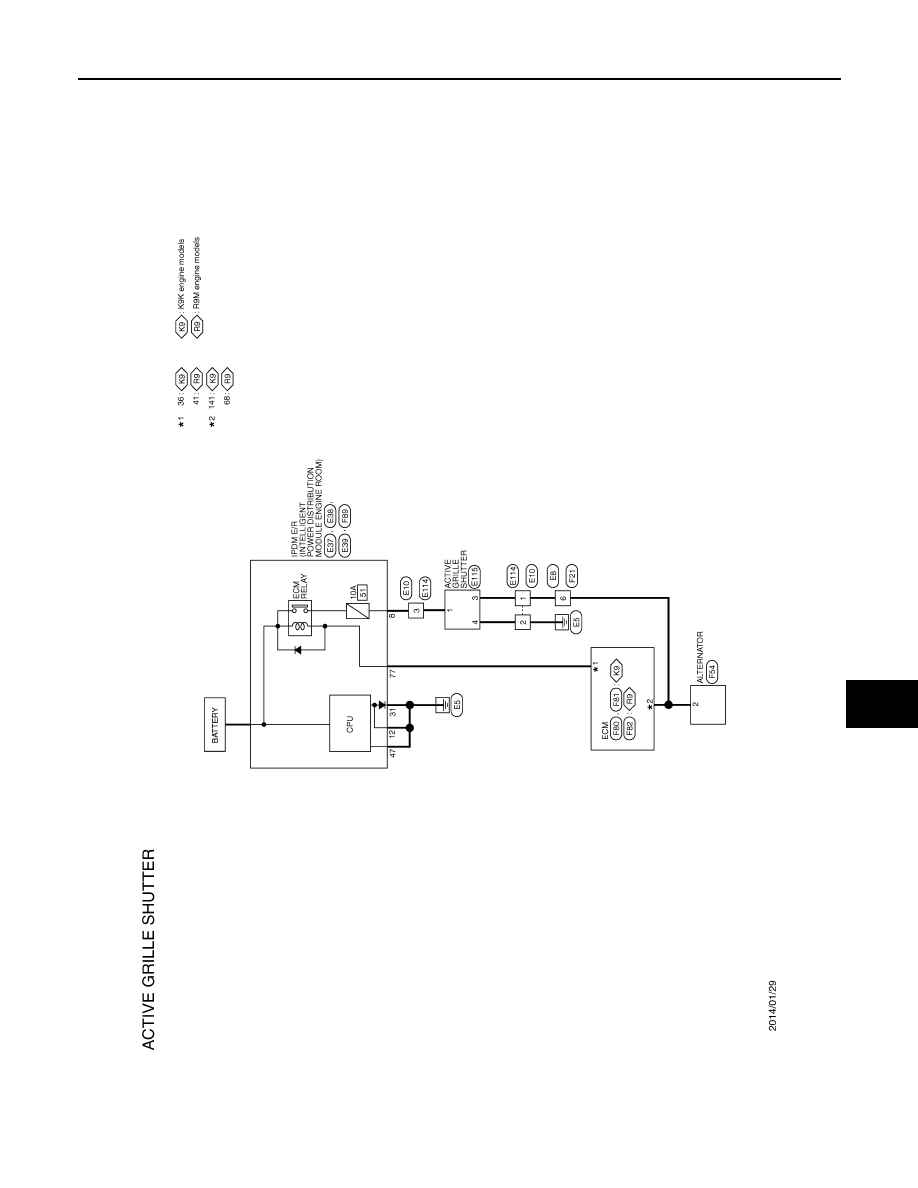
ACTIVE GRILLE SHUTTER
Wiring Diagram
INFOID:0000000010479947
JRKWD3175GB
|
|
|
ACTIVE GRILLE SHUTTER EXT-15 < WIRING DIAGRAM > C D E F G H I J L M A B EXT N O P WIRING DIAGRAM ACTIVE GRILLE SHUTTER Wiring Diagram INFOID:0000000010479947 JRKWD3175GB |