Nissan Qashqai J11. Manual - part 792
DLN-84
< UNIT DISASSEMBLY AND ASSEMBLY >
[TRANSFER: TY21C]
RING GEAR SHAFT
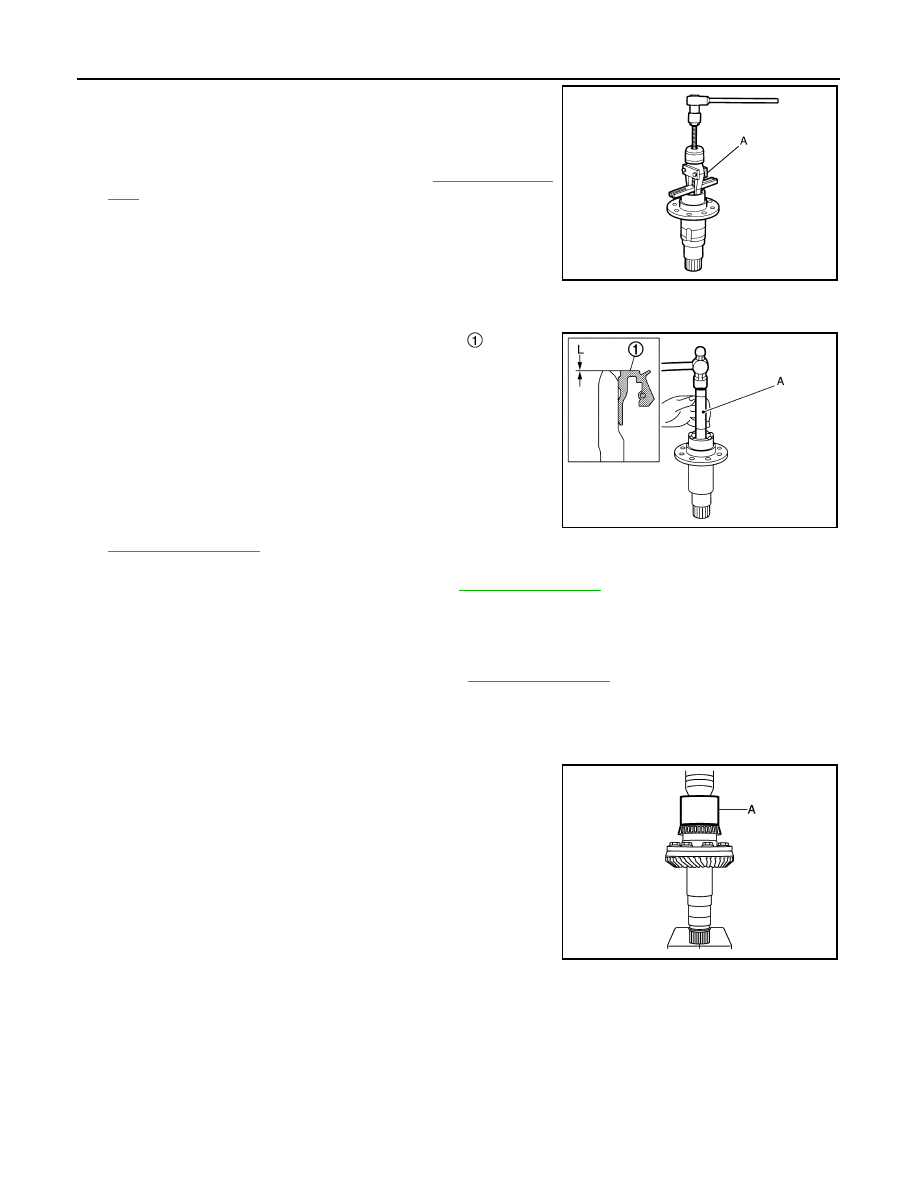
9.
Remove ring gear shaft oil seal from the ring gear shaft with the
Tool (A).
10. Perform inspection after disassembly. Refer to
Assembly
INFOID:0000000010755200
1.
Using suitable tool (A), install ring gear shaft oil seal
within the
dimension (L) shown as follows.
CAUTION:
• Never reuse the oil seal.
• When installing, never incline oil seal.
• Apply multi-purpose grease onto oil seal lips, and transfer
oil onto the circumference of the oil seal.
2.
Select ring gear bearing adjusting shim (transfer case side) and
ring gear bearing adjusting shim (transfer cover side). Refer to
.
3.
Assemble the selected ring gear bearing adjusting shim (transfer case side) and ring gear bearing outer
race (transfer case side) to transfer case. Refer to
CAUTION:
• Never reuse ring gear bearing.
• Apply transfer oil to the ring gear bearing.
4.
Assemble the selected ring gear bearing adjusting shim (transfer cover side) and ring gear bearing outer
race (transfer cover side) to transfer cover. Refer to
.
CAUTION:
• Never reuse ring gear bearing.
• Apply transfer oil to the ring gear bearing.
5.
Install the ring gear to ring gear shaft, and tighten mounting bolts to the specified torque.
6.
Install ring gear bearing inner race (transfer cover side) with drift
(A) (commercial service tool).
CAUTION:
• Never reuse ring gear bearing.
• Apply transfer oil to the ring gear bearing.
Tool number
: KV381054S0
JPDIE0032ZZ
L
: 2.0 +0.6/
−
0 mm (0.079 +0.024/
−
0 in)
JSDIA2492ZZ
JSDIA1056ZZ