Content .. 2264 2265 2266 2267 ..
Nissan Qashqai J11. Manual - part 2266
ENGINE MAINTENANCE (R9M)
MA-99
< PERIODIC MAINTENANCE >
C
D
E
F
G
H
I
J
K
L
M
B
MA
N
O
A
2.
Hold the hexagonal part of drive belt auto-tensioner pulley with a
hexagonal socket (A) securely. Then move the wrench handle in
the direction of arrow (loosening direction of tensioner).
CAUTION:
Never place hand in a location where pinching may occur if
the holding tool accidentally comes off.
3.
Insert a stopper pin (A) in diameter such as short-length screw-
driver into the hole of the retaining boss to fix drive belt auto-ten-
sioner pulley.
• Keep drive belt auto-tensioner pulley arm locked after drive
belt is removed.
NOTE:
Use approximately 3.0 mm (0.118 in) dia. hard metal pin as a
stopper pin.
4.
Remove drive belt.
INSTALLATION
1.
Install drive belt.
CAUTION:
• Check that drive belt is completely set to pulleys.
• Check for engine oil, working fluid and engine coolant are not adhered to drive belt and each
pulley groove.
2.
Release drive belt auto-tensioner, and apply tension to drive belt.
3.
Turn crankshaft pulley clockwise several times to equalize tension between each pulley.
4.
Check that the indicator (notch on fixed side) of drive belt auto-tensioner is within the range when new
drive belt is installed. Refer to
MA-98, "DRIVE BELT : Checking"
.
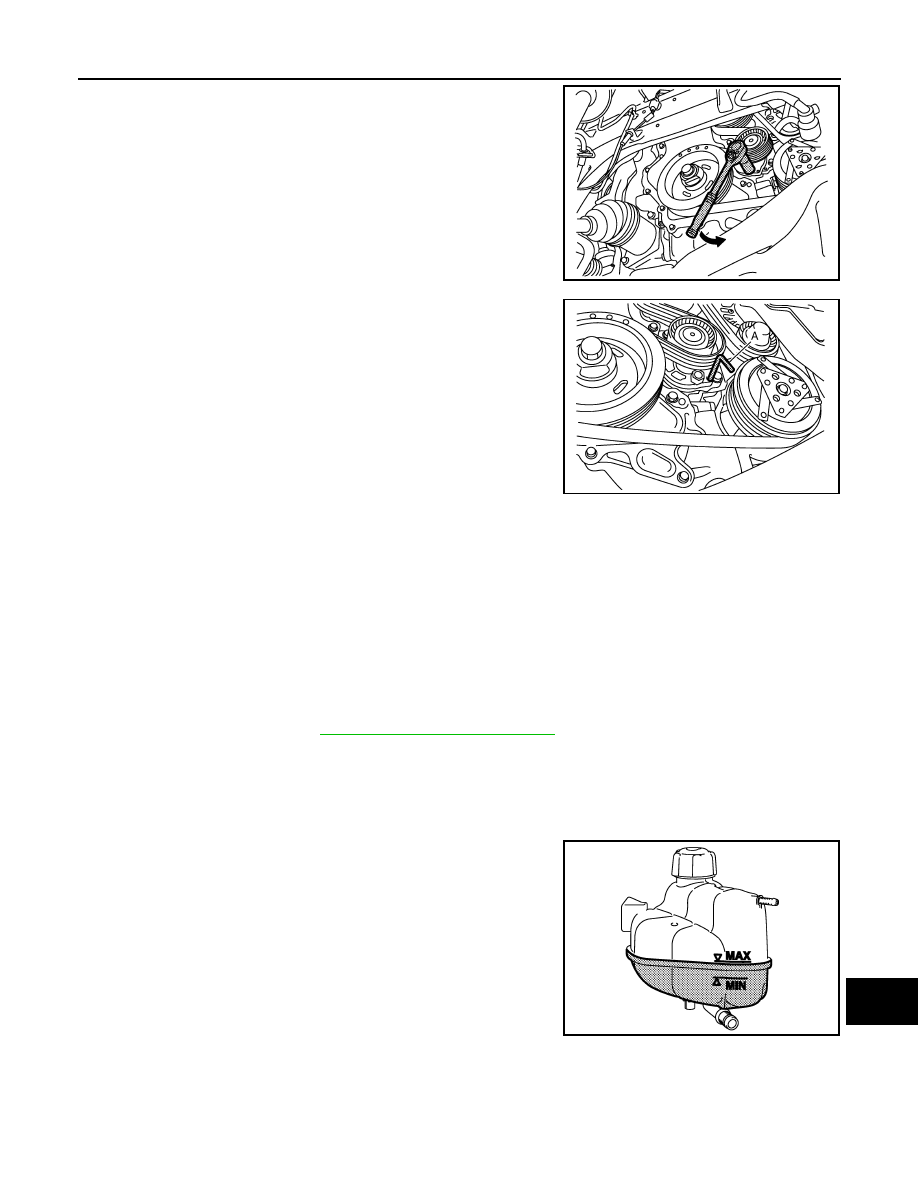
ENGINE COOLANT
ENGINE COOLANT : Inspection
INFOID:0000000010503164
LEVEL
• Check if the reservoir tank engine coolant level is within the “MIN”
to “MAX” when the engine is cool.
• Adjust the engine coolant level as necessary.
• Check that the reservoir tank cap is tightened.
WARNING:
Never remove reservoir tank cap when engine is hot. Serious
burns could occur from high-pressure engine coolant escaping
from reservoir tank.
LEAKAGE
E1BIA0658ZZ
E1BIA0657ZZ
E1BIA1145ZZ