Nissan Qashqai J11. Manual - part 173
CO-96
< REMOVAL AND INSTALLATION >
[R9M]
RADIATOR
NOTE:
When removing components such as hoses, tubes/lines, etc., cap or plug openings to prevent fluid from spill-
ing.
1.
Drain engine coolant from radiator. Refer to
CAUTION:
• Perform this step when the engine is cold.
• Never spill engine coolant on drive belt.
2.
Remove front bumper. Refer to
EXT-19, "Removal and Installation"
3.
Remove air inlet tube and air inlet hose. Refer to
EM-27, "Removal and Installation"
.
4.
Remove charge air cooler. Refer to
EM-27, "Removal and Installation"
5.
Separate condenser from radiator.
6.
Remove radiator hose (upper and lower).
7.
Disconnect harness connectors from cooling fan, and move harness aside.
8.
Remove radiator and cooling fan assembly.
CAUTION:
Be careful not to damage radiator core and condenser core.
NOTE:
In case of lower pin radiator is damaged, it can be repaired instead of replacing the radiator.
INSTALLATION
Note the following, and install in the reverse order of removal.
CAUTION:
• Replace water hose clamp if it is removed.
• Use genuine mounting bolts for the cooling fan assembly and strictly observe the tightening torque.
(Breakage prevention for radiator)
Never reuse o-ring
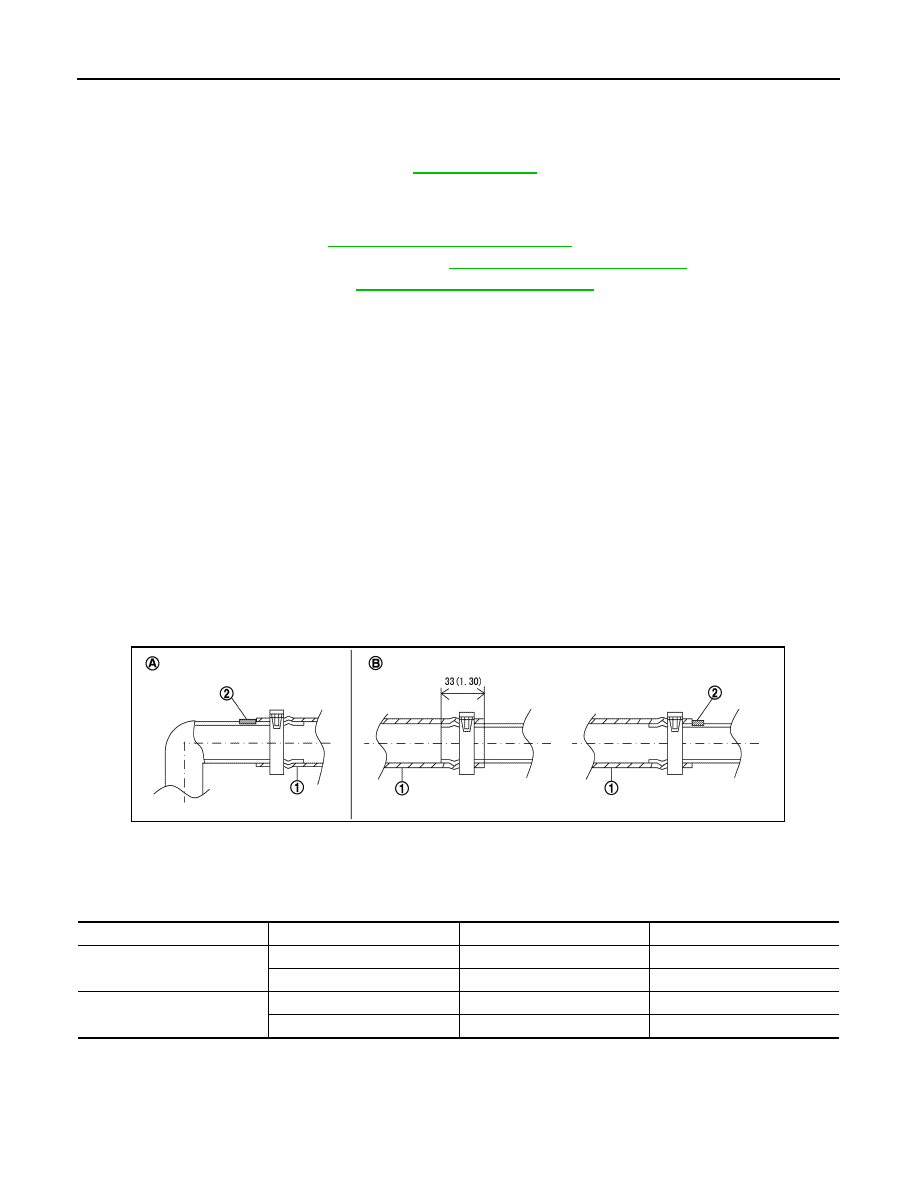
NOTE:
• Insert the radiator hose (1) all the way to the stopper (2) or by 33 mm (1.30in) (hose without a stopper)
• For the orientation of the hose clamp pawl, refer to the figure.
*: Refer to the illustrations for the specific position each hose clamp tab.
Unit: mm (in)
A.
Radiator side
B.
Engine side
JPBIA4294GB
Radiator hose
Hose end
Paint mark
Position of hose clamp*
Radiator hose (upper)
Radiator side
Upper
A
Engine side
Upper
B
Radiator hose (lower)
Radiator side
Lower
C
Engine side
Upper
D