Content .. 1572 1573 1574 1575 ..
Nissan Qashqai J11. Manual - part 1574
BRM-124
< VEHICLE INFORMATION >
[FOR EUROPE (RHD)]
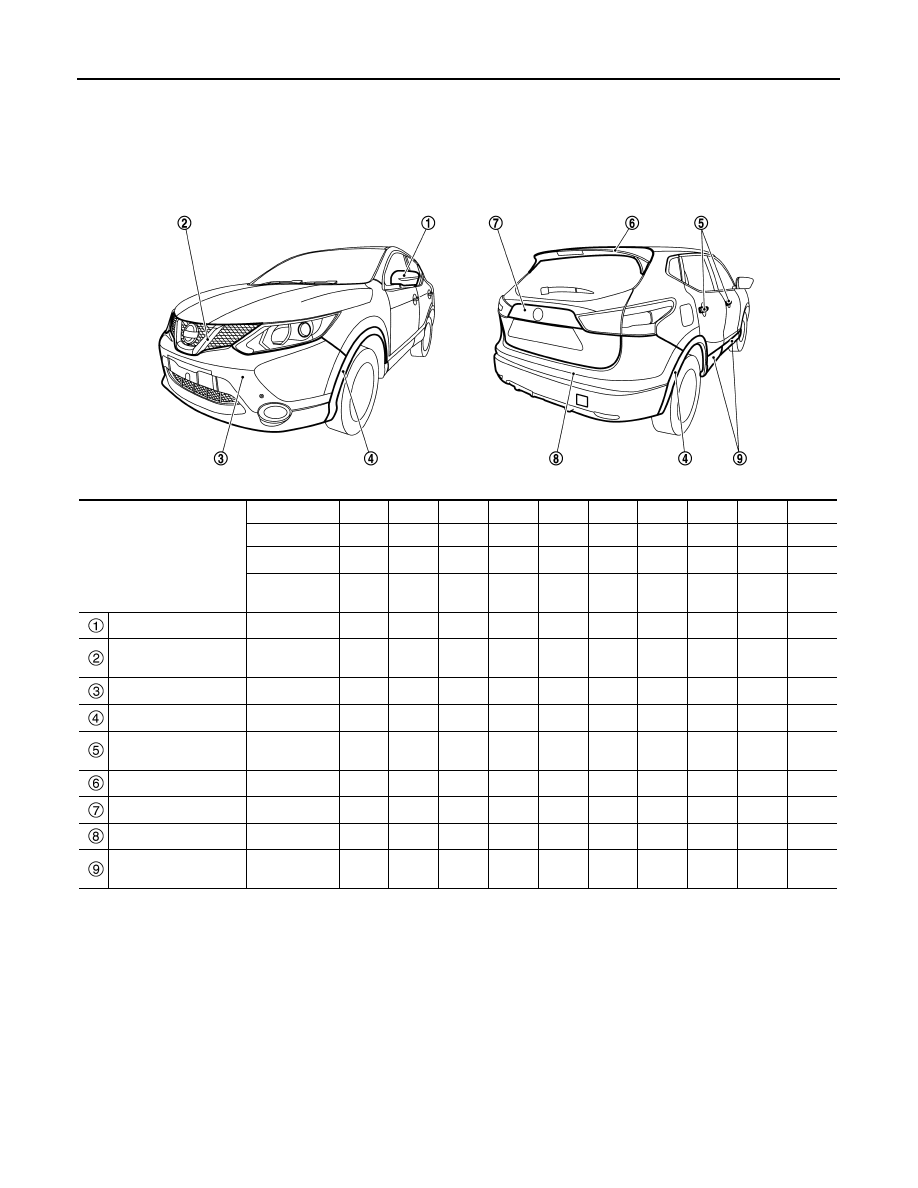
BODY EXTERIOR PAINT COLOR
VEHICLE INFORMATION
BODY EXTERIOR PAINT COLOR
Body Exterior Paint Color
INFOID:0000000010308778
NOTE:
• S: 1-Coat solid
• 2M: 2-Coat Metallic
• 2S: 2-Coat solid
• 3P: 3-Coat pearl
• 2PM: 2-Coat Pearl metallic
Component
Color code
B326
BZ11
BKY0
BGAB
BKAD
BNAJ
BCAP
BRBN
BZ10
BQAB
Description
White
Black
Silver
Black
Gray
Red
Brown
Blue
Red
White
Paint type
note
S
2M
2M
2M
2M
2PM
2M
2M
2S
3P
Standard
clear coat
–
×
×
×
×
×
×
×
×
×
Door mirror cover
Body color
B326
BZ11
BKY0
BGAB
BKAD
BNAJ
BCAP
BRBN
BZ10
BQAB
Front grille molding
Chromium
plate
Cr
Cr
Cr
Cr
Cr
Cr
Cr
Cr
Cr
Cr
Front bumper fascia
Body color
B326
BZ11
BKY0
BGAB
BKAD
BNAJ
BCAP
BRBN
BZ10
BQAB
Fillet molding
Material color
–
–
–
–
–
–
–
–
–
–
Door outside handle
Chromium
plate
Cr
Cr
Cr
Cr
Cr
Cr
Cr
Cr
Cr
Cr
Rear spoiler
Body color
B326
BZ11
BKY0
BGAB
BKAD
BNAJ
BCAP
BRBN
BZ10
BQAB
Back door finisher
Body color
B326
BZ11
BKY0
BGAB
BKAD
BNAJ
BCAP
BRBN
BZ10
BQAB
Rear bumper fascia
Body color
B326
BZ11
BKY0
BGAB
BKAD
BNAJ
BCAP
BRBN
BZ10
BQAB
Door outside lower
molding
Material color
–
–
–
–
–
–
–
–
–
–
JSKIA3881ZZ