Nissan Juke F15. Manual - part 649
 

  Index      Nissan     Nissan Juke F15 (2015 year) - Service and Repair Manual


Search            


Content   ..  647  648  649  650   ..


Nissan Juke F15. Manual - part 649


EM-150

< PRECAUTION >

[MR EXCEPT FOR NISMO RS MODELS]

PRECAUTIONS

PRECAUTION

PRECAUTIONS

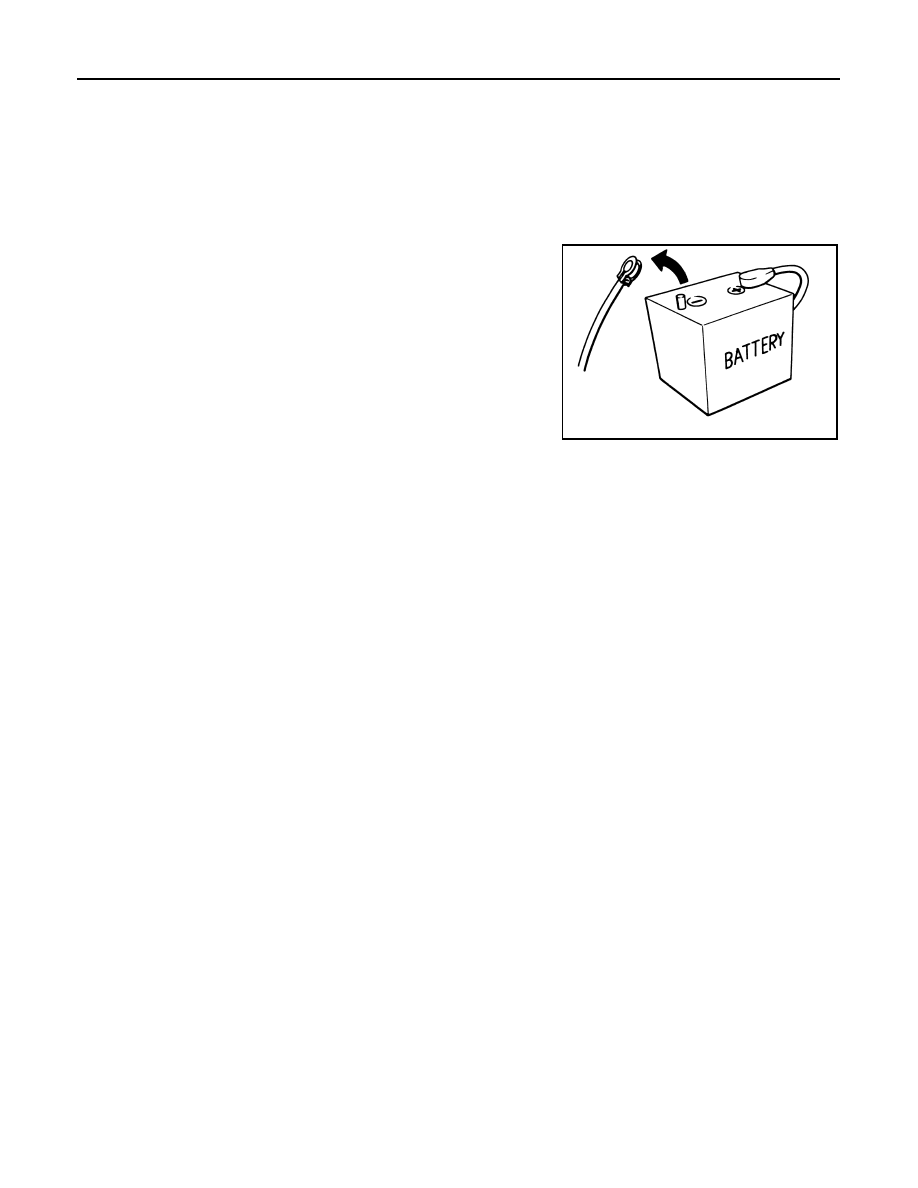
Precautions for Removing Battery Terminal

INFOID:0000000012958958

When disconnecting the battery terminal, pay attention to the following.

• Always use a 12V battery as power source.

• Never disconnect battery terminal while engine is running.

• When removing the 12V battery terminal, turn OFF the ignition

switch and wait at least 30 seconds.

• For vehicles with the engine listed below, remove the battery termi-

nal after a lapse of the specified time:

NOTE:

ECU may be active for several tens of seconds after the ignition switch is turned OFF. If the battery terminal

is removed before ECU stops, then a DTC detection error or ECU data corruption may occur.

• After high-load driving, if the vehicle is equipped with the V9X engine, turn the ignition switch OFF and wait

for at least 15 minutes to remove the battery terminal.

NOTE:

• Turbocharger cooling pump may operate in a few minutes after the ignition switch is turned OFF.

• Example of high-load driving

- Driving for 30 minutes or more at 140 km/h (86 MPH) or more.

- Driving for 30 minutes or more on a steep slope.

• For vehicles with the 2-batteries, be sure to connect the main battery and the sub battery before turning ON

the ignition switch.

NOTE:

If the ignition switch is turned ON with any one of the terminals of main battery and sub battery discon-

nected, then DTC may be detected.

• After installing the 12V battery, always check "Self Diagnosis Result" of all ECUs and erase DTC.

NOTE:

The removal of 12V battery may cause a DTC detection error.

Precaution for Supplemental Restraint System (SRS) "AIR BAG" and "SEAT BELT 
PRE-TENSIONER"

INFOID:0000000012197326

The Supplemental Restraint System such as “AIR BAG” and “SEAT BELT PRE-TENSIONER”, used along

with a front seat belt, helps to reduce the risk or severity of injury to the driver and front passenger for certain

types of collision. This system includes seat belt switch inputs and dual stage front air bag modules. The SRS

system uses the seat belt switches to determine the front air bag deployment, and may only deploy one front

air bag, depending on the severity of a collision and whether the front occupants are belted or unbelted.

Information necessary to service the system safely is included in the “SRS AIR BAG” and “SEAT BELT” of this

Service Manual.

WARNING:

Always observe the following items for preventing accidental activation.

• To avoid rendering the SRS inoperative, which could increase the risk of personal injury or death in

the event of a collision that would result in air bag inflation, it is recommended that all maintenance

and repair be performed by an authorized NISSAN/INFINITI dealer.

• Improper repair, including incorrect removal and installation of the SRS, can lead to personal injury

caused by unintentional activation of the system. For removal of Spiral Cable and Air Bag Module,

see “SRS AIR BAG”.

D4D engine

: 20 minutes

YS23DDT

: 4 minutes

HRA2DDT

: 12 minutes

YS23DDTT

: 4 minutes

K9K engine

: 4 minutes

ZD30DDTi

: 60 seconds

M9R engine

: 4 minutes

ZD30DDTT

: 60 seconds

R9M engine

: 4 minutes

V9X engine

: 4 minutes

YD25DDTi

: 2 minutes

SEF289H

PRECAUTIONS

EM-151

< PRECAUTION >

[MR EXCEPT FOR NISMO RS MODELS]

C

D

E

F

G

H

I

J

K

L

M

A

EM

N

P

O

• Never use electrical test equipment on any circuit related to the SRS unless instructed to in this Ser-

vice Manual. SRS wiring harnesses can be identified by yellow and/or orange harnesses or harness

connectors.

PRECAUTIONS WHEN USING POWER TOOLS (AIR OR ELECTRIC) AND HAMMERS

WARNING:

Always observe the following items for preventing accidental activation.

• When working near the Air Bag Diagnosis Sensor Unit or other Air Bag System sensors with the

ignition ON or engine running, never use air or electric power tools or strike near the sensor(s) with

a hammer. Heavy vibration could activate the sensor(s) and deploy the air bag(s), possibly causing

serious injury.

• When using air or electric power tools or hammers, always switch the ignition OFF, disconnect the

battery or batteries, and wait at least 3 minutes before performing any service.

Precaution for Procedure without Cowl Top Cover

INFOID:0000000012197327

When performing the procedure after removing cowl top cover, cover

the lower end of windshield with urethane, etc to prevent damage to

windshield.

Precaution Necessary for Steering Wheel Rotation after Battery Disconnect

INFOID:0000000012197329

NOTE:

• Before removing and installing any control units, first turn the push-button ignition switch to the LOCK posi-

tion, then disconnect both battery cables.

• After finishing work, confirm that all control unit connectors are connected properly, then re-connect both

battery cables.

• Always use CONSULT-II to perform self-diagnosis as a part of each function inspection after finishing work.

If a DTC is detected, perform trouble diagnosis according to self-diagnosis results.

This vehicle is equipped with a push-button ignition switch and a steering lock unit.

If the battery is disconnected or discharged, the steering wheel will lock and cannot be turned.

If turning the steering wheel is required with the battery disconnected or discharged, follow the procedure

below before starting the repair operation.

OPERATION PROCEDURE

1. Connect both battery cables.

NOTE:

Supply power using jumper cables if battery is discharged.

2. Carry the Intelligent Key or insert it to the key slot and turn the push-button ignition switch to ACC position.

(At this time, the steering lock will be released.)

3. Disconnect both battery cables. The steering lock will remain released with both battery cables discon-

nected and the steering wheel can be turned.

4. Perform the necessary repair operation.
5. When the repair work is completed, re-connect both battery cables. With the brake pedal released, turn

the push-button ignition switch from ACC position to ON position, then to LOCK position. (The steering

wheel will lock when the push-button ignition switch is turned to LOCK position.)

6. Perform self-diagnosis check of all control units using CONSULT-II.

PIIB3706J

EM-152

< PRECAUTION >

[MR EXCEPT FOR NISMO RS MODELS]

PRECAUTIONS

Special Cautions to Ensure the Safe Disposal of Sodium-filled Exhaust Valves

INFOID:0000000012197330

Handling and disposal of sodium-filled exhaust valves requires spe-

cial care and consideration. Under conditions such as breakage with

subsequent contact with water, metal sodium which lines the inner

portion of exhaust valve will react violently, forming sodium hydrox-

ide and hydrogen which may result in an explosion. Sodium-filled

exhaust valve is identified on the top of its stem as shown in illustra-

tion.

DEALER DISPOSAL INSTRUCTIONS

CAUTION:

• Use approved shatter-resistant eye protection when performing this procedure.

• Perform this and all subsequent disposal work procedures in an open room, away from flammable

liquids. Keep a fire extinguisher, rated at least 10 ABC, in close proximity to the work area.

• Be sure to wear rubber gloves when performing the following operations.

• Make sure the resultant (high alkalinity) waste water does not contact your skin. If the waste water

does contact you, wash the contacted area immediately with large quantities of water.

• Dealers should check their respective state and local regulations concerning any chemical treatment

or waste water discharge permits which may be required to dispose of the resultant (high alkalinity)

waste water.

1. Clamp valve stem in a vice.
2. The valve has a specially-hardened surface. To cut through it,

first remove a half-round section, approximately 30 mm (1.18 in)

long using air-powered grinder until black color is removed and

silver color appears.

3. Use hacksaw to cut through approximately half the diameter of

valve stem. Make the serration at a point 40 mm (1.57 in) from

the end of valve stem.

 Identification mark of sodium-filled exhaust valve A

: B1A

JPBIA6407ZZ

A

: Black color

B

: Silver color

c

: 47 mm (1.85 in)

d

: 17 mm (0.67 in)

JPBIA4964ZZ

a

: 32 mm (1.26 in)

JPBIA4965ZZ

PRECAUTIONS

EM-153

< PRECAUTION >

[MR EXCEPT FOR NISMO RS MODELS]

C

D

E

F

G

H

I

J

K

L

M

A

EM

N

P

O

4. Cover the serrated end of the valve with a large shop towel (A).

Strike the valve face end with a hammer, separating it into two

pieces.

5. Fill a bucket (such as a 20   oil can) with at least 10   (2-1/4

lmp gal) of water. Carefully place the alreadycut (serrated)

valves into the water one-at-a-time using a set of large tweezers

and quickly move away at least 2.7 m (9 ft).

6. The valves should be placed in a standing position as shown in

the illustration to allow complete reaction. After the bubbling

action has subsided, additional valves can be placed into the

bucket allowing each subsequent chemical reaction to subside.

However, no more than 8 valves should be placed in the same
10   (2-1/4 lmp gal) amount of water. The complete chemical

reaction may take as long as 4 to 5 hours. Remove the valves

using a set of large tweezers after the chemical reaction has

stopped. Afterwards, valves can be disposed as ordinary scrap.

Precaution for Handling High Pressure Fuel System

INFOID:0000000012197331

• High pressure fuel system components are between high pressure fuel pump and fuel injector.

• Always release fuel pressure and never start the engine when performing removal and installation.

• When removing or installing parts without releasing fuel pressure, fuel may be splashed and, if fuel contacts

skin or eyes, it may cause inflammation.

Precautions For Engine Service

INFOID:0000000012197332

DISCONNECTING FUEL PIPING

• Before starting work, check no fire or spark producing items are in the work area. 

• Release fuel pressure before disconnecting and disassembly.

• After disconnecting pipes, plug openings to stop fuel leakage.

DRAINING ENGINE COOLANT

Drain engine coolant and engine oil when the engine is cooled.

INSPECTION, REPAIR AND REPLACEMENT

Before repairing or replacing, thoroughly inspect parts. Inspect new replacement parts in the same way, and

replace if necessary.

REMOVAL AND DISASSEMBLY

• When instructed to use SST, use specified tools. Always be careful to work safely, avoid forceful or unin-

structed operations. 

• Exercise maximum care to avoid damage to mating or sliding surfaces.

• Dowel pins are used for several parts alignment. When replacing and reassembling parts with dowel pins,

check that dowel pins are installed in the original position.

• Must cover openings of engine system with a tape or equivalent, to seal out foreign materials.

• Mark and arrange disassembly parts in an organized way for easy troubleshooting and reassembly.

• When loosening nuts and bolts, as a basic rule, start with the one furthest outside, then the one diagonally

opposite, and so on. If the order of loosening is specified, do exactly as specified. Power tools may be used

in the step.

ASSEMBLY AND INSTALLATION

JPBIA4966ZZ

A

: Bucket (Such as 20   oil can)

JPBIA4967ZZ


Content   ..  647  648  649  650   ..