Nissan Juke F15. Manual - part 98
BR-52
< REMOVAL AND INSTALLATION >
FRONT DISC BRAKE
8. Install the lower sliding pin bolt and tighten it to the specified
torque.
9. Depress the brake pedal several times to check that no drag feel
is present for the front disc brake. Refer to
10. Install tires. Refer to
WT-39, "Removal and Installation"
NISMO RS
WARNING:
Since dust covering the front brake has an affect on human body, the dust must be removed with a
dust collector. Never splatter the dust with an air blow gun.
CAUTION:
• Never depress the brake pedal while removing the brake pads or the cylinder body because the pis-
ton may pop out.
• If the brake fluid or grease adheres to the disc rotor, quickly wipe it off.
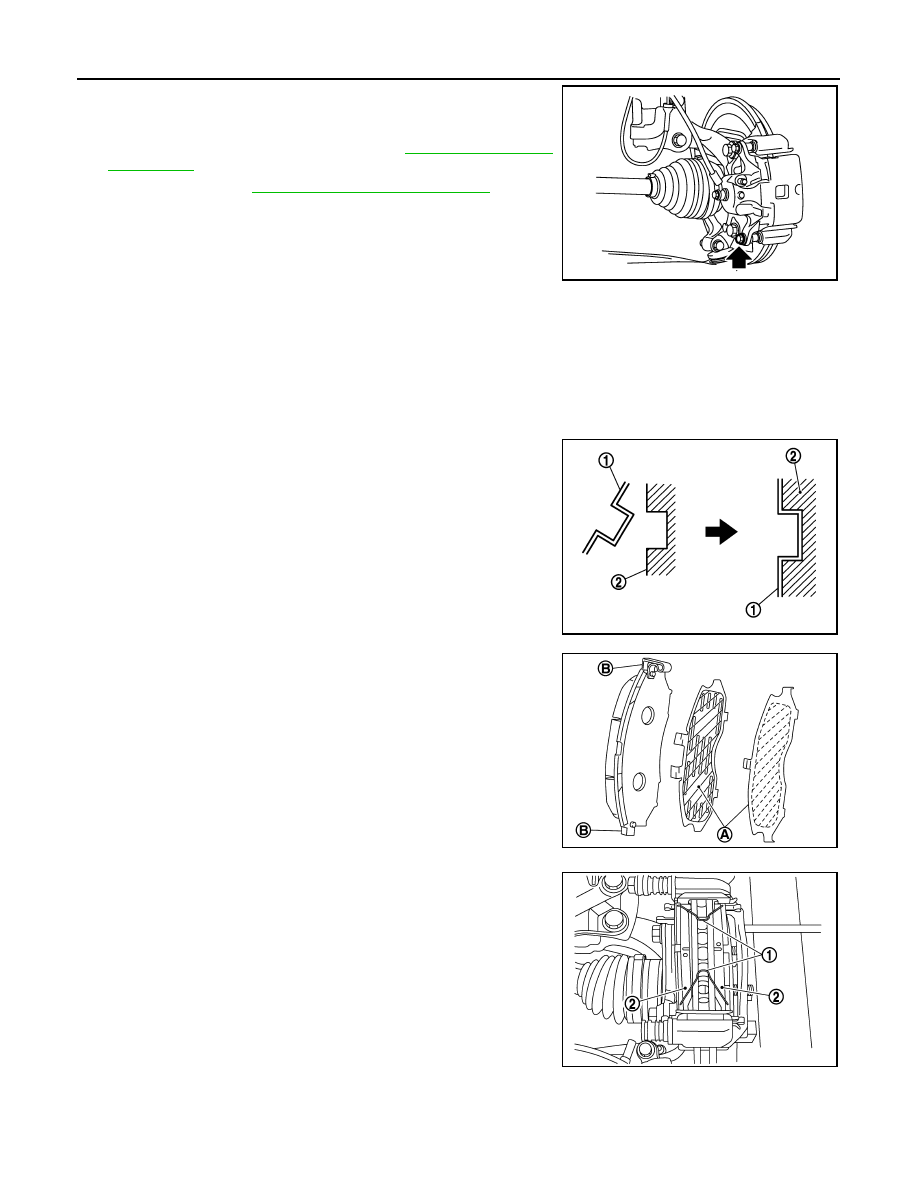
1. Install the pad retainers (1) to the torque member (2) if the pad
retainers has been removed.
CAUTION:
• Securely assemble the pad retainers so that it will not be
lifted up from the torque member.
• Never deform the pad retainers.
2. Apply MOLYKOTE
®
AS880N or silicone-based grease to the
mating faces (A) between the shim covers and the shims, and
install the shims and shim covers to the brake pad.
CAUTION:
Always replace the shim together with the shim cover when
replacing the brake pad.
Molykote is a registered trademark of Dow Corning Corporation.
3. Apply MOLYKOTE
®
7439 or equivalent to the mating faces (B)
between the brake pad and the pad retainers, and install the
brake pads to the torque member.
Molykote is a registered trademark of Dow Corning Corporation.
4. Install the pad return spring (1) to the brake pad (2).
CAUTION:
• Never deform the pad return spring.
• Correctly insert the pad return spring in to the pad return
spring hole on the brake pad.
5. Install cylinder body to torque member.
CAUTION:
• Never damage the piston boot.
• When replacing brake pad with new one, check a brake
fluid level in the reservoir tank because brake fluid
returns to master cylinder reservoir tank when pressing
piston in.
NOTE:
Use a disc brake piston tool to easily press piston.
JPFIA0832ZZ
PFIA0763J
JSFIA0642ZZ
JSFIA1212ZZ