содержание .. 922 923 924 925 ..
Nissan Tiida C11. Manual - part 924
INT-14
< ON-VEHICLE REPAIR >
DOOR FINISHER
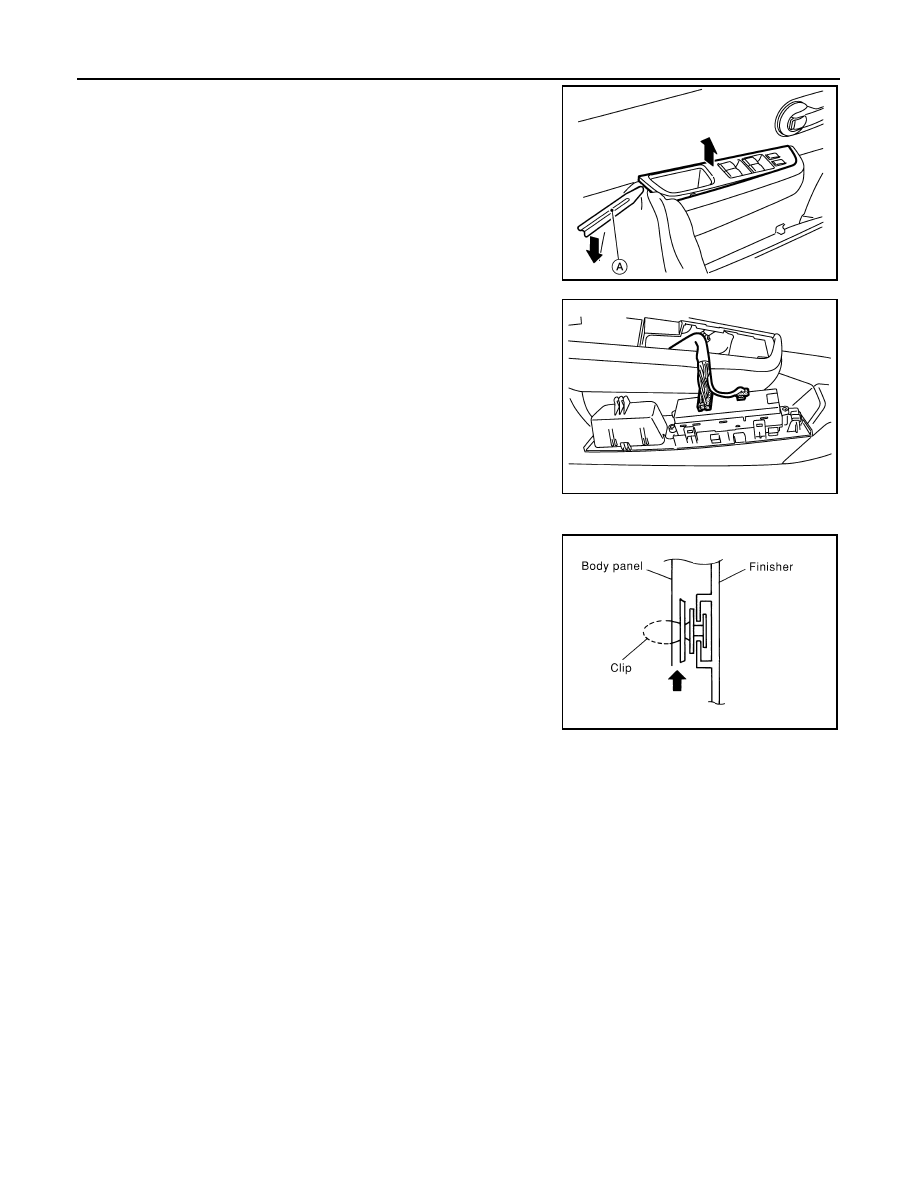
4.
Insert a trim stick (A) or suitable tool into back edge of front door
power window and door lock/unlock switch finisher. Lift upward
to release the clips and remove.
5.
Disconnect front door power window and door lock/unlock
switch harness connector.
6.
Remove the (2) front door finisher screws.
7.
Release the clips, then lift front door finisher upward to remove it
from door body panel.
Installation
Installation is in the reverse order of removal.
REAR DOOR
WIIA1237E
PIIB6042E
SIIA0810E