содержание .. 828 829 830 831 ..
Nissan Tiida C11. Manual - part 830
COMPRESSOR
HA-35
< ON-VEHICLE REPAIR >
C
D
E
F
G
H
J
K
L
M
A
B
HA
N
O
P
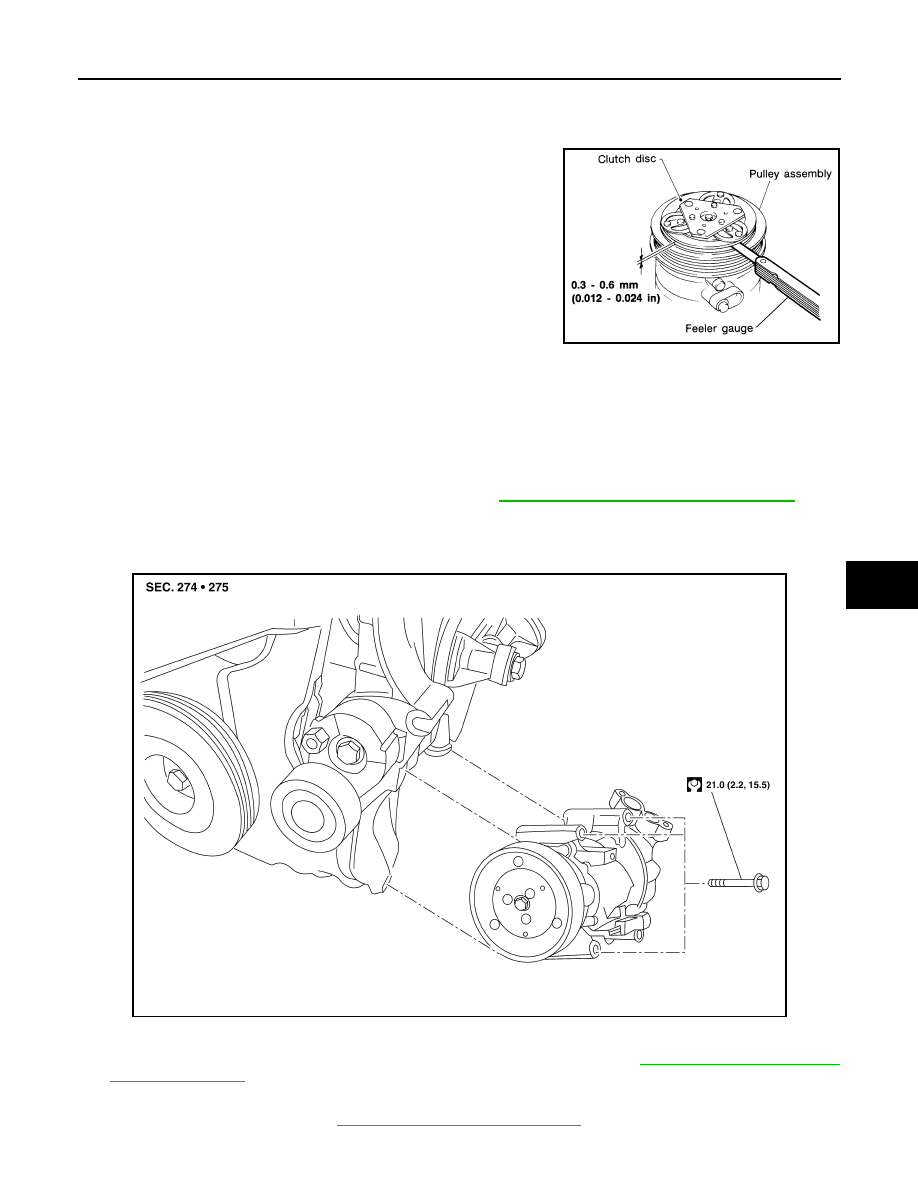
1.
Check the clearance around the entire periphery of the clutch disc.
• Measure the clearance for the compressor as shown.
2.
If specified clearance is not obtained, replace compressor.
INSTALLATION
Installation is in the reverse order of removal.
CAUTION:
• Replace O-rings of low-pressure flexible hose and high-pressure flexible hose with new ones, and
apply compressor oil when installing.
• When recharging refrigerant, check for leaks. Refer to
HA-22, "Checking of Refrigerant Leaks"
Removal and Installation of Compressor - K9K
INFOID:0000000001523297
K9K
REMOVAL
1.
Use the recovery/recycling equipment to evacuate the refrigerant. Refer to
2.
Remove the engine cover.
3.
Remove the front grille. Refer to
EXT-19, "Removal and Installation"
Clutch disc to pulley clearance
: 0.3 - 0.6 mm (0.012 - 0.024 in)
RHA087E
ALIIA0094GB