содержание .. 777 778 779 780 ..
Nissan Tiida C11. Manual - part 779
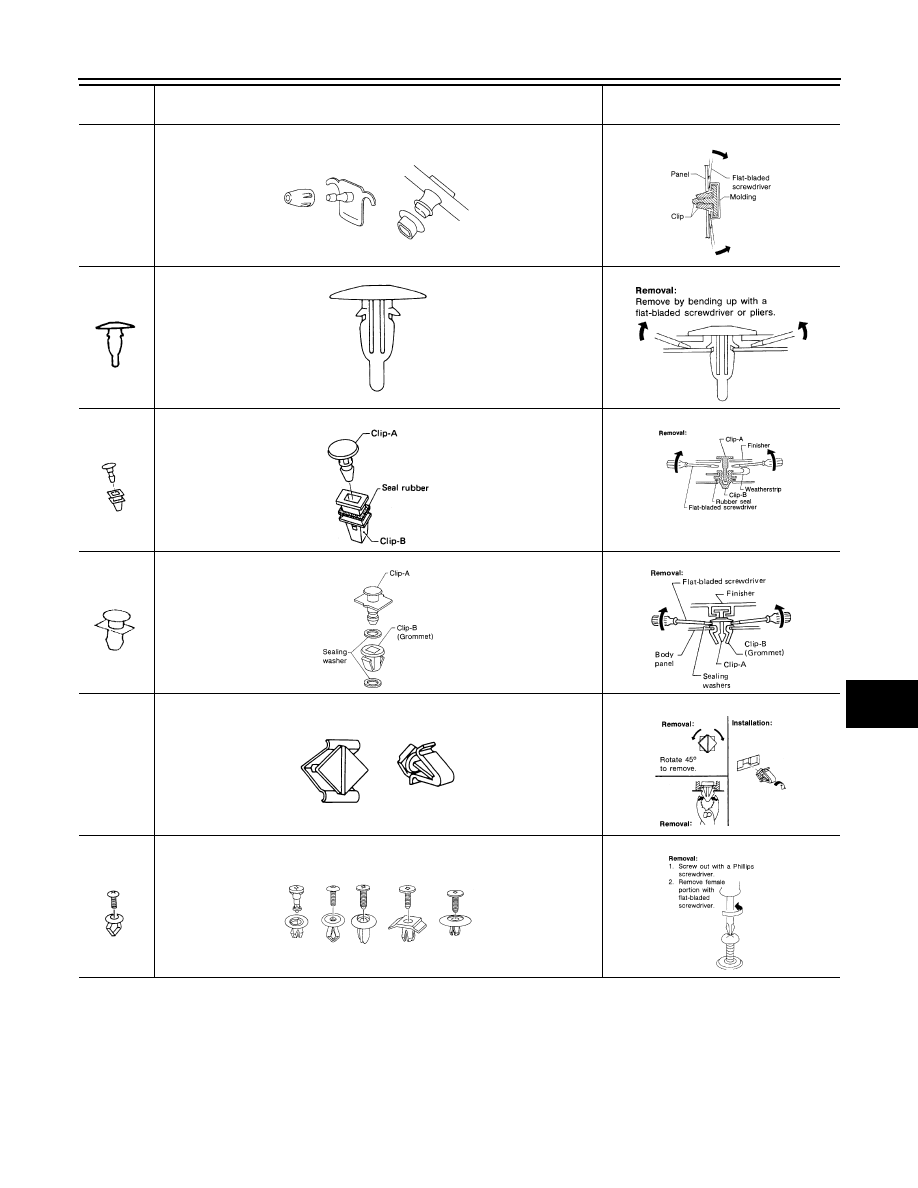
CLIP AND FASTENER
EXT-11
< ON-VEHICLE REPAIR >
C
D
E
F
G
H
I
J
L
M
A
B
EXT
N
O
P
CE107
CE117
CF110
CF118
CG101
CS101
Symbol
No.
Shapes
Removal & Installation
SBF411H
SBF767B
SBF174D
SBF175DA
SBF648B
SBF649B
SBF151D
SBF259G
SBF145B
SBF085B
SBF078B
SBF992G