Nissan Tiida C11. Manual - part 1421


  Главная      Nissan     Nissan Tiida C11 - Service Manual


поиск по сайту            


содержание   ..  1419  1420  1421  1422   ..


Nissan Tiida C11. Manual - part 1421


VTL-20

< ON-VEHICLE REPAIR >

[AUTOMATIC AIR CONDITIONER]

INTAKE DOOR MOTOR

INTAKE DOOR MOTOR

Removal and Installation

INFOID:0000000001696288

REMOVAL

1.

Remove the instrument lower finisher and instrument lower cover (LH) for LHD only. Refer to 

IP-11,

"Removal and Installation"

.

2.

Remove the glove box assembly and instrument lower cover (RH) for RHD only. Refer to 

IP-11, "Removal

and Installation"

.

3.

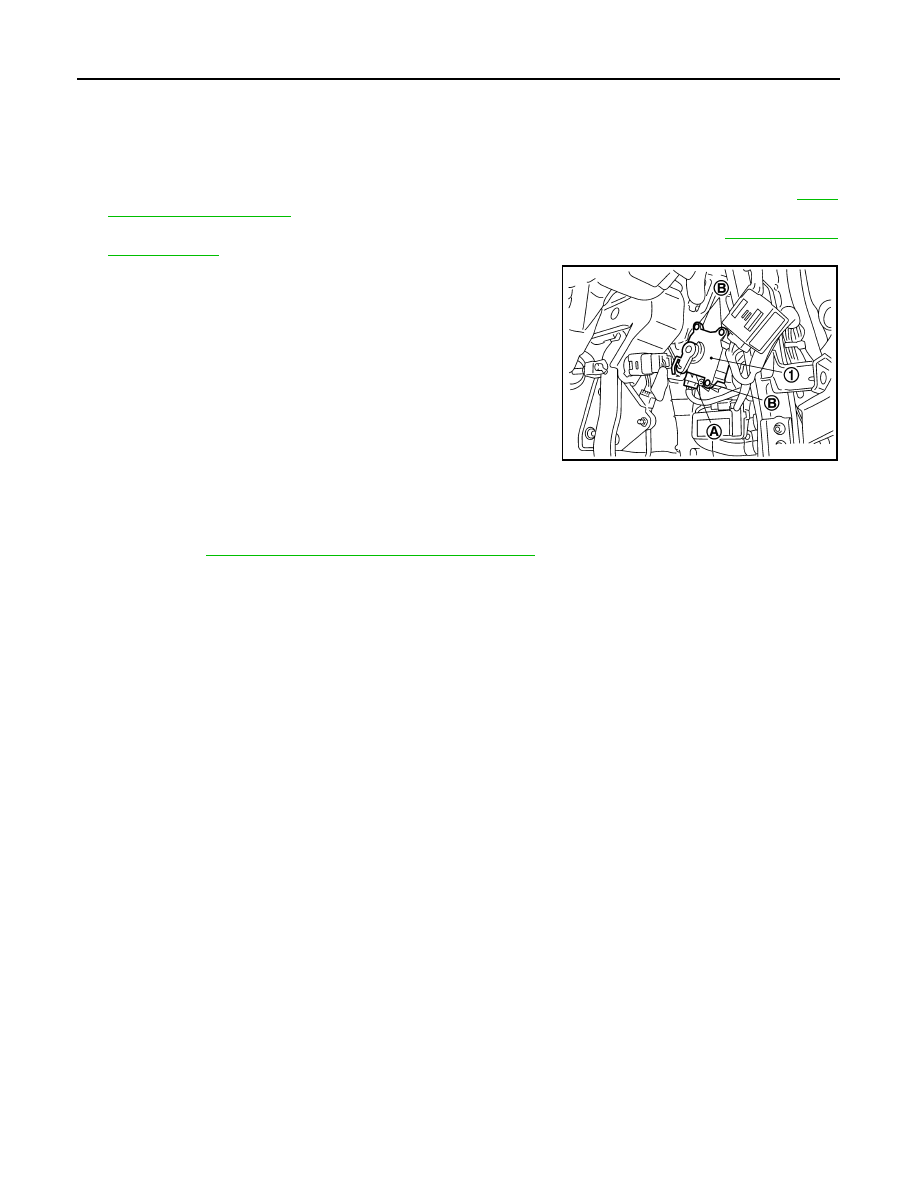
Disconnect the intake door motor connector (A).

4.

Remove the intake door motor screws (B), and then remove the
intake door motor (1).

INSTALLATION

Installation is in the reverse order of removal.

CAUTION:

After installing door motor, perform door motor starting position reset by following self-diagnosis
STEP-3. Refer to 

HAC-213, "Front Air Control Self-Diagnosis"

.

SJIA0692E

AIR MIX DOOR MOTOR

VTL-21

< ON-VEHICLE REPAIR >

[AUTOMATIC AIR CONDITIONER]

C

D

E

F

G

H

J

K

L

M

A

B

VTL

N

O

P

AIR MIX DOOR MOTOR

Removal and Installation

INFOID:0000000001696289

REMOVAL

1.

Remove the instrument lower finisher and instrument lower cover (LH) for LHD only. Refer to 

IP-11,

"Removal and Installation"

.

2.

Remove the glove box assembly and instrument lower cover (RH) for RHD only. Refer to 

IP-11, "Removal

and Installation"

.

3.

Remove the console box assembly. Refer to 

IP-11, "Removal and Installation"

.

4.

Remove the instrument stay nuts (A) and harness clamps (B),
and then remove instrument stay (1).

5.

Remove the air mix door motor screws (A), and then pull out the
air mix door motor (1).

6.

Disconnect the air mix door motor connector and remove the air
mix door motor (1).

INSTALLATION

Installation is in the reverse order of removal.

CAUTION:

After installing door motor, perform door motor starting position reset by following self-diagnosis
STEP-3. Refer to 

HAC-213, "Front Air Control Self-Diagnosis"

.

SJIA0646E

SJIA0695E

VTL-22

< ON-VEHICLE REPAIR >

[AUTOMATIC AIR CONDITIONER]

MODE DOOR MOTOR

MODE DOOR MOTOR

Removal and Installation

INFOID:0000000001696290

REMOVAL

1.

Remove the glove box assembly and instrument lower cover (RH) for LHD only. Refer to 

IP-11, "Removal

and Installation"

.

2.

Remove the instrument lower finisher and instrument lower cover (LH) for RHD only. Refer to 

IP-11,

"Removal and Installation"

.

3.

Remove the mode door motor screws (A), and then pull out the
mode door motor (1).

4.

Disconnect mode door motor connector and remove the mode
door motor (1).

INSTALLATION

Installation is in the reverse order of removal.

CAUTION:

After installing door motor, perform door motor starting position reset by following self-diagnosis
STEP-3. Refer to 

HAC-213, "Front Air Control Self-Diagnosis"

.

SJIA0694E

DUCTS AND GRILLES

VTL-23

< ON-VEHICLE REPAIR >

[AUTOMATIC AIR CONDITIONER]

C

D

E

F

G

H

J

K

L

M

A

B

VTL

N

O

P

DUCTS AND GRILLES

Removal and Installation

INFOID:0000000001696358

NOTE:
A LHD vehicle shown, RHD vehicle similar

Instrument Panel Ducts

Floor Ducts

SJIA0657E

1.

Side defroster duct (right)

2.

Defroster nozzle

3.

Side defroster duct (left)

4.

Side defroster grille (left)

5.

Instrument side panel (left)

6.

Instrument panel and pad

7.

Side ventilator assembly (left)

8.

Cluster lid C

9.

Side ventilator assembly (right)

10. Instrument finisher E

11. Instrument side panel (right)

12. Side defroster grille (right)

13. Side ventilator duct (right)

14. Center ventilator duct (right)

15. Center ventilator duct (left)

16. Side ventilator duct (left)

WJIA2198E


содержание   ..  1419  1420  1421  1422   ..