Mitsubishi Outlander GS45X. Manual - part 469
 

  Index      Mitsubishi     Mitsubishi Outlander GS45X - service repair manual


Search            


Content   ..  467  468  469  470   ..


Mitsubishi Outlander GS45X. Manual - part 469


SPECIAL TOOLS

TSB Revision

ENGINE MECHANICAL <2.4L ENGINE>

11A-7

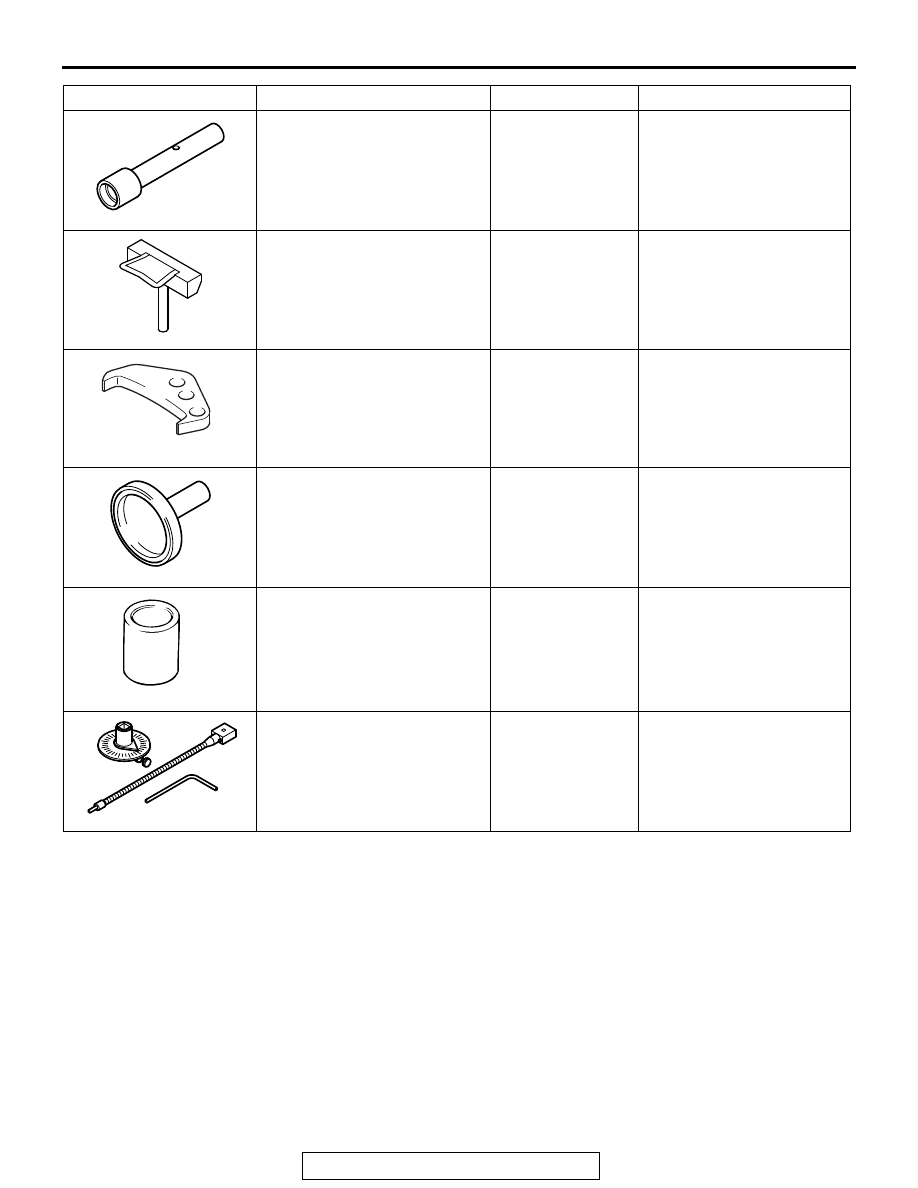
MD998737
Valve stem seal installer

MD998737-01

Valve stem seal 
press-fitting

MD998727
Oil pan FIPG cutter

MD998727-01

Oil pan removal

MB991883
Flywheel stopper

General service 
tool

Supporting the drive plate

MD998718
Crankshaft rear oil seal 
installer

MD998718-01

Press-fitting the crankshaft 
rear oil seal

MB991448
Bush remover and installer 
base

MB991448-01

Press-fitting the crankshaft 
front oil seal

MB991614
Angle gauge

−

Balancer shaft and oil pump 
module bolt installation

Tool

Tool number and name

Supersession

Application

D998727

MB991883

MB991614

SPECIAL TOOLS

TSB Revision

ENGINE MECHANICAL <2.4L ENGINE>

11A-8

MB991454
Engine hanger balancer

MZ203827-01

When the engine hanger is 
used: Supporting the 
engine assembly during 
removal and installation of 
the transaxle assembly
NOTE: Special tool 
MB991454 is a part of 
engine hanger attachment 
set MB991453.

MB991527
Hanger 

Tool not available

MB991895
Engine hanger

Tool not available

MB991928
Engine hanger

a: MB991929

Joint (50) 

× 2

b: MB991930

Joint (90) 

× 2

c: MB991931

Joint (140) 

× 2

d: MB991932

Foot (standard) 

× 4

e: MB991933

Foot (short) 

× 2

f: MB991934

Chain and hook assembly

Tool not available

MB991956
Engine hanger plate

−

Tool

Tool number and name

Supersession

Application

B991454

B991527

MB991895

B991928

a

b

c

d

e

f

Slide bracket (HI)

B991956

ON-VEHICLE SERVICE

TSB Revision

ENGINE MECHANICAL <2.4L ENGINE>

11A-9

ON-VEHICLE SERVICE

DRIVE BELT TENSION CHECK

M1111003103558

1. Remove the radiator condenser tank mounting bolt, and 

move the radiator condenser tank to a place where it does 
not interfere with the drive belt tension check (Refer to 
GROUP 14 

− Radiator 

P.14-49

).

CAUTION

Check the drive belt tension after turning the crankshaft 
clockwise one turn or more.
2. Make sure that the indicator mark on the auto-tensioner is 

within the area marked with A in the illustration.

3. If the mark is out of the area A, replace the drive belt (Refer 

to 

P.11A-21

.)

NOTE: The drive belt tension adjustment is not necessary 
as the auto-tensioner is adopted.

4. Install the radiator condenser tank to the original position 

(Refer to GROUP 14 

− Radiator 

P.14-49

).

AUTO-TENSIONER CHECK

M1111003002343

OPERATION CHECK

Required Special Tool:
MB992278: Belt tension release wrench
1. Stop the engine from the idle state.
2. Remove the radiator condenser tank mounting bolt, and 

move the radiator condenser tank to a place where it does 
not interfere with the auto-tensioner check (Refer to GROUP 
14 

− Radiator 

P.14-49

).

3. Check that the drive belt are not protruding from the pulley 

width of drive belt auto-tensioner.

4. Remove the drive belt (Refer to 

P.11A-21

).

AC506730 AC

A

Indicator mark 

Auto-tensioner

ON-VEHICLE SERVICE

TSB Revision

ENGINE MECHANICAL <2.4L ENGINE>

11A-10

WARNING

Always work from above when releasing the tension 
of the auto-tensioner. When you try to gain access 
from underneath the vehicle, you will experience diffi-
culty, thus causing the tool to be dropped off.

CAUTION

To work at the optimum angle, you must choose a most 
suitable box-type wrench is applied to the special tool.

WARNING

Be sure to set the box-type wrench and the special 
tool MB992278 to the hexagonal parts securely to pre-
vent the tool from falling off because the tension of 
the auto-tensioner is high.

5. Install special tool MB992278 and a box-type wrench at the 

optimum angle.

6. Check that no binding is present by turning the 

auto-tensioner in the left and right directions.

7. If there are any problems in the procedure 3 or 6, replace 

the auto-tensioner (Refer to 

P.11A-67

).

8. Install the drive belt (Refer to 

P.11A-21

.)

9. Install the radiator condenser tank to the original position 

(Refer to GROUP 14 

− Radiator 

P.14-49

).

FUNCTION CHECK

The auto-tensioner can be checked whether it is in good condi-
tion by checking its tension.

.

<When the vibration frequency is measured: 
Recommendation>

Required Special Tools:

• MB992080: Belt Tension Meter Set

• MB992081: Belt Tension Meter

• MB992082: Microphone Assembly

1. Check the tension of the drive belt (Refer to 

P.11A-9

.)

AC804028

AM

Auto-tensioner

MB992278

Box-type 
wrench 


Content   ..  467  468  469  470   ..