Mitsubishi Outlander GS45X. Manual - part 1530


  Index      Mitsubishi     Mitsubishi Outlander GS45X - service repair manual


Search            


Content   ..  1528  1529  1530  1531   ..


Mitsubishi Outlander GS45X. Manual - part 1530


STRUT ASSEMBLY

TSB Revision

FRONT SUSPENSION

33-11

REMOVAL SERVICE POINT

.

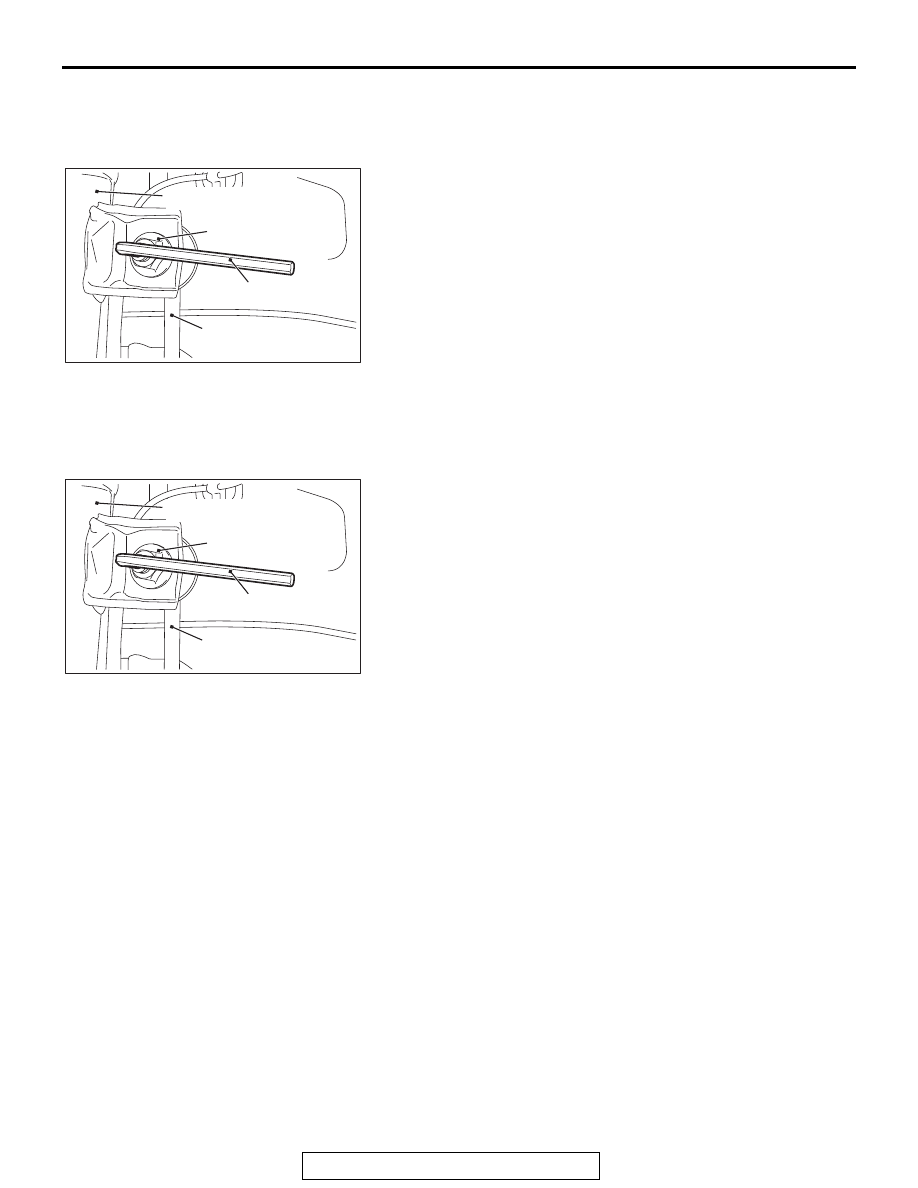
<<A>> STABILIZER LINK AND STRUT CONNEC-
TION NUT REMOVAL

Use a hexagon wrench to remove the stabilizer link and strut 
connection nut as shown in the figure.

INSTALLATION SERVICE POINT

.

>>A<< STABILIZER LINK AND STRUT CONNEC-
TION NUT INSTALLATION

Use a hexagon wrench to install the stabilizer link and strut 
connection nut as shown in the figure.

INSPECTION

M1332001200548

• Check for oil leaks from the strut assembly.

• Check the strut assembly for damage or deformation.

AC613526 AD

Stabilizer link

Strut assembly

Hexagon wrench

Stabilizer link and
strut connection nut

AC613526 AD

Stabilizer link

Strut assembly

Hexagon wrench

Stabilizer link and
strut connection nut

STRUT ASSEMBLY

TSB Revision

FRONT SUSPENSION

33-12

DISASSEMBLY AND ASSEMBLY

M1332001300987

Required Special Tools:

• MB991681: Wrench

• MB991682: Socket

• MB991793: Spring compressor

• MB991794: Upper plate

• MB991795: Attachment A

• MB991830: Fixture 

DISASSEMBLY SERVICE POINTS

.

<<A>> STRUT NUT (JAM NUT) REMOVAL

1. Install the special tool attachment A (MB991795) to the 

special tool spring compressor (MB991793) as shown in the 
figure.

AC704225AC

1

2

3

4

5

6

7

8

9

60 ± 9 N·m
44 ± 6 ft-lb

Disassembly steps 

<<A>>

>>C<<

1.

Strut nut jam nut)

2.

Strut insulator assembly

>>B<<

3.

Strut bearing

4.

Upper spring seat

5.

Upper spring pad

6.

Bump rubber

>>A<<

7.

Coil spring

8.

Spring tube

<<B>>

9.

Strut

AC704226AB

MB991795

MB991793

STRUT ASSEMBLY

TSB Revision

FRONT SUSPENSION

33-13

2. Set the strut assembly to the following special tools:

• Spring compressor (MB991793)

• Attachment A (MB991795)

• Upper plate (MB991794)

• Fixture (MB991830)

NOTE: Use the bolts and nuts removed from the vehicle to 
secure the strut assembly and tighten them lightly by hand.

3. After setting the strut assembly, operate the spring 

compressor and compress the coil spring by approximately 
5 mm.

CAUTION

The locking nut for the piston rod inside the strut may be 
loose. Do not use the impact wrench to loosen the strut 
nut (jam nut).

4. Use the following tools to loosen the strut nut (jum nut):

• Wrench (MB991681)

• Socket (MB991682)

.

<<B>> STRUT REMOVAL

CAUTION

Wear the protective glasses. Although the gas is harmless, 
drilling chips may be blown out by the gas.
Before disposal of the strut, place the strut on the level surface 
with the piston rod extended, and make a hole of approximately 
3 mm in diameter at the point shown in the figure to discharge 
the gas.

AC704227AB

MB991794

MB991830

MB991795

MB991793

AC704228

AC

MB991681

MB991682

Strut nut
(jam nut)

AC704230

AB

STRUT ASSEMBLY

TSB Revision

FRONT SUSPENSION

33-14

ASSEMBLY SERVICE POINTS

.

>>A<< COIL SPRING INSTALLATION

1. Fit the coil spring to the spring tube securely.
2. Install the coil spring equipping with the spring tube to align 

the bottom with the shape of the strut spring sheet.

.

>>B<< STRUT BEARING INSTALLATION

CAUTION

Install the bearing without any damage.

.

>>C<< STRUT NUT (JAM NUT) INSTALLATION

1. Check that both of the coil spring ends align with the spring 

sheet groove correctly.

2. Align the strut spring sheet hole with the upper spring sheet 

hole.
NOTE: Use the pipe to align the holes easily.

AC704229AB

Spring seat 
of strut

Coil spring

Spring tube

AC704231AB

Pipe

Spring seat 
of strut

Upper 
spring seat


Content   ..  1528  1529  1530  1531   ..